At last, you've returned from a big box store with a new TV or soundbar in tow, or maybe you've finally received the HDMI cable you need. Now, it's time to learn how to connect your soundbar to your TV with HDMI. While each configuration depends on your individualized needs and devices, the good news is that putting together your new setup is usually quick and easy.
We'll walk you through the process step by step, covering devices, connections, and settings. By the end, you'll know which method works best for your setup and how to make sure your audio is working as intended.
Source Devices
This is likely the most significant constraint on your setup. Your source devices will largely determine your needs and, as a result, how you connect and arrange your devices. The three most important factors are:
How Many Source Devices Do You Have?
The number of ports on both TVs and soundbars is limited; knowing how many sources you plan to connect will help you determine the total number of ports you'll need.
What Resolution And Refresh Rate Does Your Device Use?
Once you have the number of sources, you'll need to know what capabilities and HDMI version are required for them to operate at their full capacity. Blu-ray releases cap out at 4k @ 60Hz (Gemini Man, for example), so you won't need to allocate a high bandwidth port for your player. But consoles or a gaming PC need more bandwidth for buttery smooth action at higher frame rates. As a rule of thumb, source devices that have a resolution and refresh rate higher than 4k @ 60Hz will work best with an HDMI 2.1 input.
What Formats And Features Do The Devices Support?
Some devices, particularly gaming-oriented ones like consoles, also have specific features like variable refresh rate (VRR) and auto low latency mode (ALLM) meant to enhance your experience. These features typically have spottier pass-through support on soundbars, so it's worth noting. Additionally, certain brands have quirks in dynamic HDR format support. For example:
- Samsung TVs typically don't support Dolby Vision, opting for HDR 10+ as their dynamic metadata HDR format of choice (their soundbars can pass through Dolby Vision, though).
- LG soundbars typically don't pass through HDR 10+ because they support Dolby Vision as their dynamic metadata HDR format of choice (their soundbars cannot pass through HDR 10+, either).
Therefore, if you have a Samsung TV and an LG soundbar and want to play HDR 10+ content, you can't pass through an HDR 10+ video signal through that soundbar. Instead, you should connect the source directly to your Samsung TV and send the audio to the LG soundbar via HDMI ARC/eARC or Optical.
At this point, you should have a solid idea of what your requirements are, so it's time to plan how you'll allocate your sources.
Soundbar
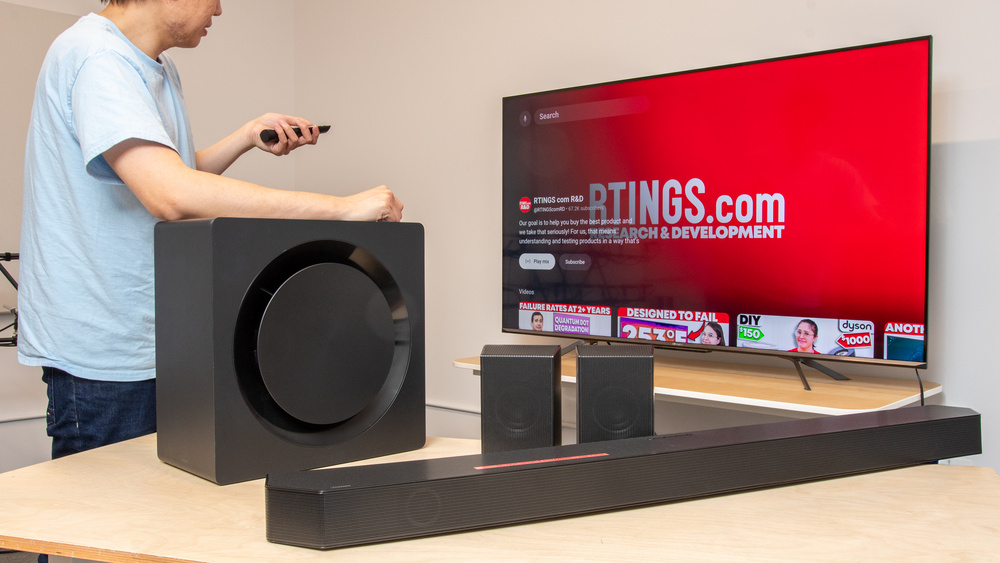
Unlike TVs, soundbars come with a wide variety of connectivity options, even at the premium end. Bars like the Nakamichi DRAGON can accommodate up to three HDMI sources, and audio via HDMI eARC or Optical, while the Sonos Arc Ultra offers a lone HDMI eARC port.
 |
 |
Depending on the number of devices you plan to hook up to your TV, your setup may require an extra HDMI input port. It's important to note that not all HDMI inputs are created equal, as some don't support video passthrough at a higher bandwidth or lack support for additional features like VRR.
If you've already unpacked your soundbar, don't sweat it. Most support HDMI ARC/eARC, which allows your TV to send audio signals to your soundbar through the same HDMI connection used for video passthrough. You can use our table tool to check your soundbar's audio format support and video passthrough capabilities and tentatively assign a source device (or more), depending on your needs and your bar's capabilities.
TV
The last piece of the puzzle is your TV. Like soundbars, most TVs also support ARC/eARC, so at minimum, you'll be able to play content from your built-in Smart TV apps and have the sound come out of your soundbar. Mid-range and upper-range options typically have at least one HDMI port with high bandwidth for gaming consoles, too.
While TV HDMI inputs are predictable in number (generally three or four), considerable variation in HDMI ARC/eARC port assignment between products can pose significant problems if you have multiple source devices that require higher bandwidth. If ARC/eARC is enabled on a 4k @ 60Hz input, you won't be able to pass through higher bandwidth video signals from your soundbar due to the limitations of the TV's ARC/eARC port. Conversely, if your ARC/eARC is assigned to a 4k @ 120Hz (or higher) input, you've used up one of a potentially limited number of high bandwidth ports on your TV (which can be especially inefficient if your soundbar doesn't support high bandwidth passthrough).
 |
 |
As with soundbars, you can use our table tool to verify your TV's audio and video capabilities and assign devices to certain inputs. Just keep in mind your soundbar will take up one of the TV's HDMI ports if you're using ARC/eARC.
Cables
Fortunately, cables for soundbars and TVs are quite straightforward. If you have older gear, optical cables don't differ in performance, and you're mostly paying for build quality. Meanwhile, the HDMI Licensing Administrator conveniently evaluates whether HDMI cables are within specification. Look out for cables certified as 'Ultra High Speed' or 'Premium High Speed' for HDMI 2.1 and 2.0 bandwidth, respectively.
If you're chasing a minimalist setup or just aren't a fan of visible cables, you can pick up cable sheaths or covers so cables running between your soundbar and TV aren't exposed. You could also route cables behind your walls, though the option is a bit more invasive. Some soundbars, like the LG S95AR or Samsung HW-Q990F, also support wireless audio streaming with certain TVs from their respective brands.
Examples
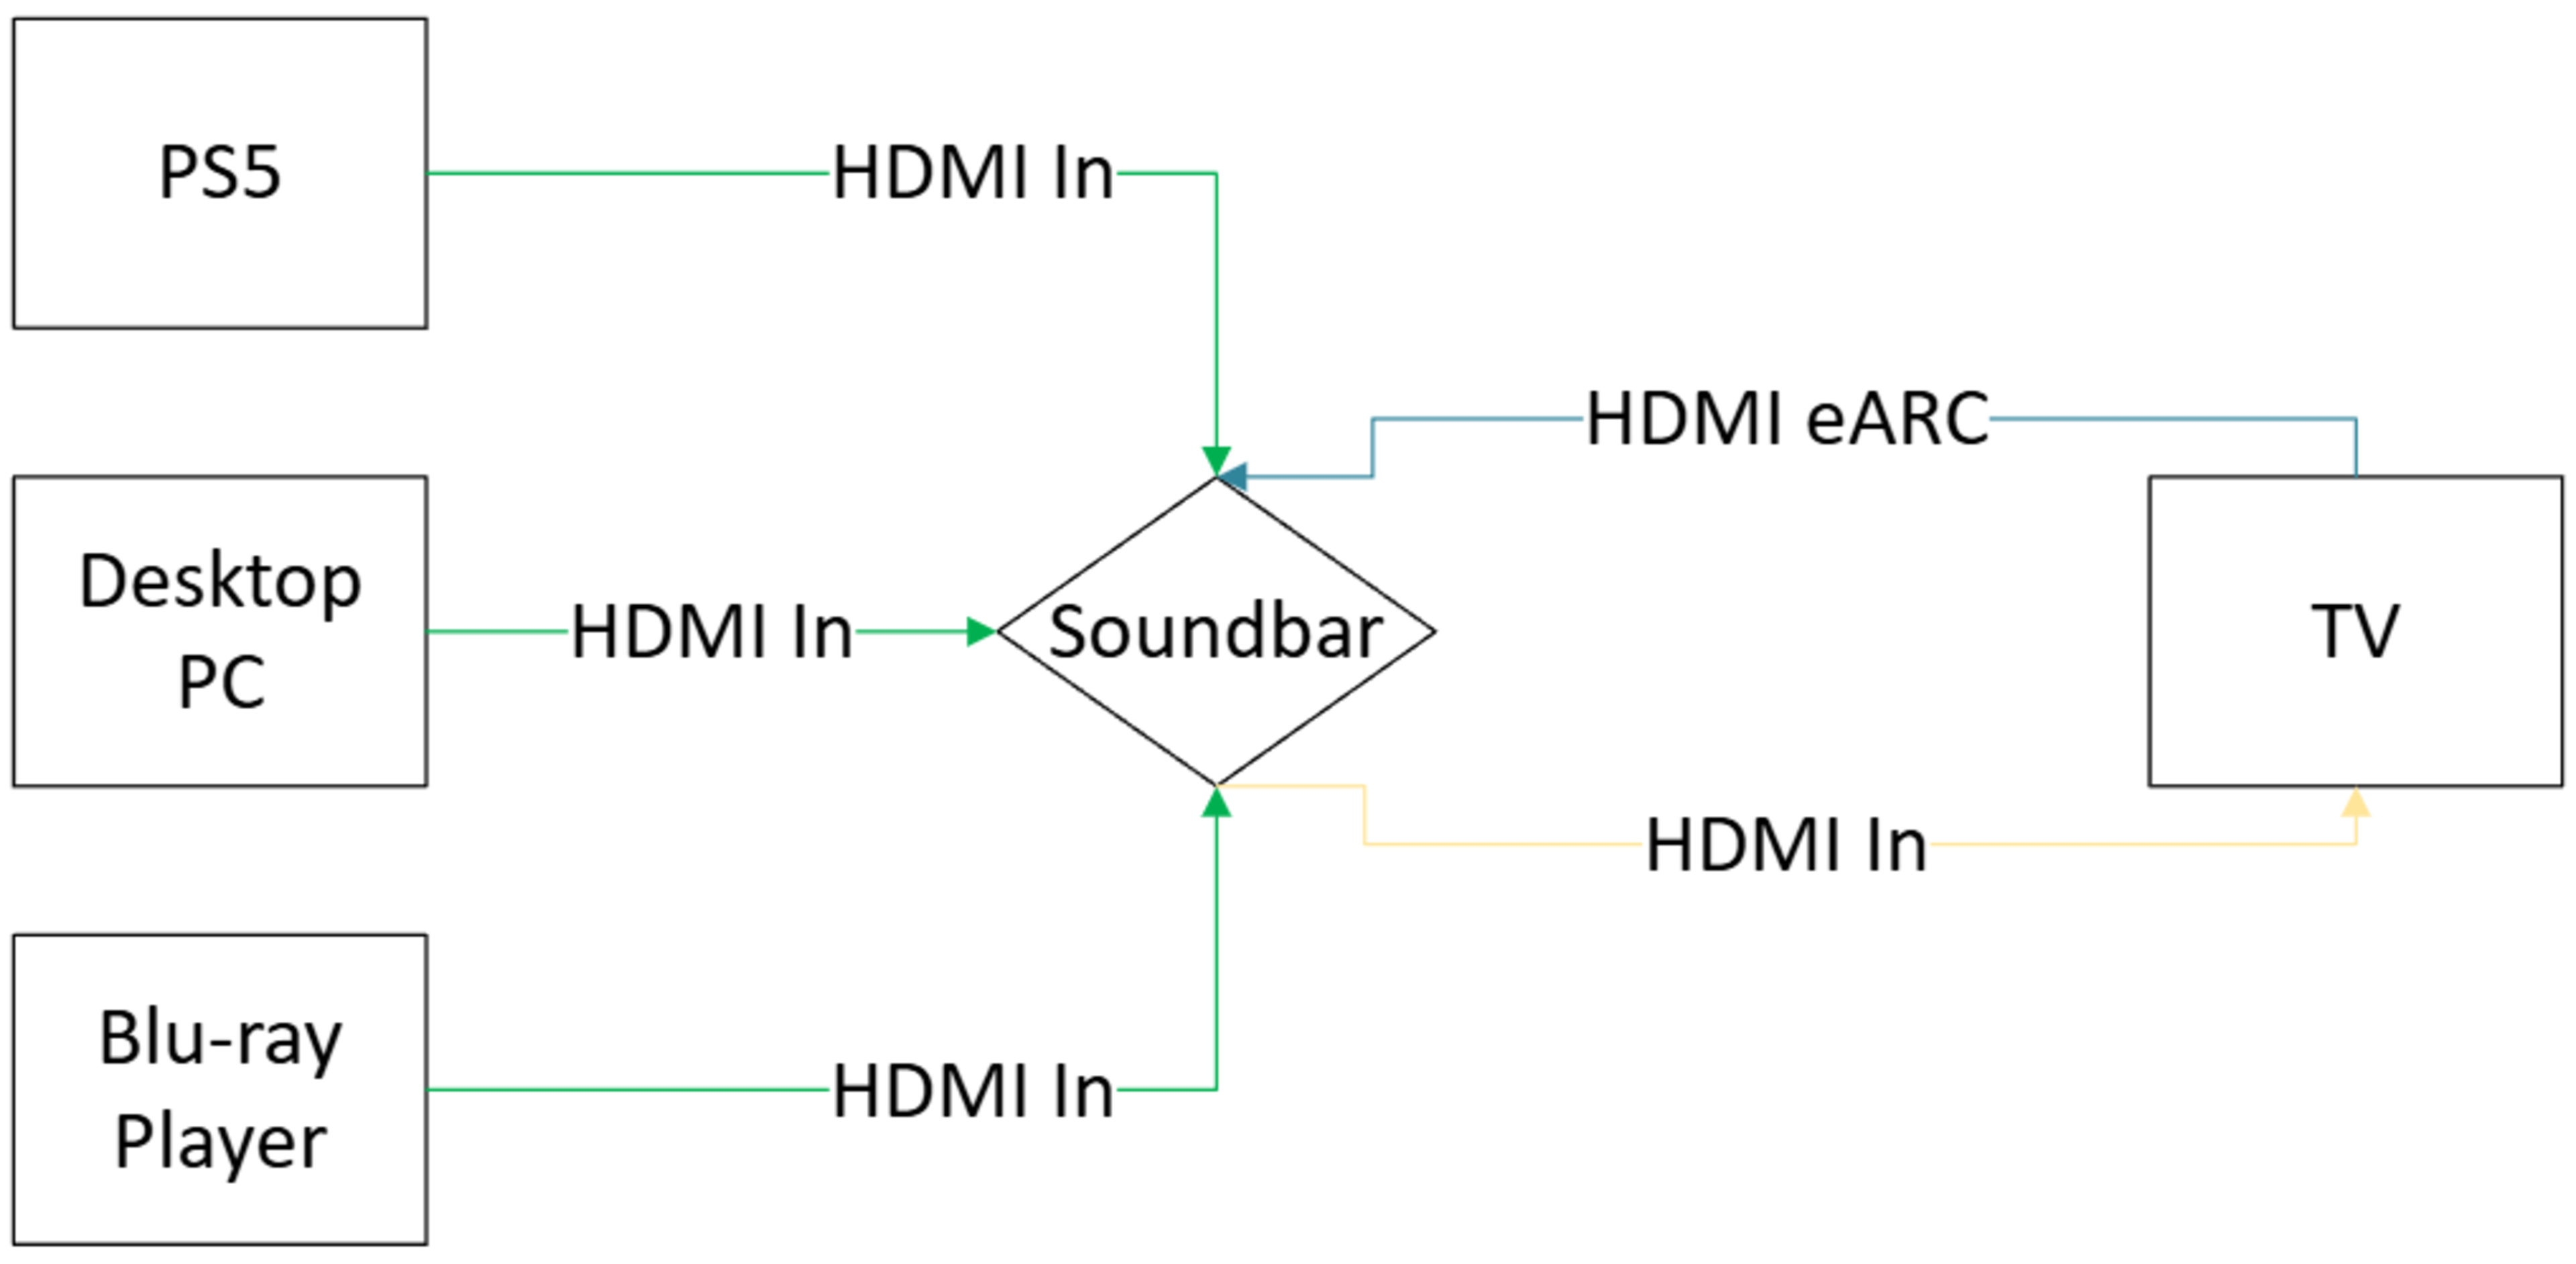
Let's walk through a couple of examples with three source devices:
- Desktop PC (HDMI 2.1 preferred)
- PS5 (HDMI 2.1 preferred)
- Blu-ray player (HDMI 2.0 sufficient)
|
Blue = Audio Signal Green = Video + Audio Signal |
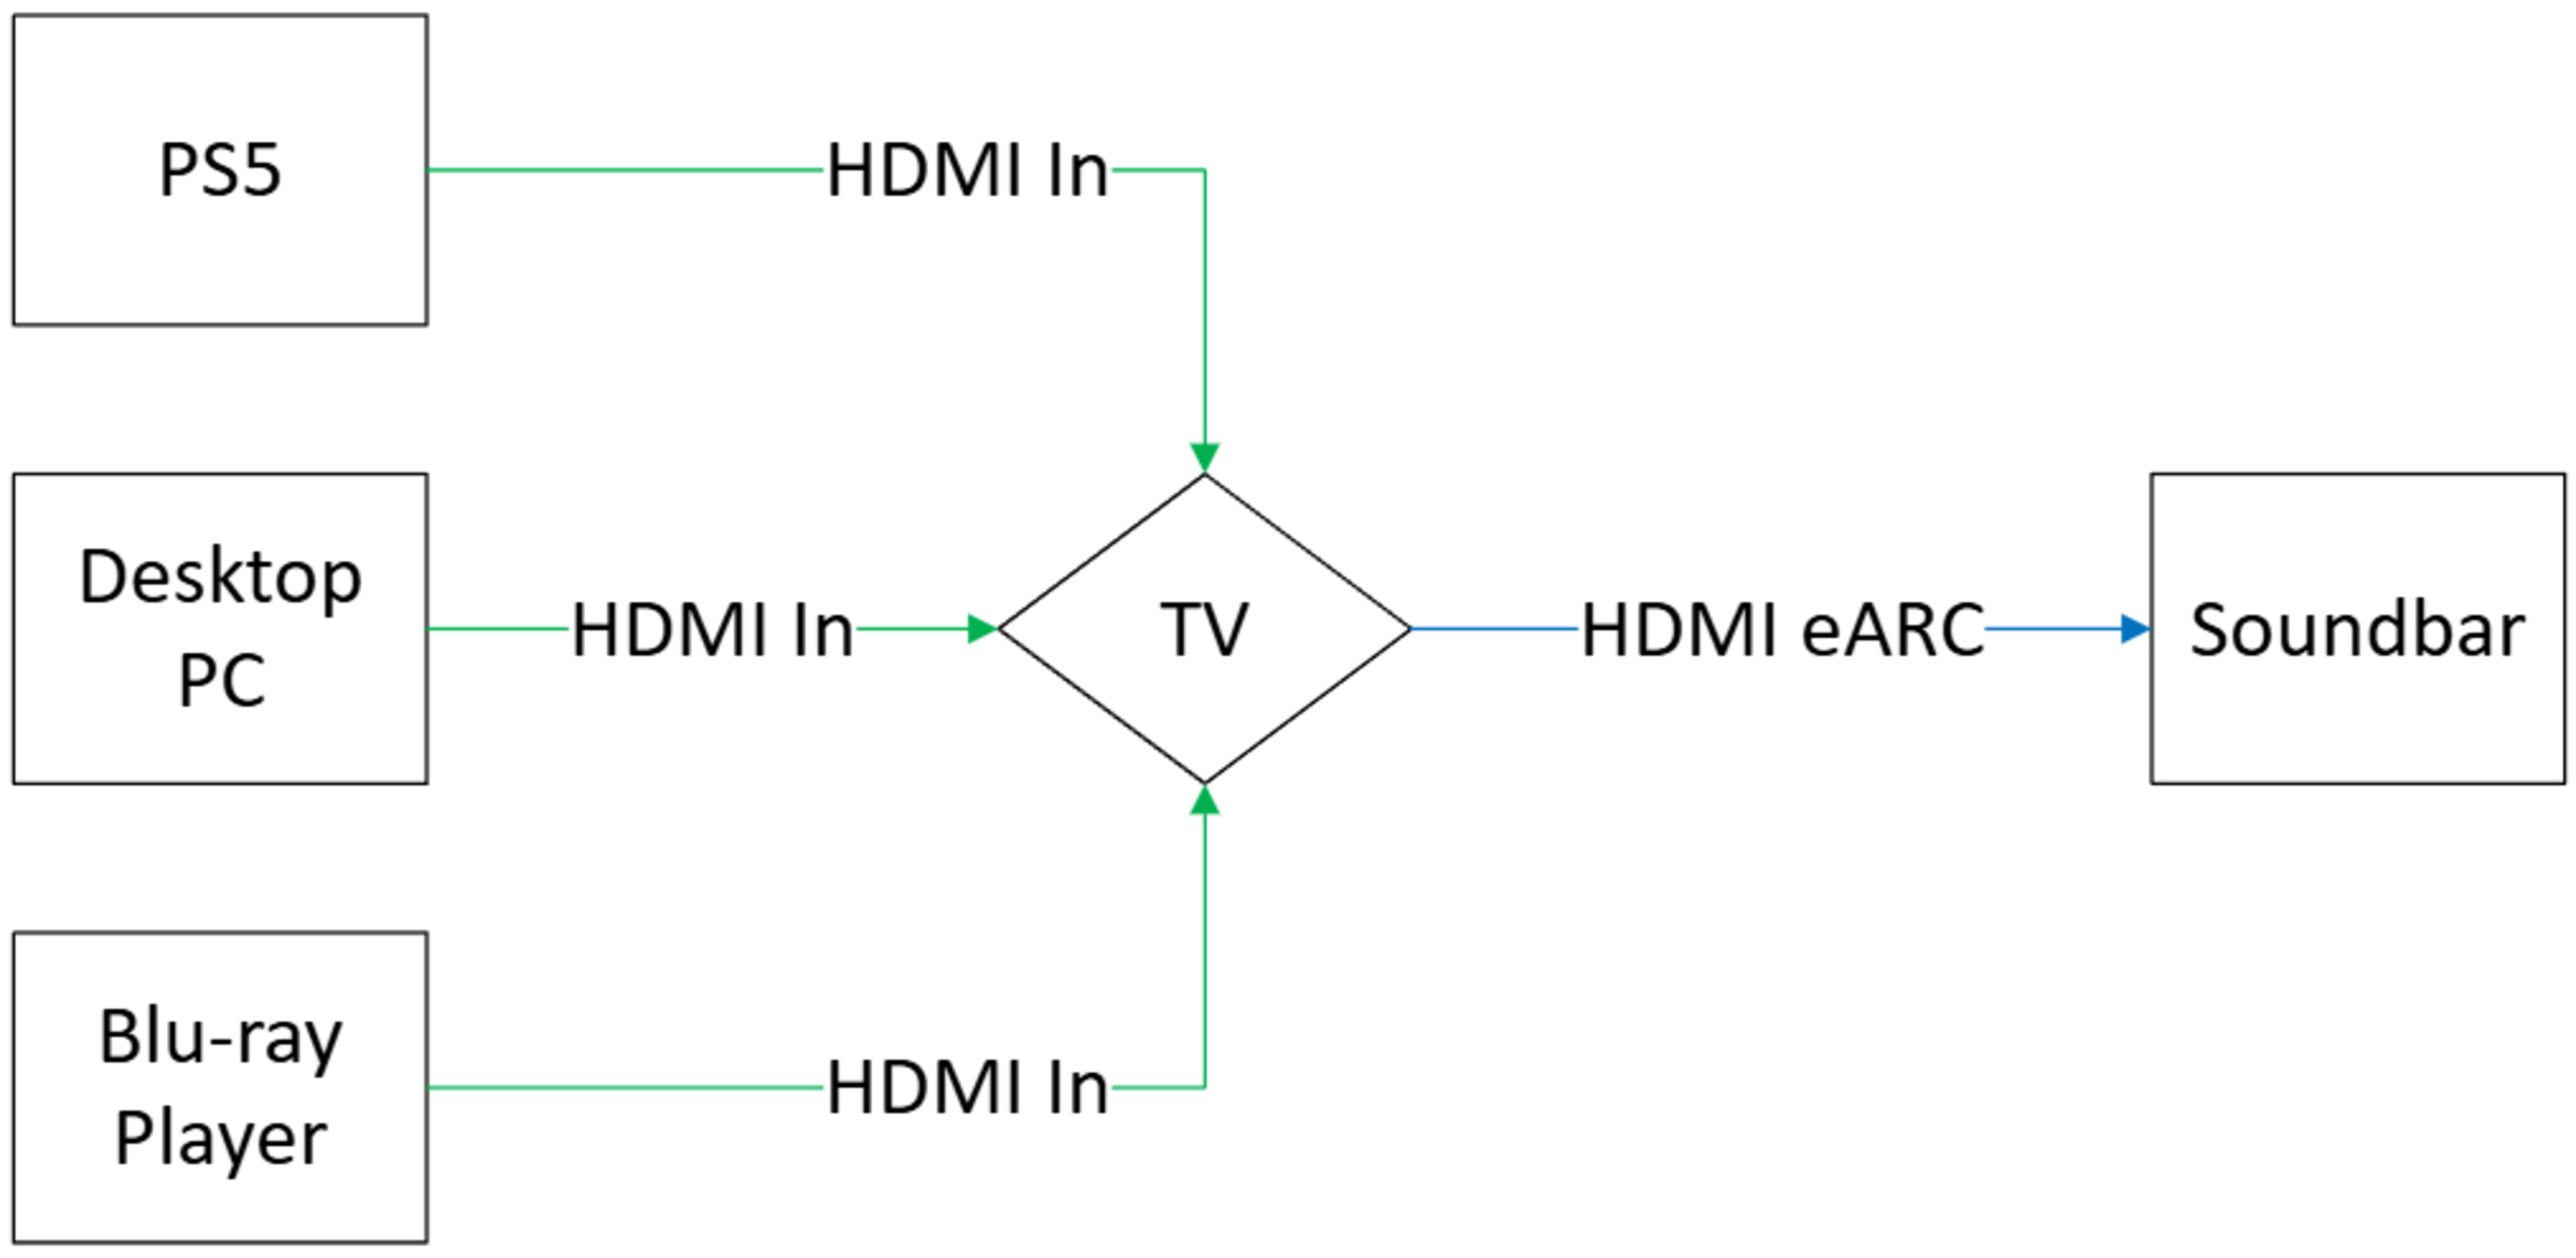 |
If you have a device like the Sonos Arc Ultra, using your TV as a device hub is a good solution since you can't route any source devices through your soundbar. However, keep in mind that HDMI 2.1 ports can be limited on TVs. If you recall, the TCL QM6K has two HDMI 2.1 inputs remaining once you connect your soundbar. That's just enough in this situation, since you can connect your PS5 and Desktop PC to them. However, if you use the Panasonic Z95B OLED, you'll have two devices that both want to use its one remaining HDMI 2.1 input.
|
Yellow = Video Signal Blue = Audio Signal Green = Video + Audio Signal |
 |
But what if you plan on mounting your TV on the wall and you don't want to plug/replug devices in a cramped space? Well, you could opt for something like the Nakamichi DRAGON with three HDMI inputs. But be careful: ARC/eARC port assignment varies by TV. Because the TCL QM6K uses an HDMI 2.0 port (limited to 4k @ 60Hz) for ARC/eARC functionality, even if your soundbar supports 4k @ 120Hz video passthrough, you're limited by the weakest link in the chain, so you'll be stuck capped at 4k @ 60Hz for any devices that ultimately pass their signal through that port. On the other hand, the Panasonic Z95B OLED won't have that issue since ARC/eARC functionality is allocated to a higher-bandwidth HDMI 2.1 port.
Setup
At this point, you're done with the hard part. Planning and assigning devices can take some time, but once you've completed the process, it's smooth sailing for the rest of your setup.
Placement
Before you start plugging devices in, you should first confirm where to place your devices in your physical space. You can consult a size-to-distance calculator for your TV, so you know where to adjust your couch, and make sure your TV isn't too high on its stand or before wall mounting (lest you end up on r/TVTooHigh).
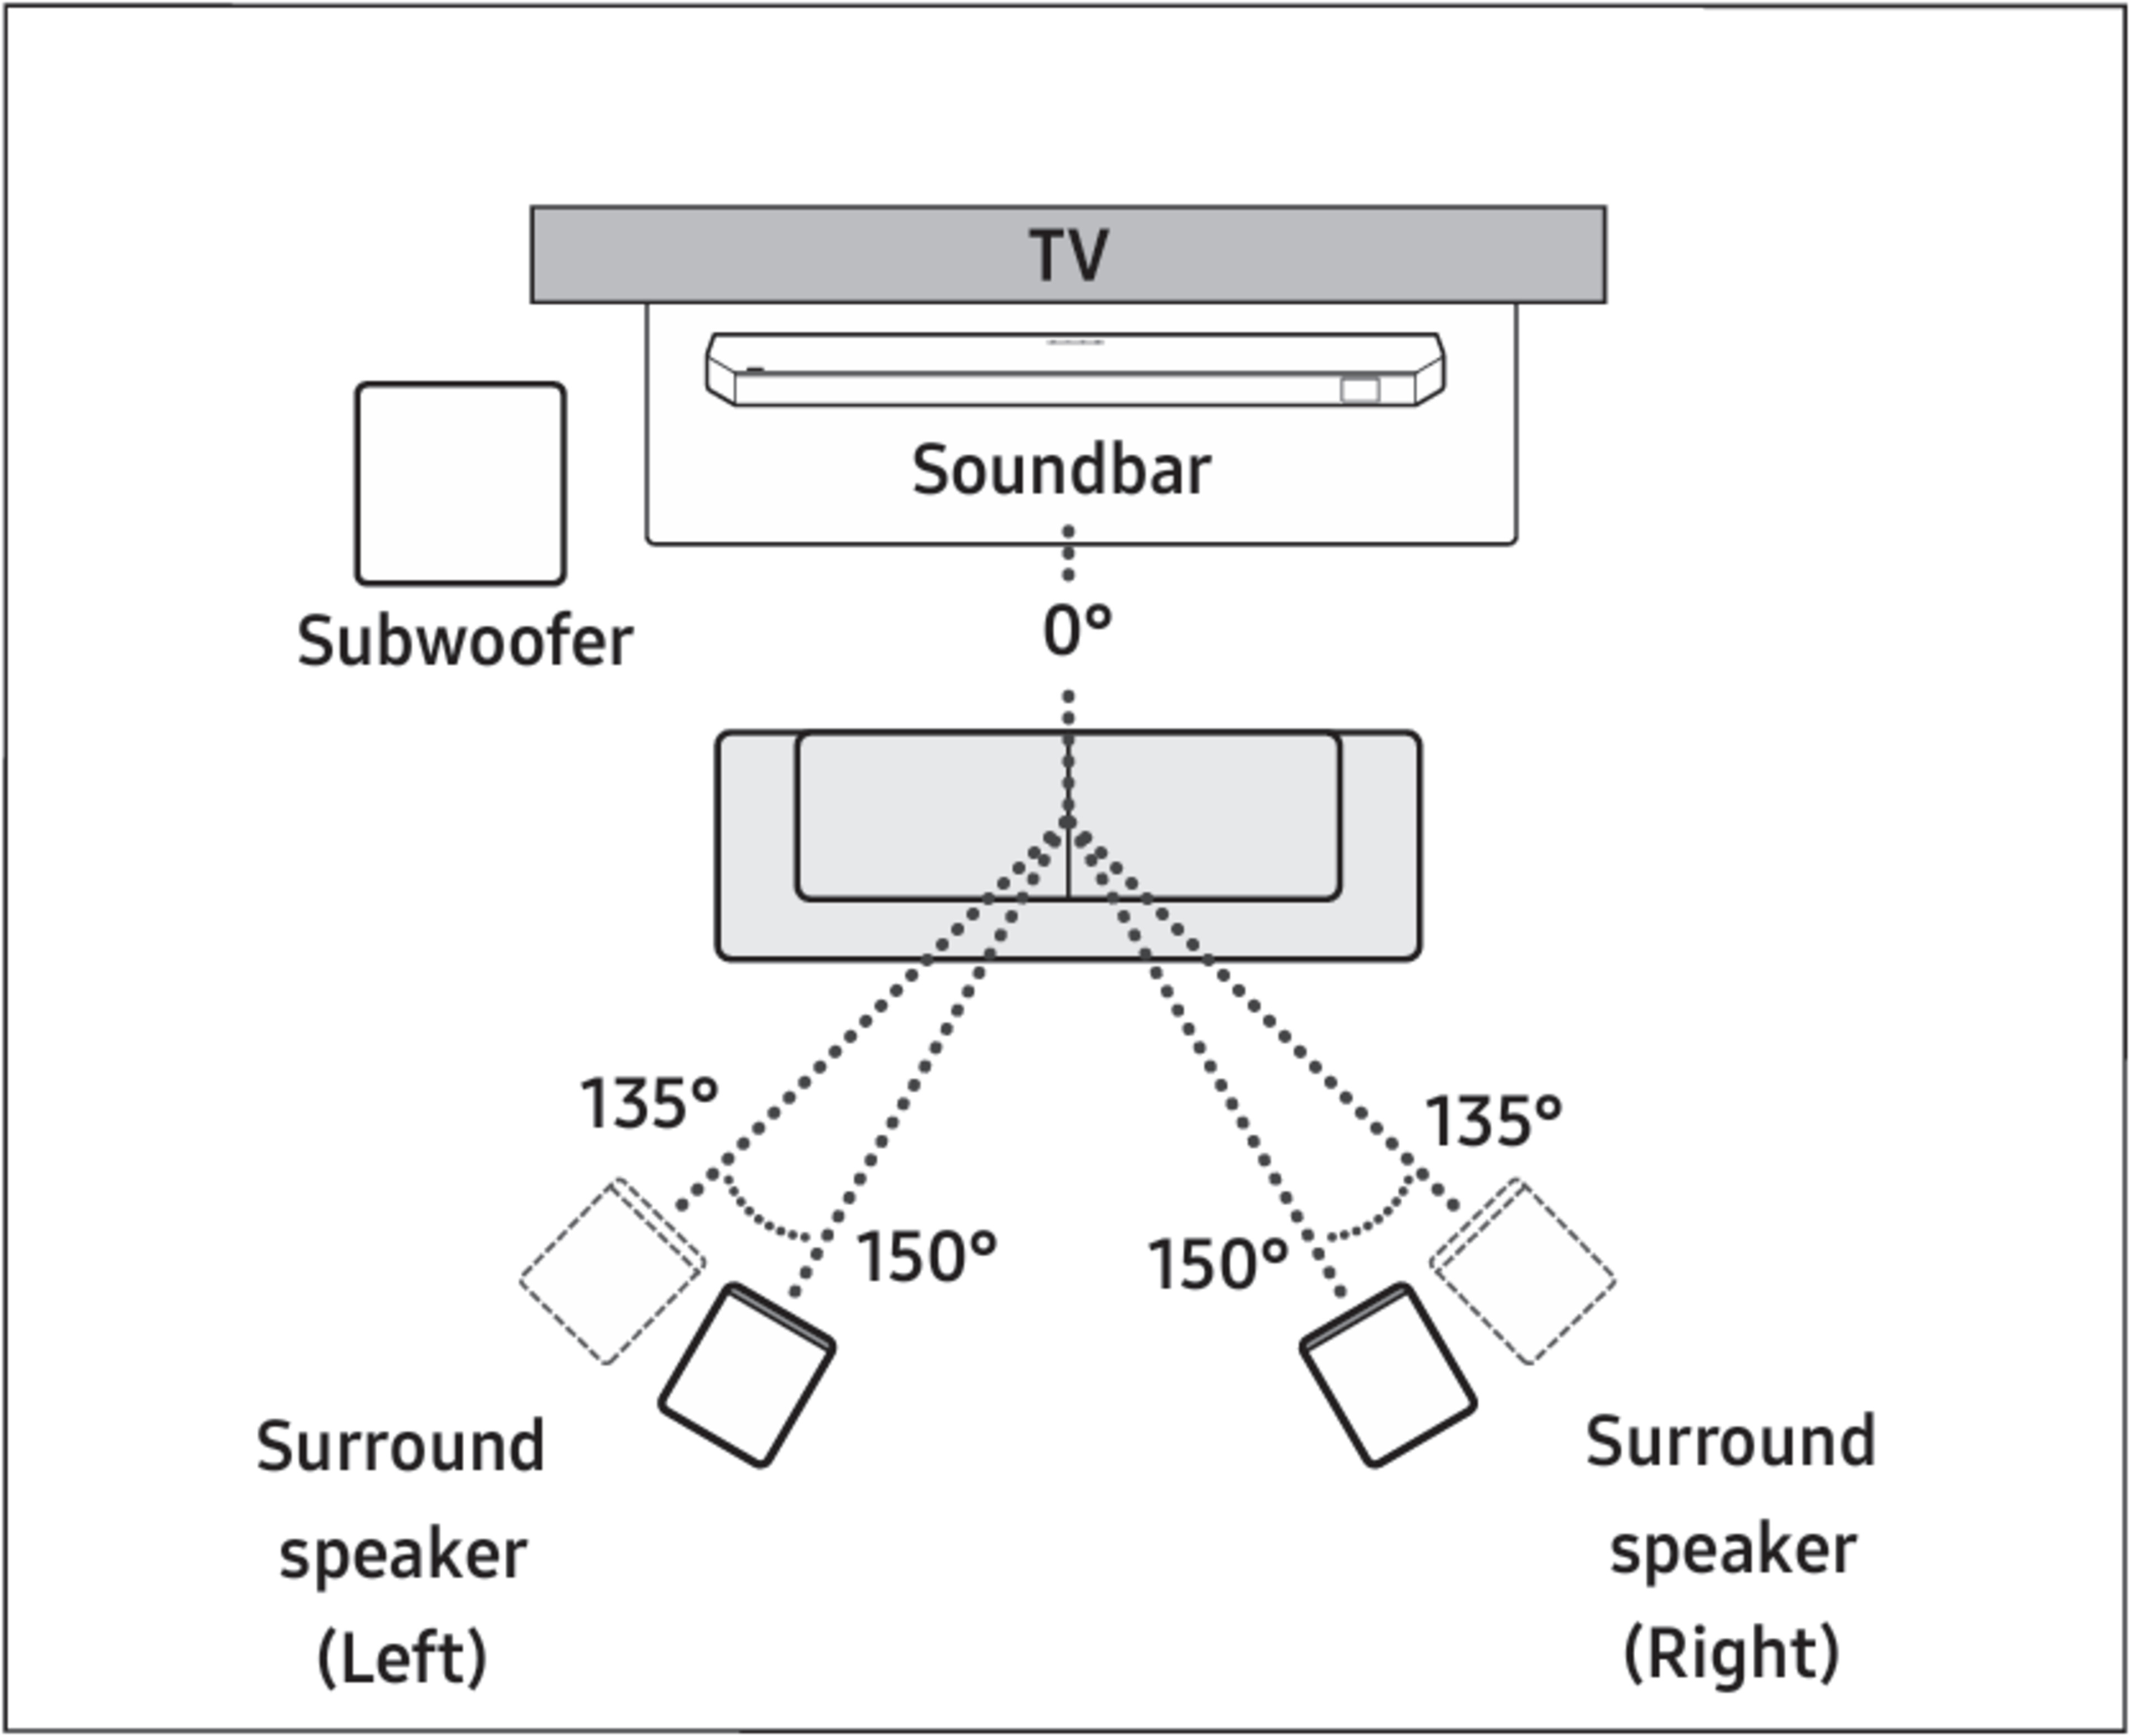
For soundbar placement, we recommend checking out the manufacturer's placement instructions when applicable and following them to the best of your ability. Also, keep in mind that your placement options are limited by your soundbar's dimensions (too wide or tall to fit underneath a TV). If you have a standalone bar, you can place it in front of your TV or mount it underneath, making sure the drivers (including up-firing ones) remain unobstructed. For satellites, you should typically place them beside or behind the listening position (depending on how many your system comes with). As a general rule, try to make sure the soundbar and satellites are positioned symmetrically, and your listening position is centered horizontally.
Things get a bit more complicated when it comes to subwoofers. Due to the longer wavelengths, bass frequencies interact more strongly with the size and shape of your room, leading to room modes. These are patterns of standing waves that cause certain frequencies to sound exaggerated in some spots and weaker in others. To tackle this effect, you can optionally do a subwoofer crawl to find a place to put your subwoofer that works best for your listening position, even if you have a soundbar that supports room correction.
Keep in mind your placement options are also constrained by factors like power cable length and whether your satellites are wired to a receiver, each other, or even to your sub. Your listening experience also varies a decent bit depending on the dimensions, shape, furniture, and materials of your room. Take some time to experiment with the positioning of your devices and seating, and trust your ears. If you want to get the most out of your setup, you can also consider treating your room.
Settings
Once you've settled on placement and mounted and connected all your devices, the final step is to configure your TV and soundbar.
Room Correction
Depending on the soundbar you've picked up, it might come with a room correction feature that uses mics in the soundbar or on your phone to adjust the system's audio based on your listening environment. We do most of our testing with the feature enabled if it's available, though you might prefer how your setup sounds without it.

TV Settings
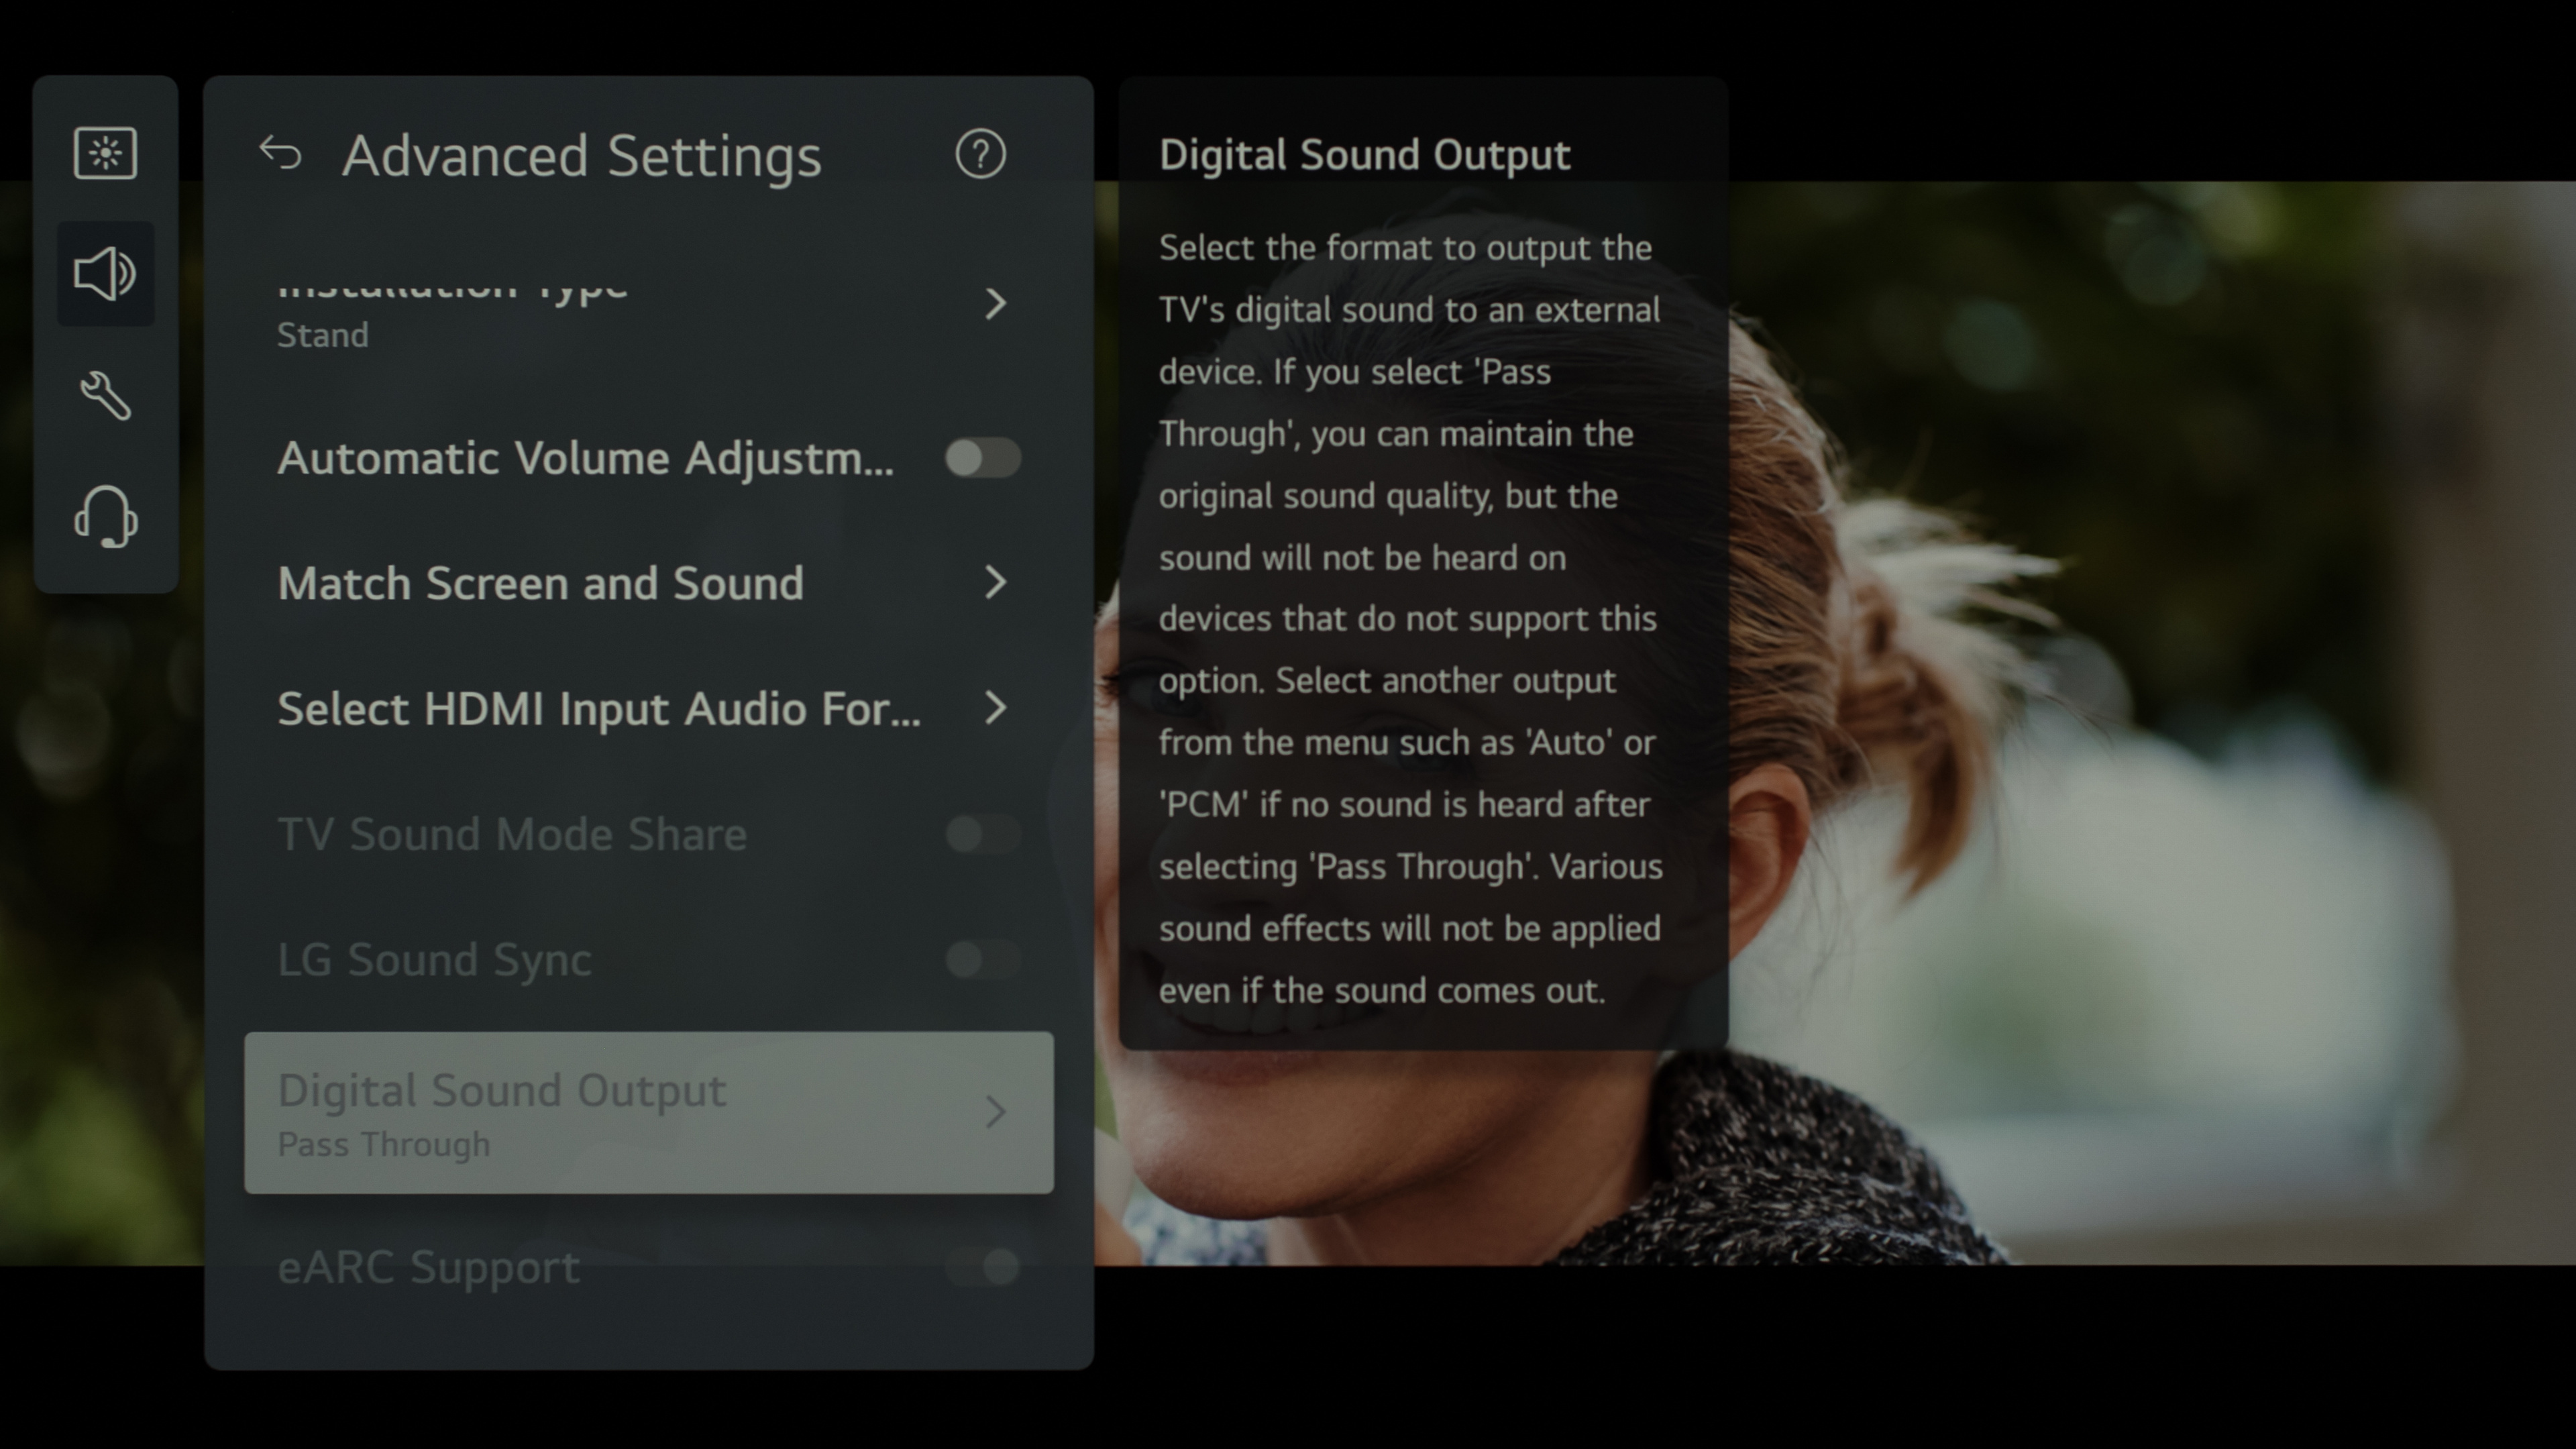
If you've connected your soundbar to your TV with HDMI ARC/eARC, you'll want to enable audio passthrough, so your TV redirects audio from onboard apps like Netflix and connected sources straight to your soundbar untouched. The setting has different names and locations depending on your TV's make, model, and even year. But in general, you're looking for keywords like 'Audio Passthrough,' 'HDMI ARC,' 'HDMI eARC,' and sometimes 'Digital Audio Output.'
 |
 |
Levels and Equalizers
With all the required settings taken care of, you should also take some time to experiment with your soundbar. Put on some familiar content or a fun movie, and cycle through EQ presets or adjust individual levels to your preferences.
Conclusion
While setting up your sound bar isn't as simple as it seems, especially when you toss in a few source devices, this guide tackles most situations and provides a solid framework you can follow to put everything together. That said, this guide can't cover every setup imaginable; if you hit a wall or have an extra question, feel free to leave a comment below or contact us at feedback@rtings.com.