Products
Tested using Methodology v0.11
Updated May 13, 2026 04:45 PM
SEARCH
DicksSportingGoods.com
Tested using Methodology v0.11
Updated Apr 30, 2026 04:54 PM
SEE PRICE
On
Weight
223.0 g (7.87 oz)
Heel-To-Toe Drop
7.1 mm
Plate
Plastic Shank
Weight
287.8 g (10.15 oz)
Heel-To-Toe Drop
11.3 mm
Plate
Plastic
Our Verdict
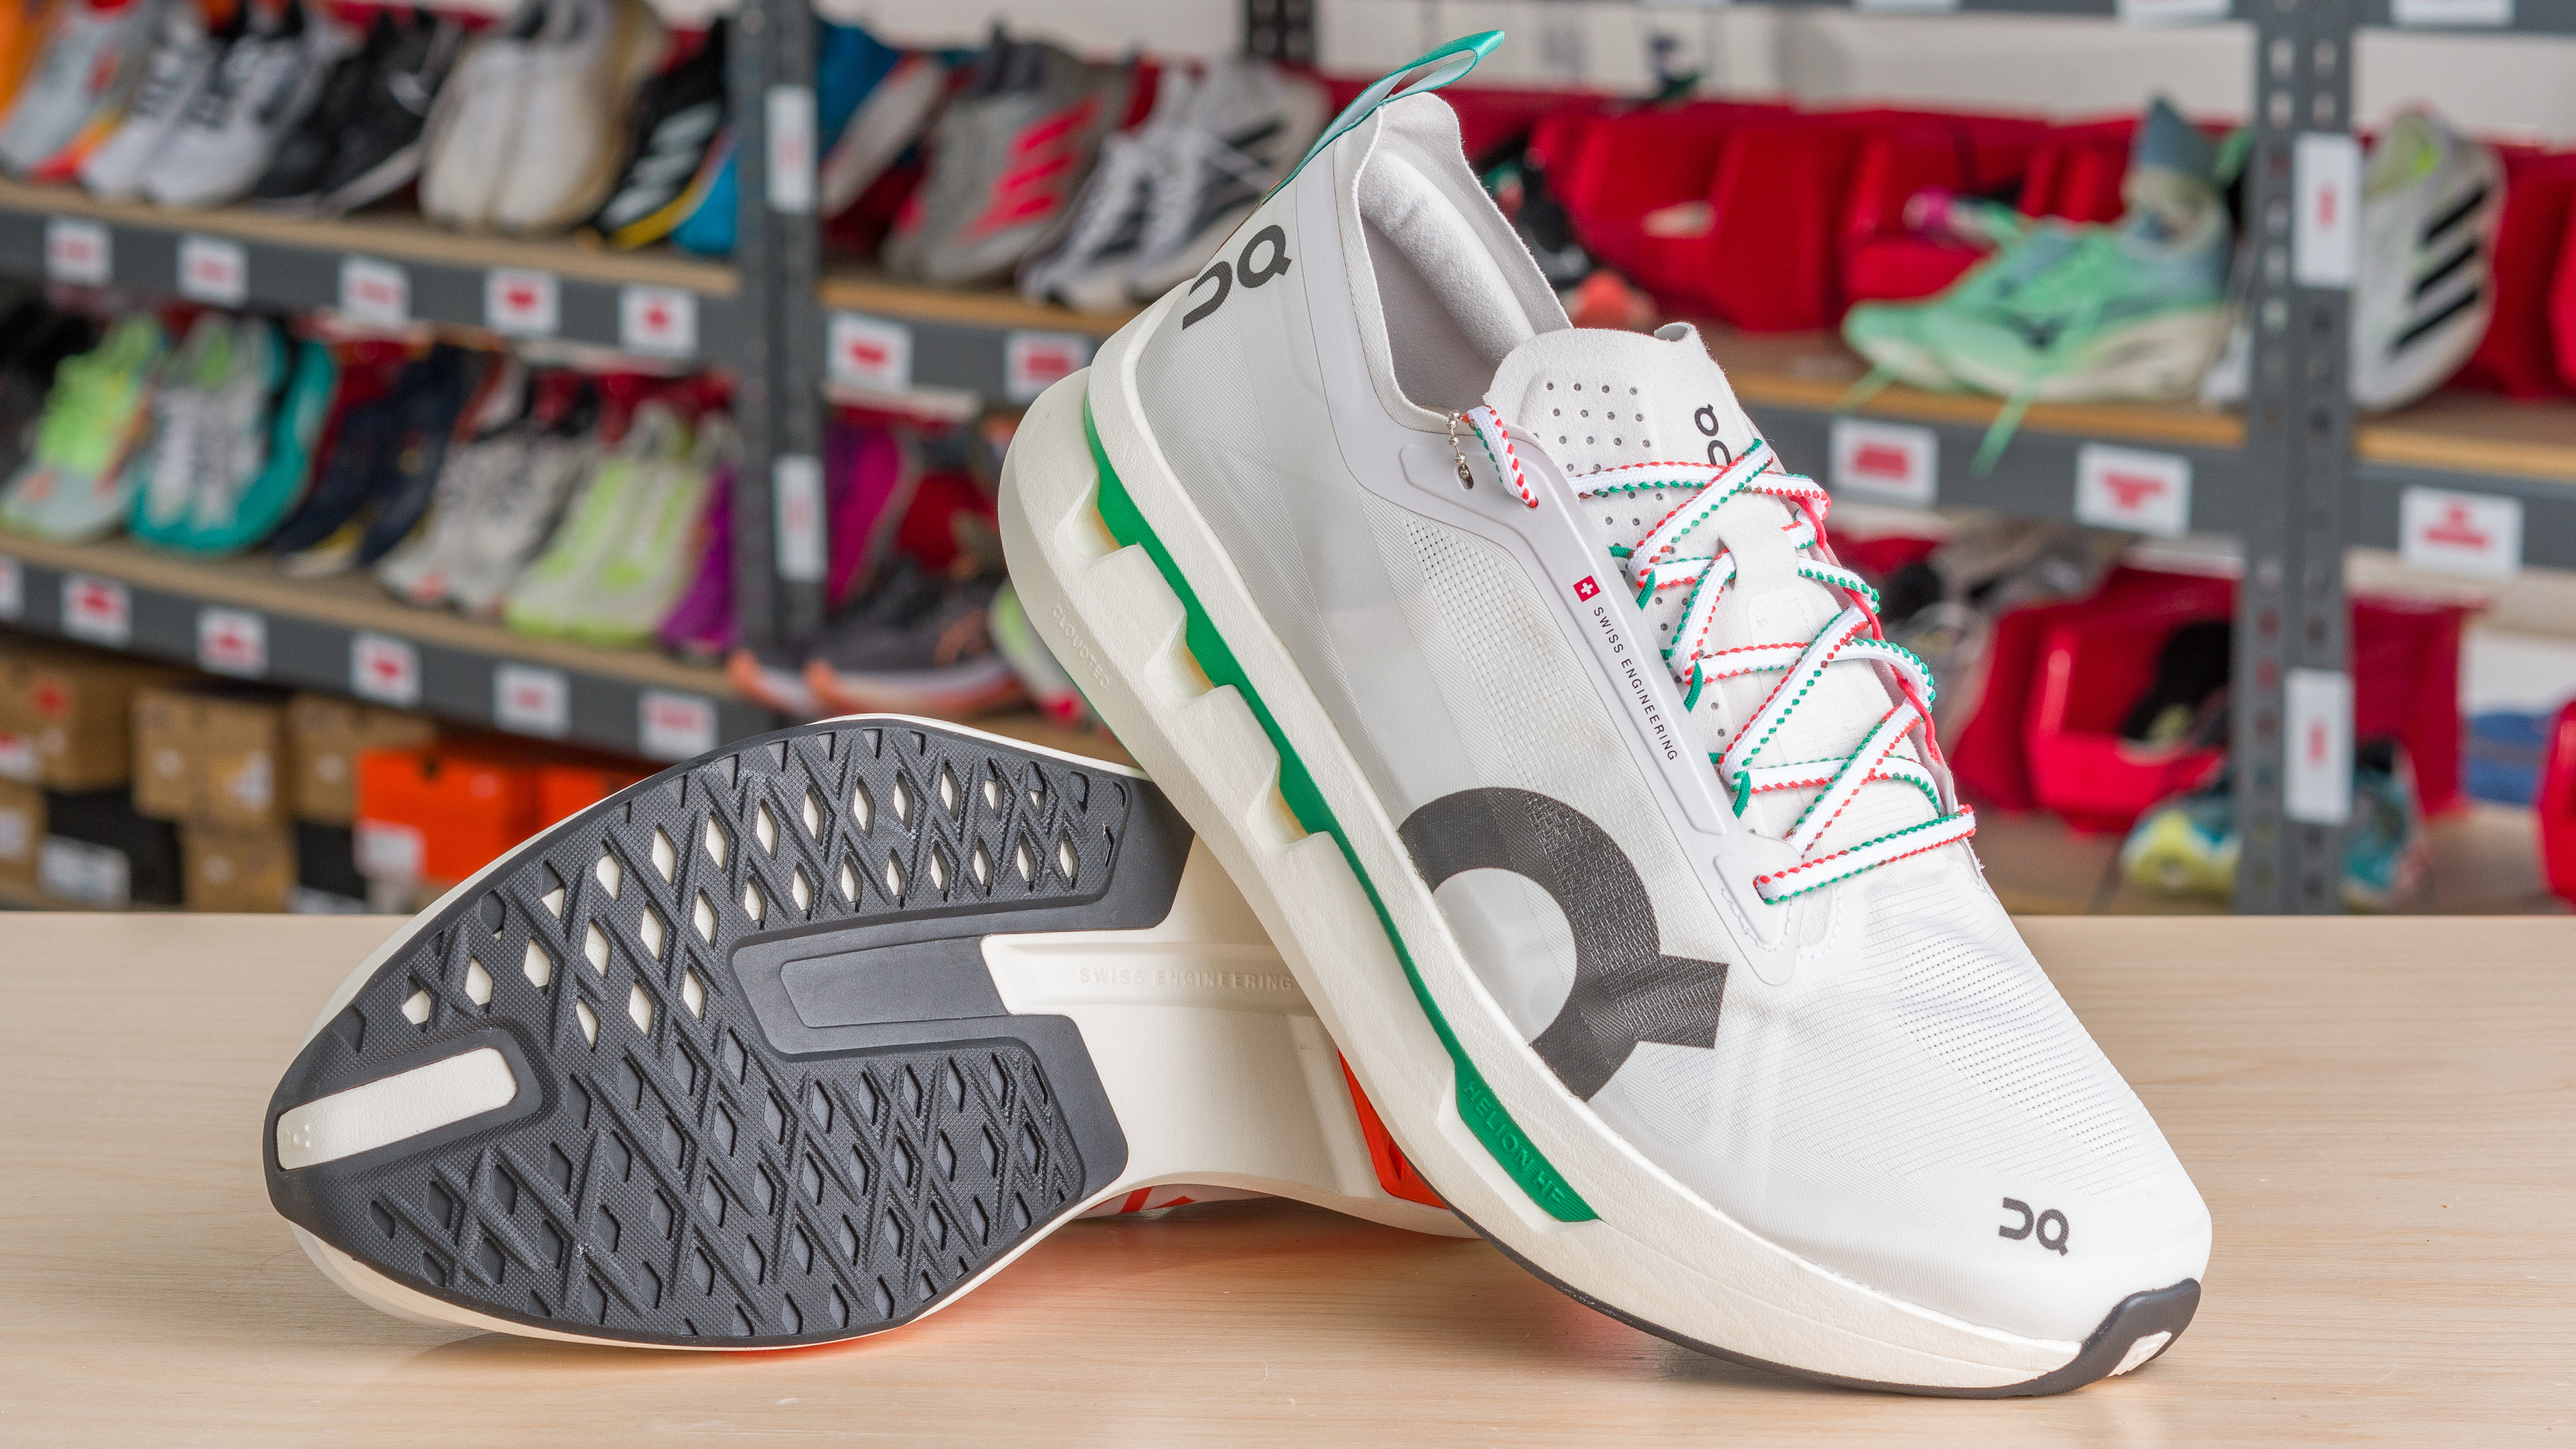
On Cloudboom Zone
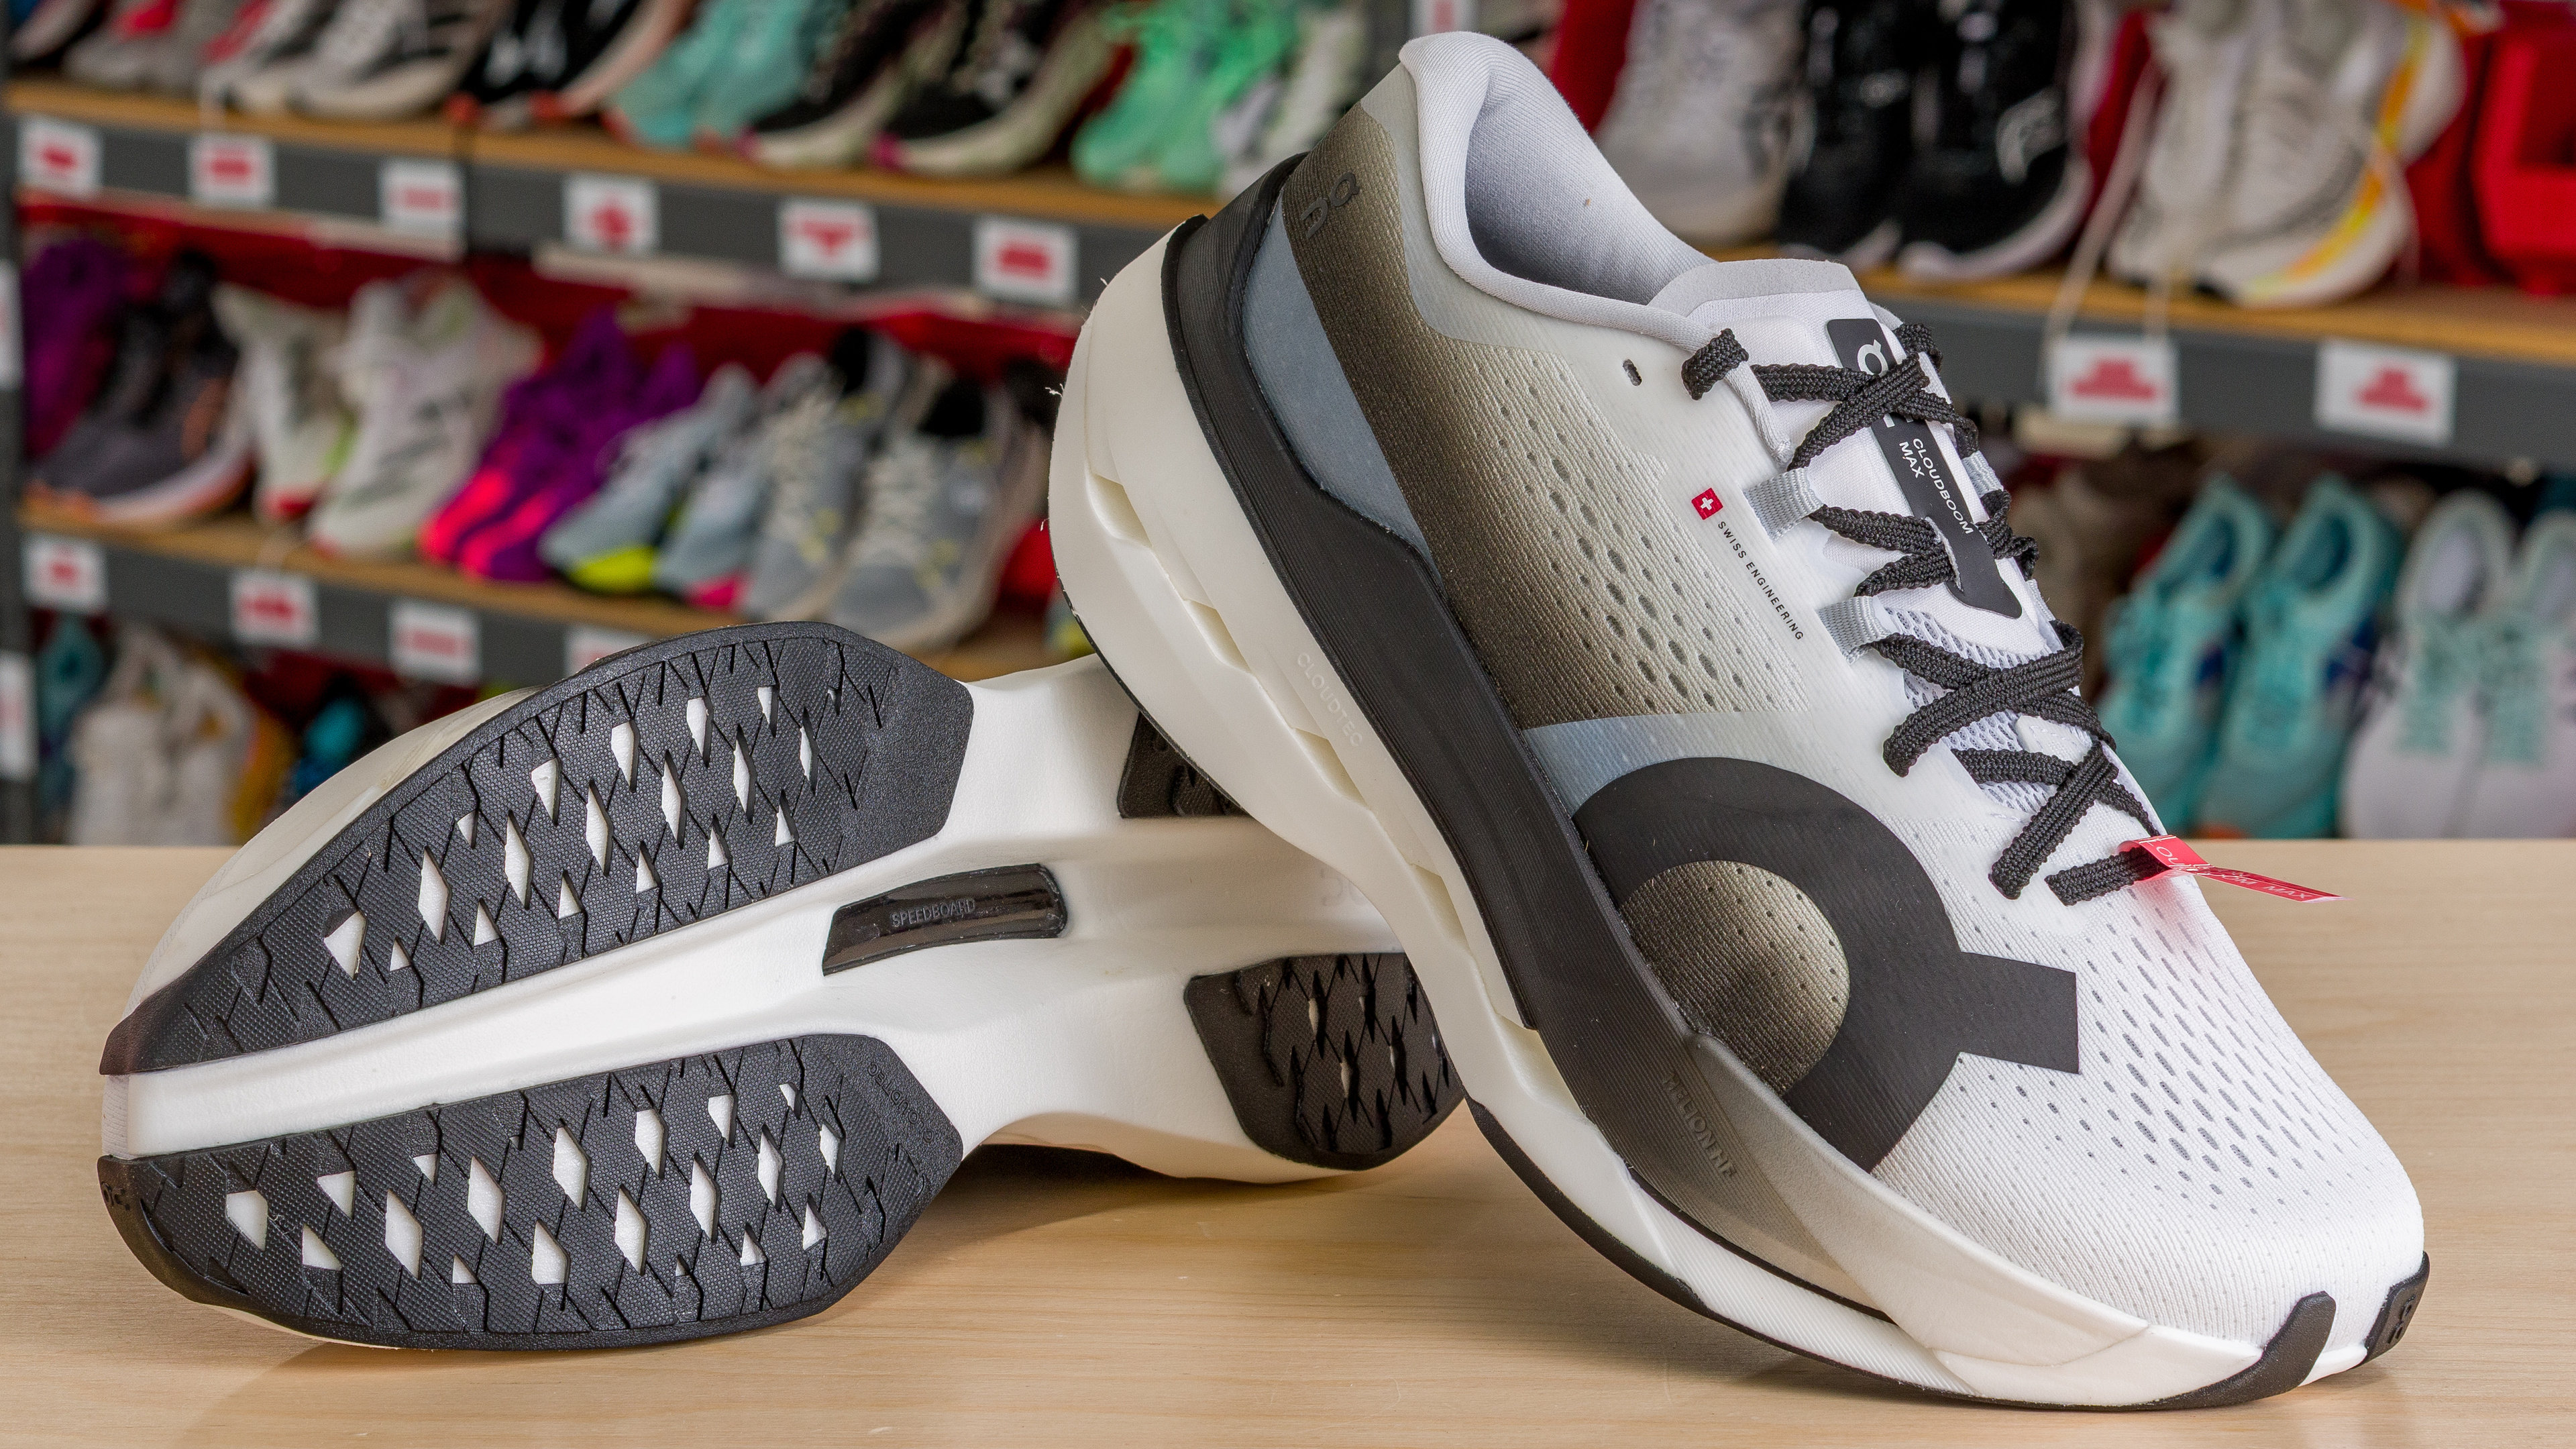
On Cloudboom Max
The On Cloudboom Zone and On Cloudboom Max are two boisterously named, ambitiously marketed, but ultimately limited-use case shoes. On claims the Zone is a versatile trainer that can handle 99 percent of a runner's mileage, but in practice, its lightweight build, partial plastic shank, and subtle rocker make it more suited to uptempo workouts. Similarly, On markets the Cloudboom Max as an elite-level super shoe, but its bulky construction that prioritises stability over speed makes it more suitable for middle-of-the-pack runners aiming for a 4-hour marathon.
Variants
- Cloudboom Zone (White/Flame - (Men - US 9))
- Cloudboom Zone (White/Flame - (Women - US 7))
- Cloudboom Max (Honeydrew/Lilac - (Men - US 9))
- Cloudboom Max (Honeydrew/Lilac - (Women - US 7))
Main Differences for
Marathon Racing
Marathon Racing
Threshold
Marathon Racing
7.5
7.3
Weight
7.4
4.9
Plate
Plastic Shank
Plastic
Heel Stack Height
37.2 mm
43.0 mm
Full Comparison
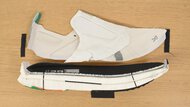
Design
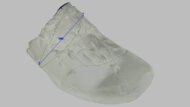
Weight
7.4
4.9
Right Shoe Weight Photo
Compare High-Res

Compare High-Res

Left Shoe Weight Photo
Compare High-Res

Compare High-Res

Weight
223.0 g (7.87 oz)
287.8 g (10.15 oz)
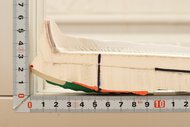
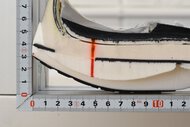
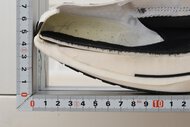
Stack Heights
Stack Height Photo
Compare High-Res
Compare High-Res
Heel Stack Height
37.2 mm
43.0 mm
Forefoot Stack Height
30.1 mm
31.7 mm
Heel-To-Toe Drop
7.1 mm
11.3 mm
Advertised Heel-To-Toe Drop
6.0 mm
8.0 mm
External Shape
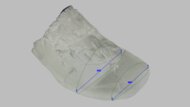
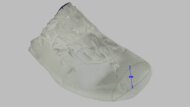
3D Model Full Shoe
Preview 3D
Preview 3D
Outsole Heel Width
85 mm (3.4")
101 mm (4.0")
Outsole Arch Width
77 mm (3.0")
73 mm (2.9")
Outsole Forefoot Width
112 mm (4.4")
115 mm (4.5")
Heel Width-To-Stack Ratio
2.28
2.35
Forefoot Width-To-Stack Ratio
3.72
3.63
Internal Shape
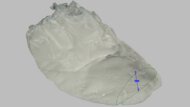
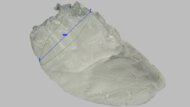
3D Model Internal
Preview 3D
Preview 3D
Internal Length
269 mm (10.6")
281 mm (11.1")
Internal Heel Width
65 mm (2.5")
50 mm (2.0")
Internal Forefoot Width
91 mm (3.6")
90 mm (3.5")
Wide Sizing Available
No
No
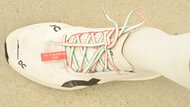
Forefoot Fit: Width
9.5
9.2
Forefoot Width Photo
Compare High-Res

Compare High-Res
Ball-Of-Foot TTS Deviation
2.5 mm (0.100")
1.0 mm (0.038")
Toe TTS Deviation
1.8 mm (0.069")
7.8 mm (0.306")
Forefoot Fit: Height
6.9
10
Forefoot Height Photo
Compare High-Res
Compare High-Res
Toe TTS Deviation
-3.8 mm (-0.148")
1.3 mm (0.050")
Arch Fit: Width
8.6
7.9
Arch Fit Photo
Compare High-Res
Compare High-Res
Arch Width TTS Deviation
-2.5 mm (-0.099")
-3.5 mm (-0.139")
Length Fit
10
10
Toe Clearance Photo
Compare High-Res
Compare High-Res
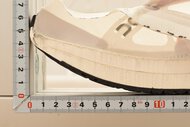
Heel Rocker Geometry
7.4
8.4
Heel Rocker Photo
Compare High-Res
Compare High-Res
Heel Spring
22 mm (0.9")
32 mm (1.3")
Heel Apex Position
22.5%
26.7%
Heel Rocker Angle
18.7°
21.8°
Forefoot Rocker Geometry
6.6
5.7
Forefoot Rocker Photo
Compare High-Res
Compare High-Res
Toe Spring
45 mm (1.8")
40 mm (1.6")
Toe Apex Position
61.9%
63.3%
Forefoot Rocker Angle
22.2°
20.0°
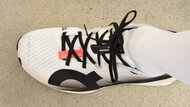
Other Features
Other Features Photo
Compare High-Res
Compare High-Res
Tongue Gusset Type
Semi-gusseted
Non-gusseted
Plate
Plastic Shank
Plastic
Performance
Heel Compression Energy Return
7.4
6.4
Heel Compression Video
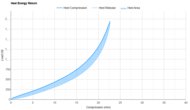
Heel Energy Return
Preview Graph
Preview Graph
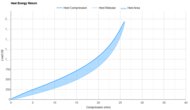
Heel Energy Return
77.7%
74.3%
Forefoot Compression Energy Return
7.6
7.4
Forefoot Compression Video
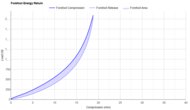
Forefoot Energy Return
Preview Graph
Preview Graph
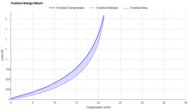
Forefoot Energy Return
78.9%
77.7%
Heel Cushioning
6.7
8.1
Heel Cushioning Picture
Compare High-Res

Compare High-Res

Heel Cushioning
Preview Graph
Preview Graph
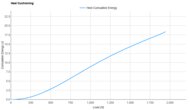
Energy Absorbed At 550N
3.21 J
3.38 J
Energy Absorbed At 1100N
8.30 J
10.07 J
Energy Absorbed At 1900N
13.97 J
17.90 J
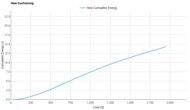
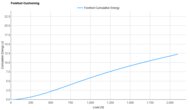
Forefoot Cushioning
7.4
8.0
Forefoot Cushioning Picture
Compare High-Res

Compare High-Res

Forefoot Cushioning
Preview Graph
Preview Graph
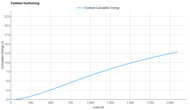
Energy Absorbed At 800N
4.41 J
4.97 J
Energy Absorbed At 1300N
7.92 J
8.61 J
Energy Absorbed At 2050N
12.03 J
12.71 J
Heel Firmness
6.4
4.8
Heel Firmness
Preview Graph

Preview Graph
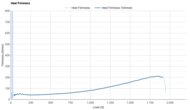
Firmness At 550N
58.0 N/mm
50.1 N/mm
Firmness At 1100N
127.4 N/mm
94.2 N/mm
Firmness At 1900N
284.6 N/mm
202.6 N/mm
Forefoot Firmness
7.8
7.8
Forefoot Firmness
Preview Graph
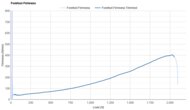
Preview Graph
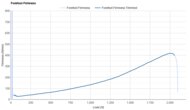
Firmness At 800N
105.9 N/mm
103.5 N/mm
Firmness At 1300N
205.7 N/mm
195.8 N/mm
Firmness At 2050N
389.9 N/mm
406.3 N/mm
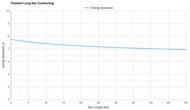
Forefoot Long Run Cushioning
6.8
7.2
Forefoot Long Run Cushioning
Preview Graph
Preview Graph
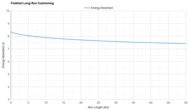
Energy Absorbed At 10km
7.42 J
7.89 J
Energy Absorbed At 20km
7.23 J
7.71 J
Energy Absorbed At 30km
7.11 J
7.58 J
Energy Absorbed At 40km
7.01 J
7.49 J
Rocker Stiffness
8.1
5.0
Forefoot Rocker Stiffness Video
Forefoot Rocker Stiffness Graph
Preview Graph
Preview Graph

Force To Flatten The Rocker
122 N
43 N
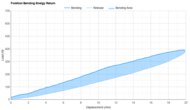
Forefoot Bending Energy Return
7.6
7.4
Forefoot Bending Video
Forefoot Bending Energy Return
Preview Graph
Preview Graph
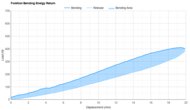
Forefoot Bending Energy Return
68.4%
67.6%
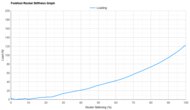
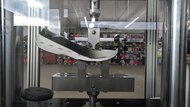
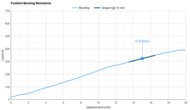
Forefoot Bending Stiffness
7.9
8.4
Forefoot Bending Resistance Picture
Compare High-Res

Compare High-Res
Forefoot Bending Resistance
Preview Graph
Preview Graph
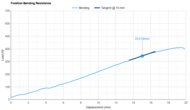
Forefoot Bending Stiffness
17.6 N/mm
23.5 N/mm
Forefoot Bending Force
322 N
343 N
To access
Become a member
unlimited full product reviews,
product prices, and
other exclusive site features
On Cloudboom Zone
On Cloudboom Max
Comments
On Cloudboom Zone vs On Cloudboom Max: Main Discussion
What do you think of these products? Let us know below.
Looking for a personalized buying advice from the RTINGS.com experts? Members have direct access to buying advice on our member forum.