Many of us wear earbuds every single day, and no matter how often you wash your hair, face, and ears, your buds need occasional cleaning and disinfecting. Think of all the sweat and oil each of us naturally produces when we go for a run or workout. Before you get grossed out, all you need to do is follow our tips and give your buds a cleaning. So, here's how to clean your earbuds.
Why You Should Clean Your Earbuds
Perhaps this is self-evident to most people, but if you repeatedly put earbuds in your ears every day, they'll eventually need a cleaning as part of maintenance and basic personal hygiene. This is especially important if you share your earbuds. How often you should clean your earbuds depends on how often you wear them and, not to put too fine a point on it, how oily and waxy your ears are. Debris can get stuck in the various vents, microphone grilles, ear tips, driver grilles, and charging points of your earbuds; keeping these clear helps avoid performance problems.
Similarly, the interior of your case can get clogged with detritus and block the battery charging points, while the exterior can collect dust and lint from your pockets in the USB port. In all, besides ensuring your earbuds don't start to look or smell funky, a bit of cleaning can go a long way to helping guarantee your buds continue to work as expected.
Supplies For Cleaning Earbuds And IEMs

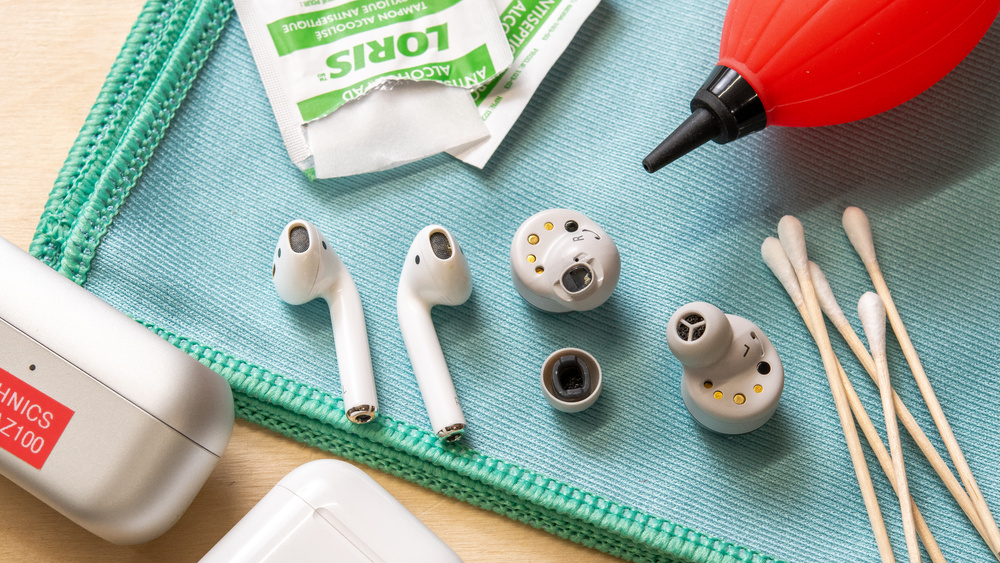
You can buy cleaning kits for your earbuds and in-ear monitors (IEMs), and some pairs include their own cleaning tools too. In most instances, though, common household items are completely adequate for cleaning your earbuds:
- Cotton swabs (also known as Q-Tips)
- Isopropyl alcohol (bottled or wipes, and preferably 70%)
- Whenever possible, check for chemical interactions with different materials and manufacturer directions. If you're still unsure, you can try a spot test.
- Lint-free microfiber cloths
- Gentle dish soap
- Water
- Wire loop cleaning tool (This one from Shure has two useful tools. One end is pointed, and that's great for tight spots. This Westone tool also works, and the brush end is helpful for clearing out charging ports.)
- If you don't have a wire loop cleaning tool, you can use a toothpick with a sanded and blunted point, but if you invest in nice earbuds, it's probably worth it to spend the $5 (or so) on the wire loop tool.
How To Clean Earbuds, Step-By-Step
In general, if your earbuds include directions for cleaning, follow those instead of ours, so you don't risk voiding a warranty. If you own AirPods or AirPods Pro models, many of the same rules apply, but we've also dedicated an article to the topic of how to clean your AirPods. Either way, read on for some tips that you can pick and choose as they apply to your pair of earbuds or IEMs.
The first step to cleaning your earbuds is to remove the ear tips and put them aside. Ideally, you want the earbuds to be 'off' or have the battery completely drained, so they're not running on the battery while you clean them; this isn't strictly necessary, but it's better to be safe than sorry.
Cleaning the buds
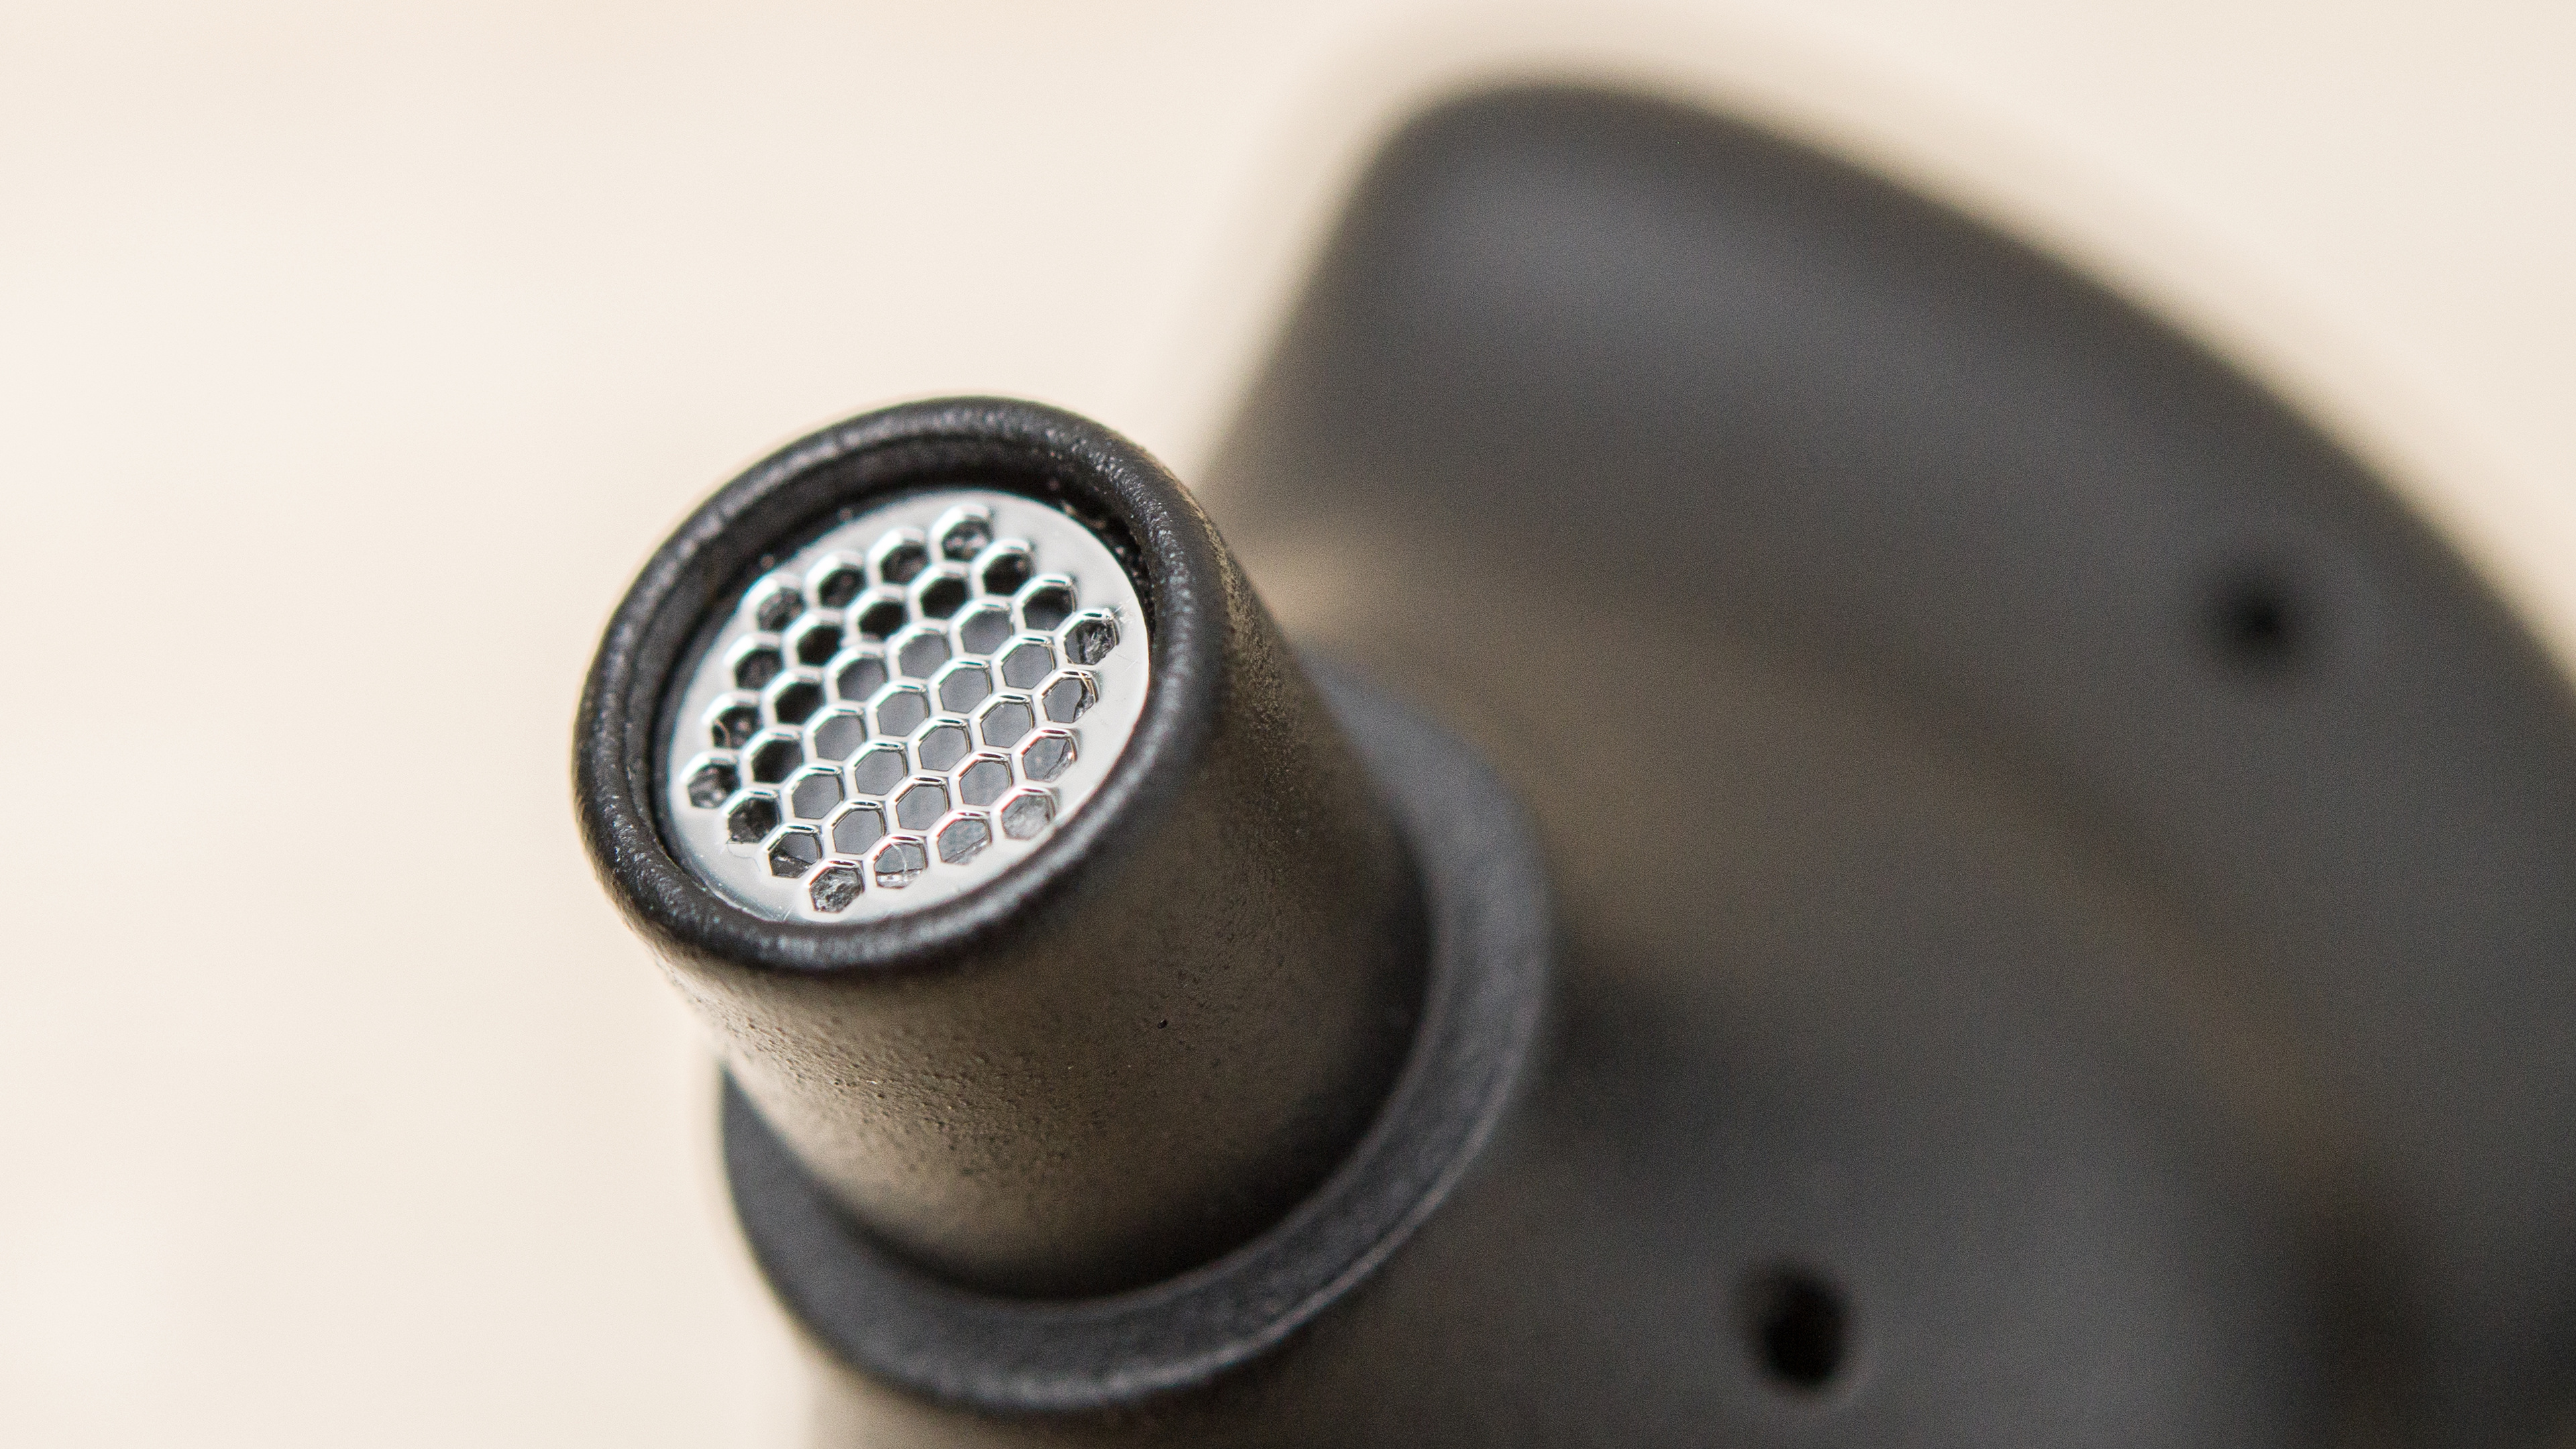
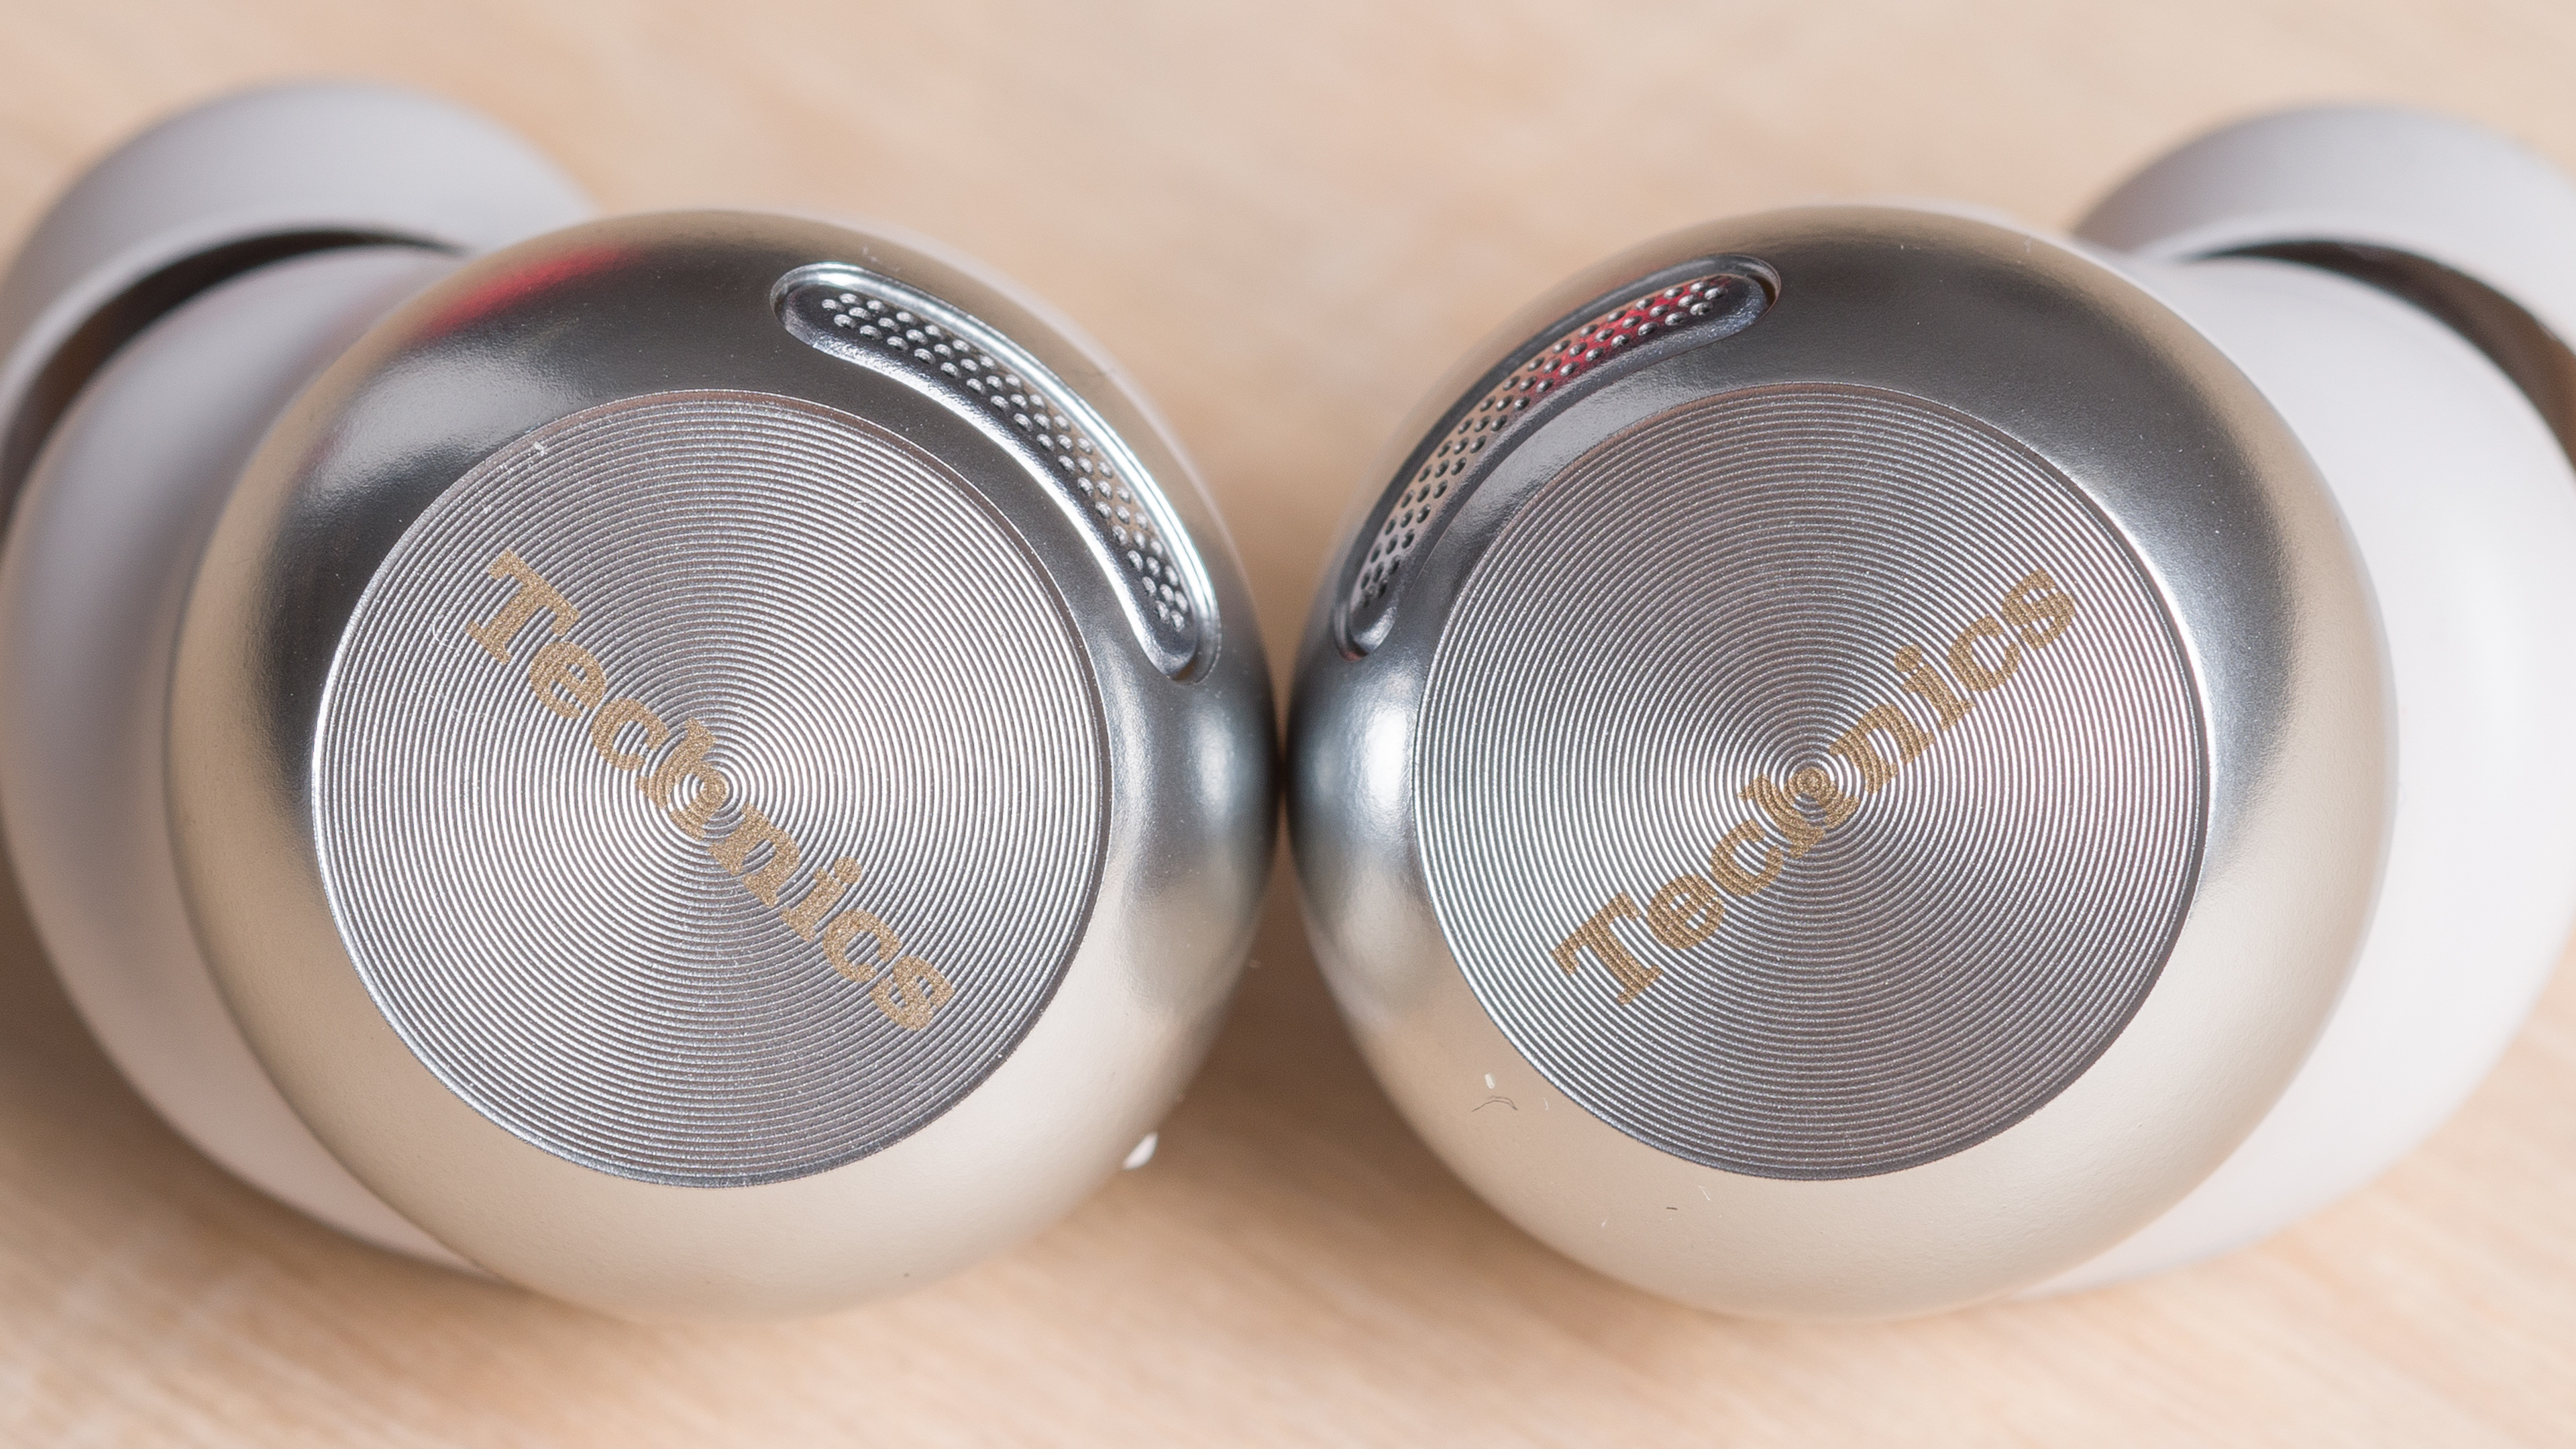
Start by observing how dirty your earbuds are; if you see stuck-on debris in hard-to-access places, remove that first. If you don't have a specialty wire loop cleaning tool for removing wax around the vents, you can substitute a toothpick that has the sharp point sanded down to a rounded end, and gingerly run it along the edges and crannies where there's compacted debris. Be mindful that you don't puncture the grilles or apply much force around the grilles and vents. When cleaning the nozzles, push your cleaning tool along the sides so you don't slip and damage the grille or dampener, and while tempting, don't try to be overly thorough or push the cleaning tool in too deeply. Holding up the bud so that the nozzle is tipped downwards can help you avoid mashing debris into the grilles by mistake. There are other ways to achieve the same outcome, and if a specialty tool comes with earbuds, it's usually the best one to use with that pair. Wipe away larger pieces of debris with a dry cotton swab.
Next, if they're especially dusty, you can give the buds a wipe-down with a dry microfiber cloth.
While most earbuds have Ingress Protection (IP) ratings that offer resistance to water exposure, in most cases, isopropyl alcohol is a better choice than water for cleaning the housings. 70% isopropyl alcohol disinfects, doesn't damage electronics, and evaporates. However, check your manual because some manufacturers, such as Shure, direct you to use a damp and soapy solution instead of alcohol. With many IEMS (and in Shure's case), this is likely because their acrylic plastic housings can become brittle with repeated exposure to alcohol. Many true wireless earbuds use other plastics besides acrylic, which are fine to briefly expose to up to 70% isopropyl alcohol, so long as you don't drench the plastic and wipe it dry. Definitely double-check if you're unsure.
Wet the cotton swab with the isopropyl alcohol or a soapy solution, and wipe the surface of buds, paying attention to crevices, metal charging points, and vents. You can use a cleanser wipe instead, but depending on the size of your fingers and the earbuds, a cotton swab can offer more precision. Most of the time, this is all you need to clear away debris, and if you don't have wax built up in hard-to-access places, the cotton swabs are easier to use than a sharper wire loop tool. Finally, sop up excess moisture, especially if you used water, and leave the buds out of the case to completely dry.
Cleaning the Ear Tips
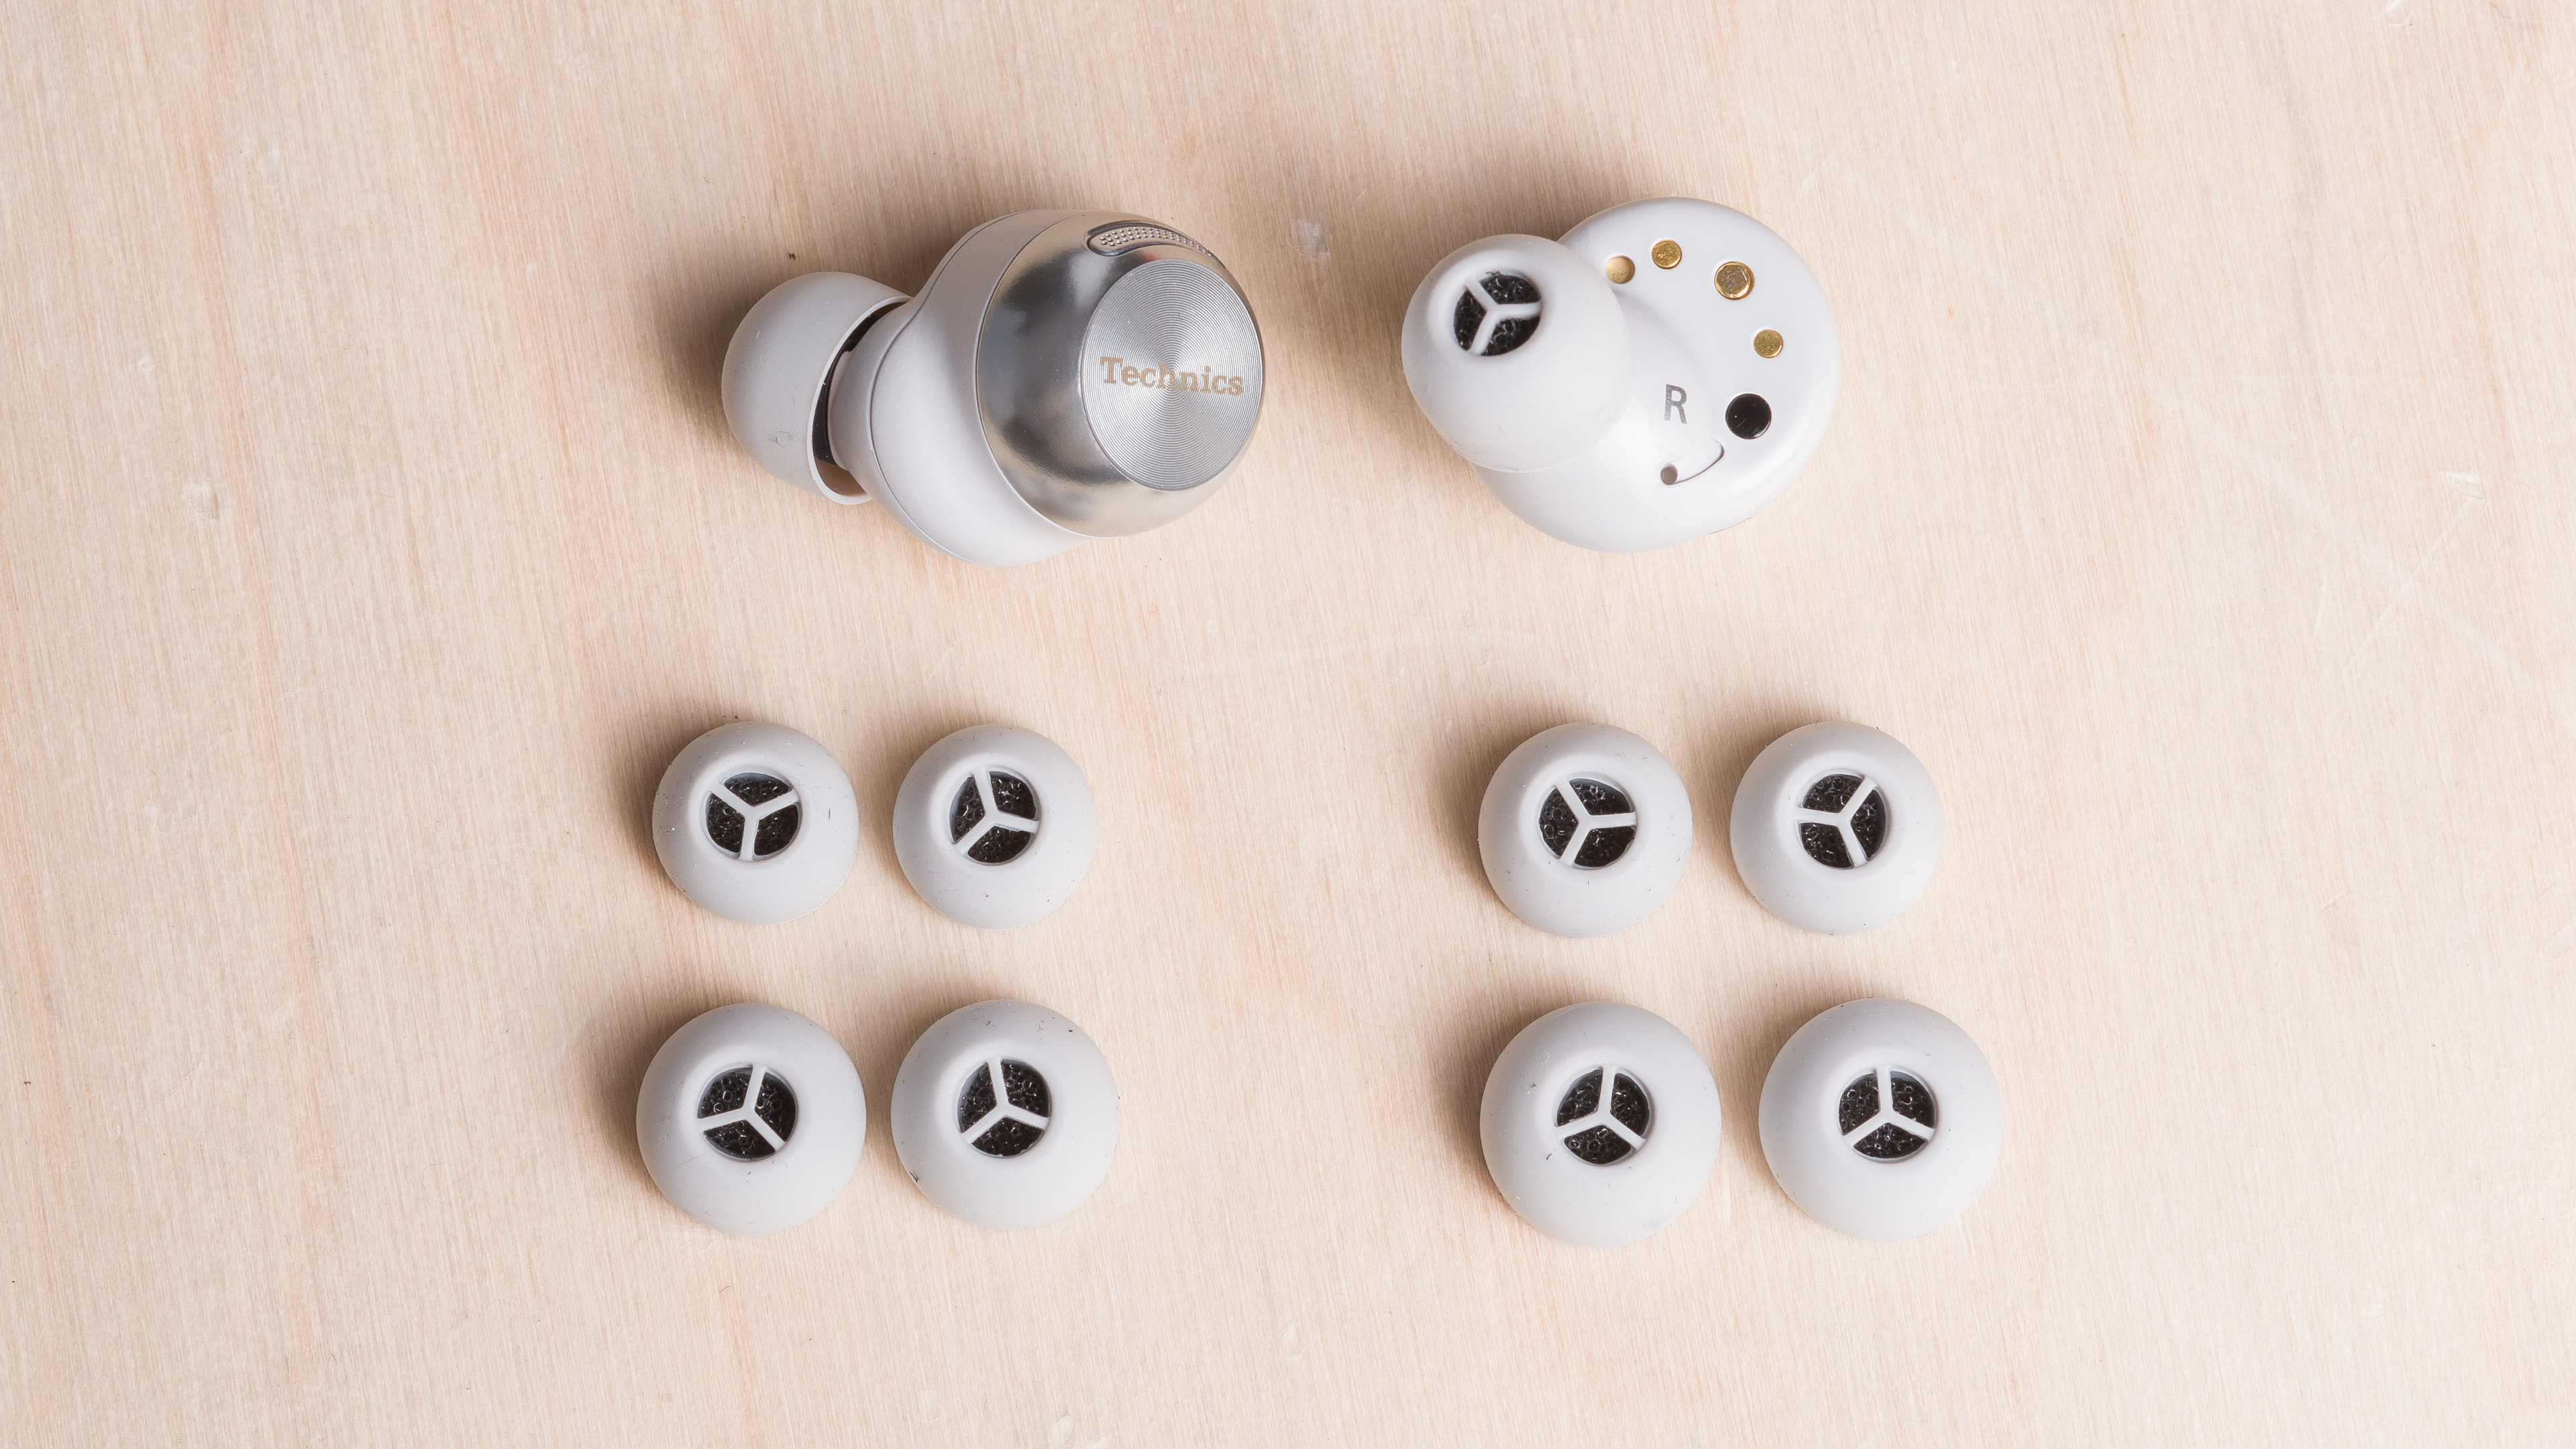
Most earbuds come with silicone ear tips. A bit of gentle dish soap and lukewarm water is sufficient to clean silicone. Remove the ear tips from the buds, and if you have tweezers or a multipurpose cleaning tool meant for cleaning earbuds, you can start by carefully extracting larger pieces of debris. If there aren't any particularly large pieces of debris to manually remove, give the ear tips a dunk in a bit of soapy warm (not hot) water in a bowl that you can fit your hands in, and agitate them around the water to knock loose wax and dust. The soap will break down oils from your skin and most microbes that collect on the silicone's surface. You can also use a wet and soapy cotton swab instead of submerging the silicone ear tips in a bowl of soapy water, but in most cases, that's more labor-intensive without much additional benefit.
If the ear tips have compacted gunk in a crevice, you can grab a cotton swab and give the area a more intentional wipe. You can also carefully use the wire loop tool to remove the stuck-on debris if a cotton swab is too large, but be mindful not to tear the ear tip. Give the ear tips a rinse under a tap to remove the soap, and let them completely air dry on a surface that won't shed fibers or dust, like a fresh lint-free cloth or a table, before putting them back on the earbuds or in the case.
All that said, some manufacturers suggest that you simply throw the ear tips away and replace them, or only recommend cleaning with a dry cloth (which doesn't exactly clean the ear tips). Although if you're replacing the dirty ear tips anyhow, you might as well see if a gentle soap and water damages them first, and if they're strictly silicone, it won't.
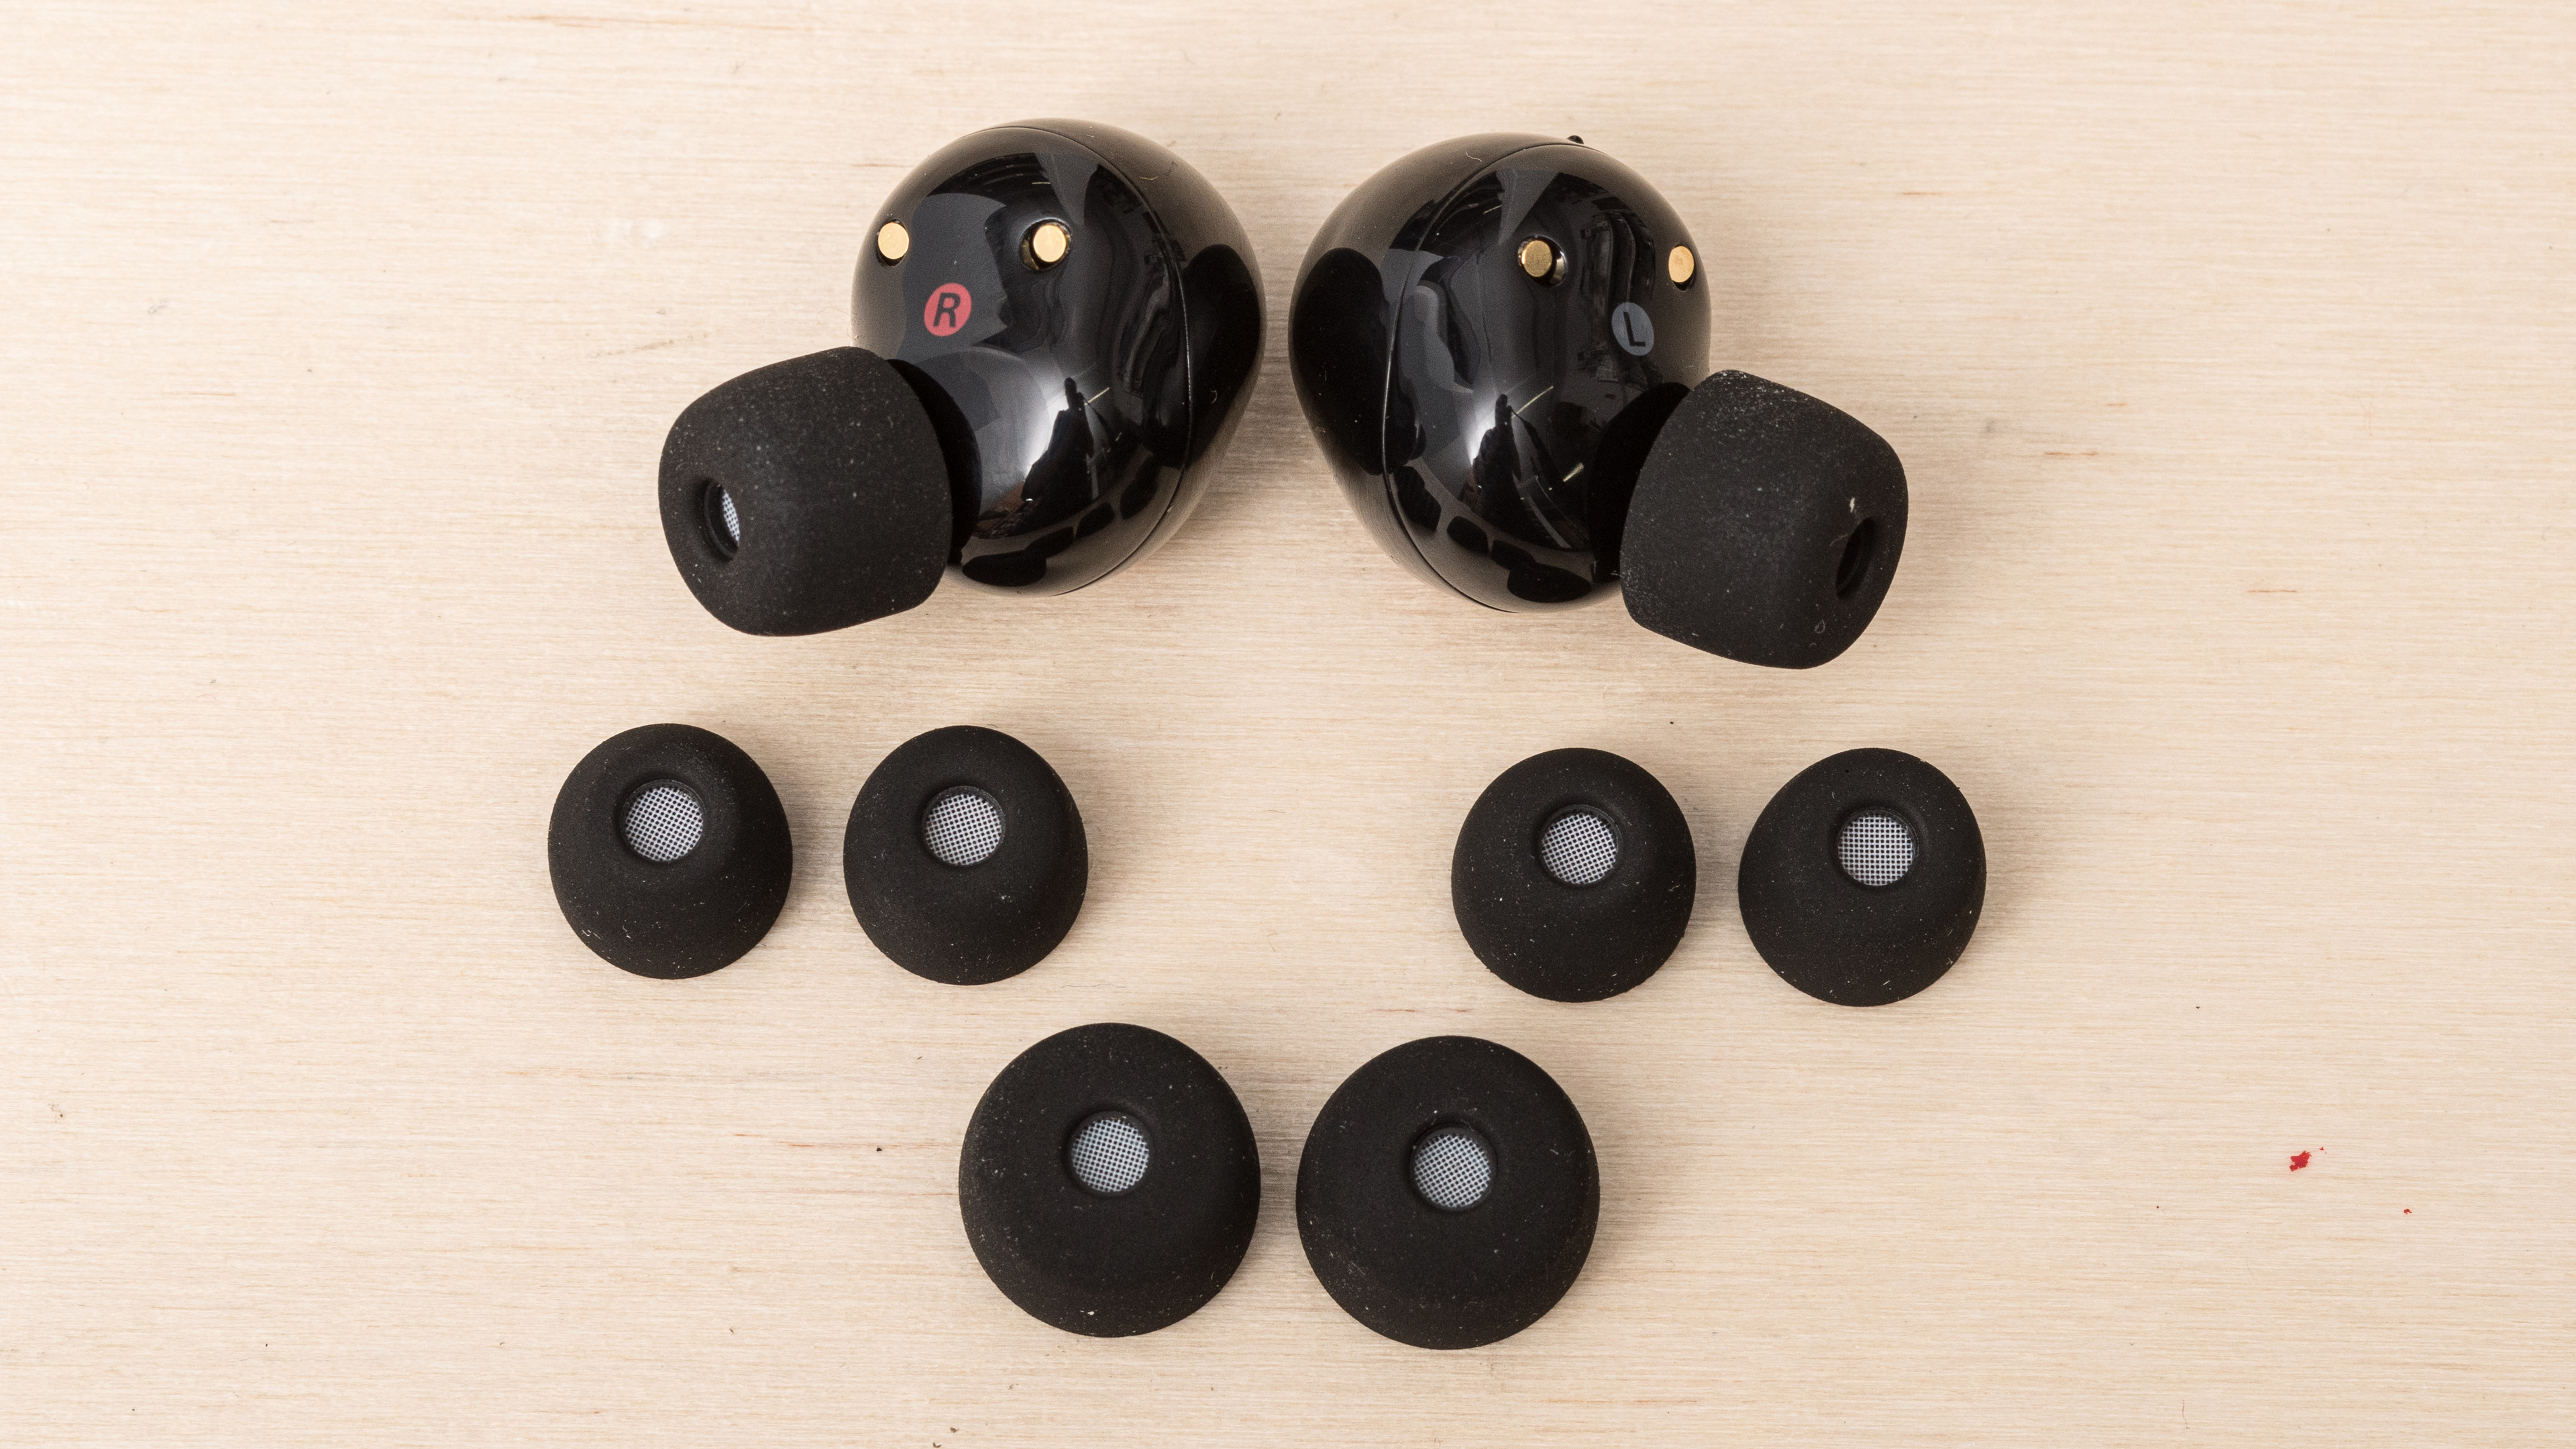
If your earbuds have foam ear tips, begin by manually removing detritus with a soft, dry microfiber cloth to catch small bits of dust on the surface. For more stuck-on grime, very gently use the wire loop cleaning tool or tweezers, but try to avoid anything too sharp. Use cotton swabs that have been lightly dampened with water and manually wipe the ear tips down. Many manufacturers discourage exposure to any chemicals and liquids (and always check if there are directions), because foam is absorbent and chemicals can degrade the material. But if it's dire, you can try dampening a cotton swab with a little soapy water since a wipe down with a dry or damp cloth doesn't address oil or microbes.
Then, leave them out to fully dry before refitting them on the earbuds. A tip: if your earbuds came with a tray to store unused ear tips, pop your cleaned ear tips on the posts to air dry to help ensure they'll still fit on the nozzles of the buds because water can warp the foam.
When Should You Replace Your Ear Tips?
The guideline touted by most manufacturers is to buy new ear tips every three months, but realistically, most people blow past that suggestion without issue. Your replacement timeline depends on how frequently you wear the earbuds, for how long, and whether you work out or live somewhere humid while wearing the buds. If you never clean them, the ear tips break down faster. While a three-month replacement cycle might suit some, consider these as signs that you need new ear tips: they feel stiff, brittle, or the foam is crumbling; they're permanently misshapened or discolored, and they stink. If cleaning the ear tips doesn't resolve these signs (and cleaning can't address crumbling), you need new ones.
Besides hygiene, deteriorating ear tips directly correlate with worse performance. For example, if an ear tip's shape has permanently warped, it can't block your ear canal as well, resulting in worse noise isolation performance. Ear tips, in general, take the brunt of everyday wear and tear, and foam ear tips are particularly susceptible to shorter lifespans due to their absorbent qualities, which is the downside of their malleable and isolating qualities. The porous foam can break down from oil and sweat more quickly than silicone ear tips, which aren't really porous. You can try to prolong their lifespan by cleaning them more often, but it's quite normal to need to replace the ear tips at some point.
Cleaning The Charging Case
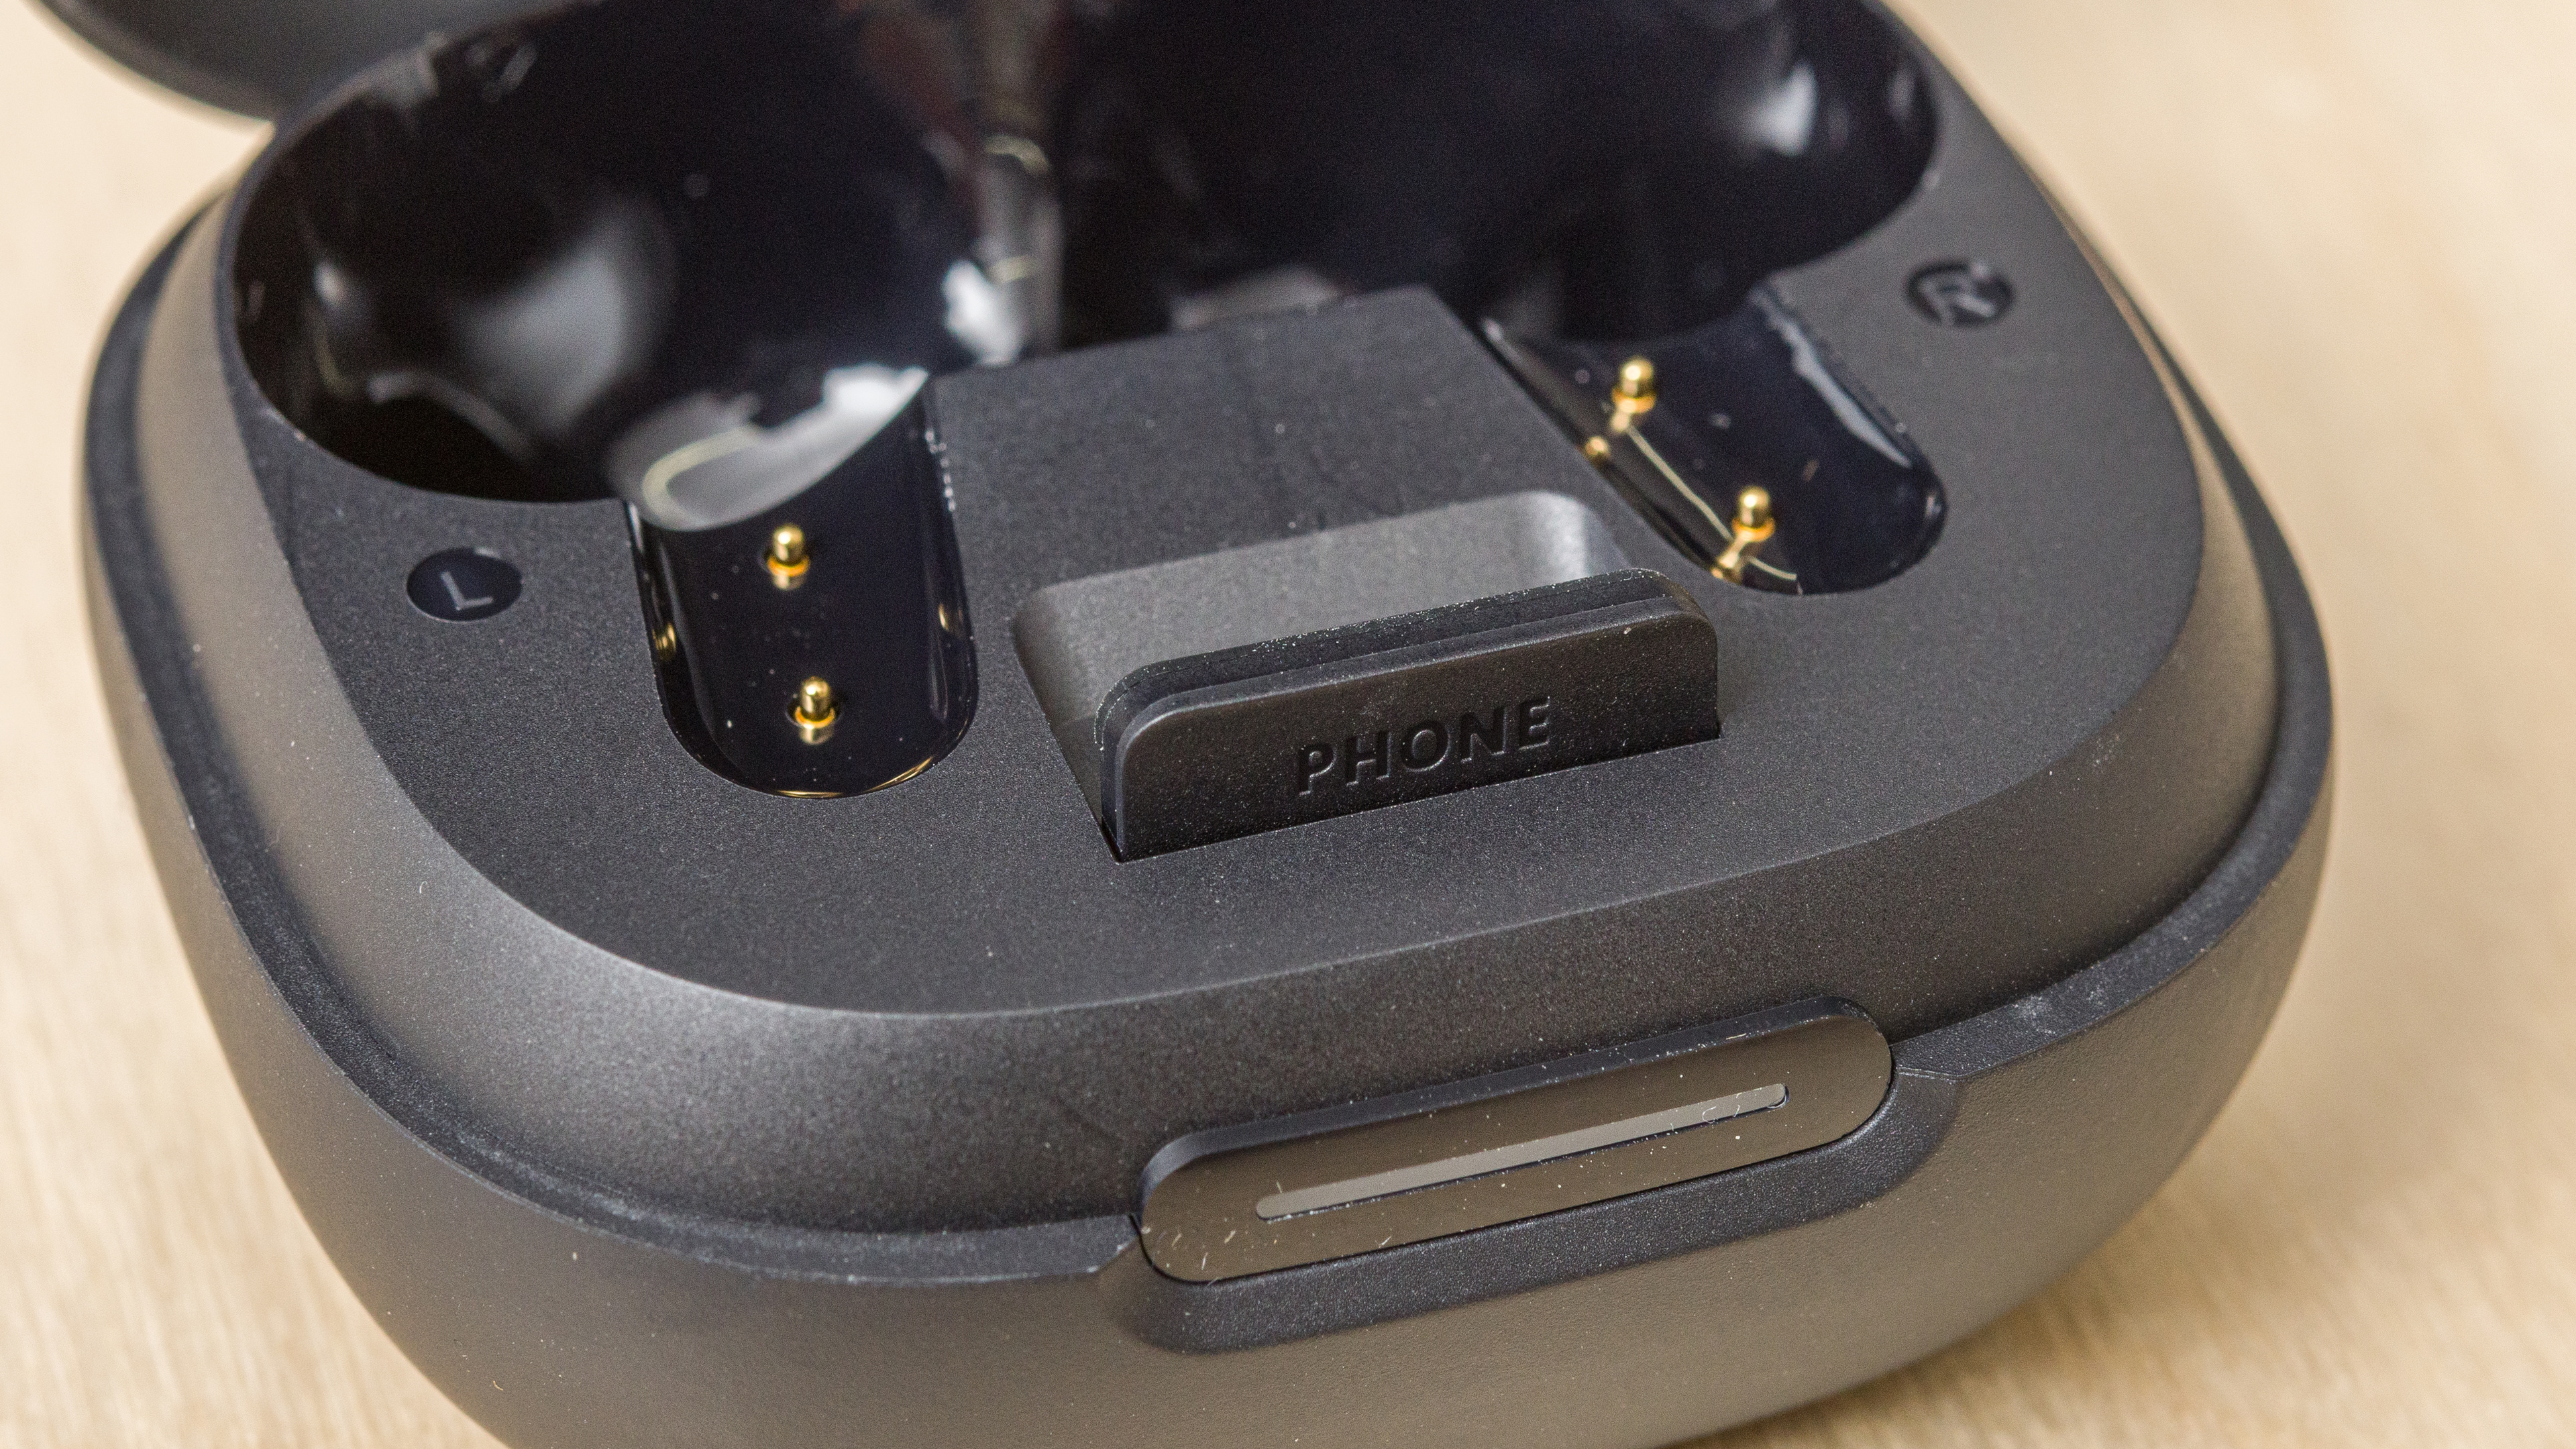
Give the charging case a thorough wipe with a dry microfiber cloth to pick up dust and dirt. Next, check the manufacturer's guidelines (if there are any) and whether the materials will react to alcohol. If it's safe, use an isopropyl alcohol-dampened microfiber cloth or a pre-moistened alcohol wipe to disinfect the case; a damp lint-free cloth is better than an alcohol wipe because it doesn't need to be particularly wet. You can touch the battery contacts with the isopropyl alcohol without causing corrosion. Tackle hard-to-reach places with a cotton swab dipped in rubbing alcohol. If you can't use alcohol, stick to a dry cloth and dry swab for the interior of the case.
In general, try not to put anything in the charging port because if the battery charges, you've no reason to interfere. However, sometimes debris gets in there and causes problems, like intermittent charging. With a small cleaning brush, you can lightly clear out lint and dust around the USB charging port. If you don't have a small enough brush, you can use a blunted toothpick to extract lint carefully, but this is far from our first recommendation. Stick to the outer edges rather than pushing against the USB jack. Air on the side of conservatism here because a little bit of dust is fine, but being too aggressive can lead to inadvertently damaging the port.
You can also use compressed air on the USB port, but only if you're out of options and the lint is very compacted. If you choose to use compressed air, don't hold the case in your hand because the cold air can injure you. Instead, find a way to hold it still hands-free, such as a vice wrapped in cloths. Aim the air stream at the port but slightly off-axis, so that the dust comes out the side, and with several inches of distance. Keep it brief because compressed air is a last resort for when problems arise, such as your case isn't charging when you plug it in, and the brush didn't help.
Cleaning IEM Cables
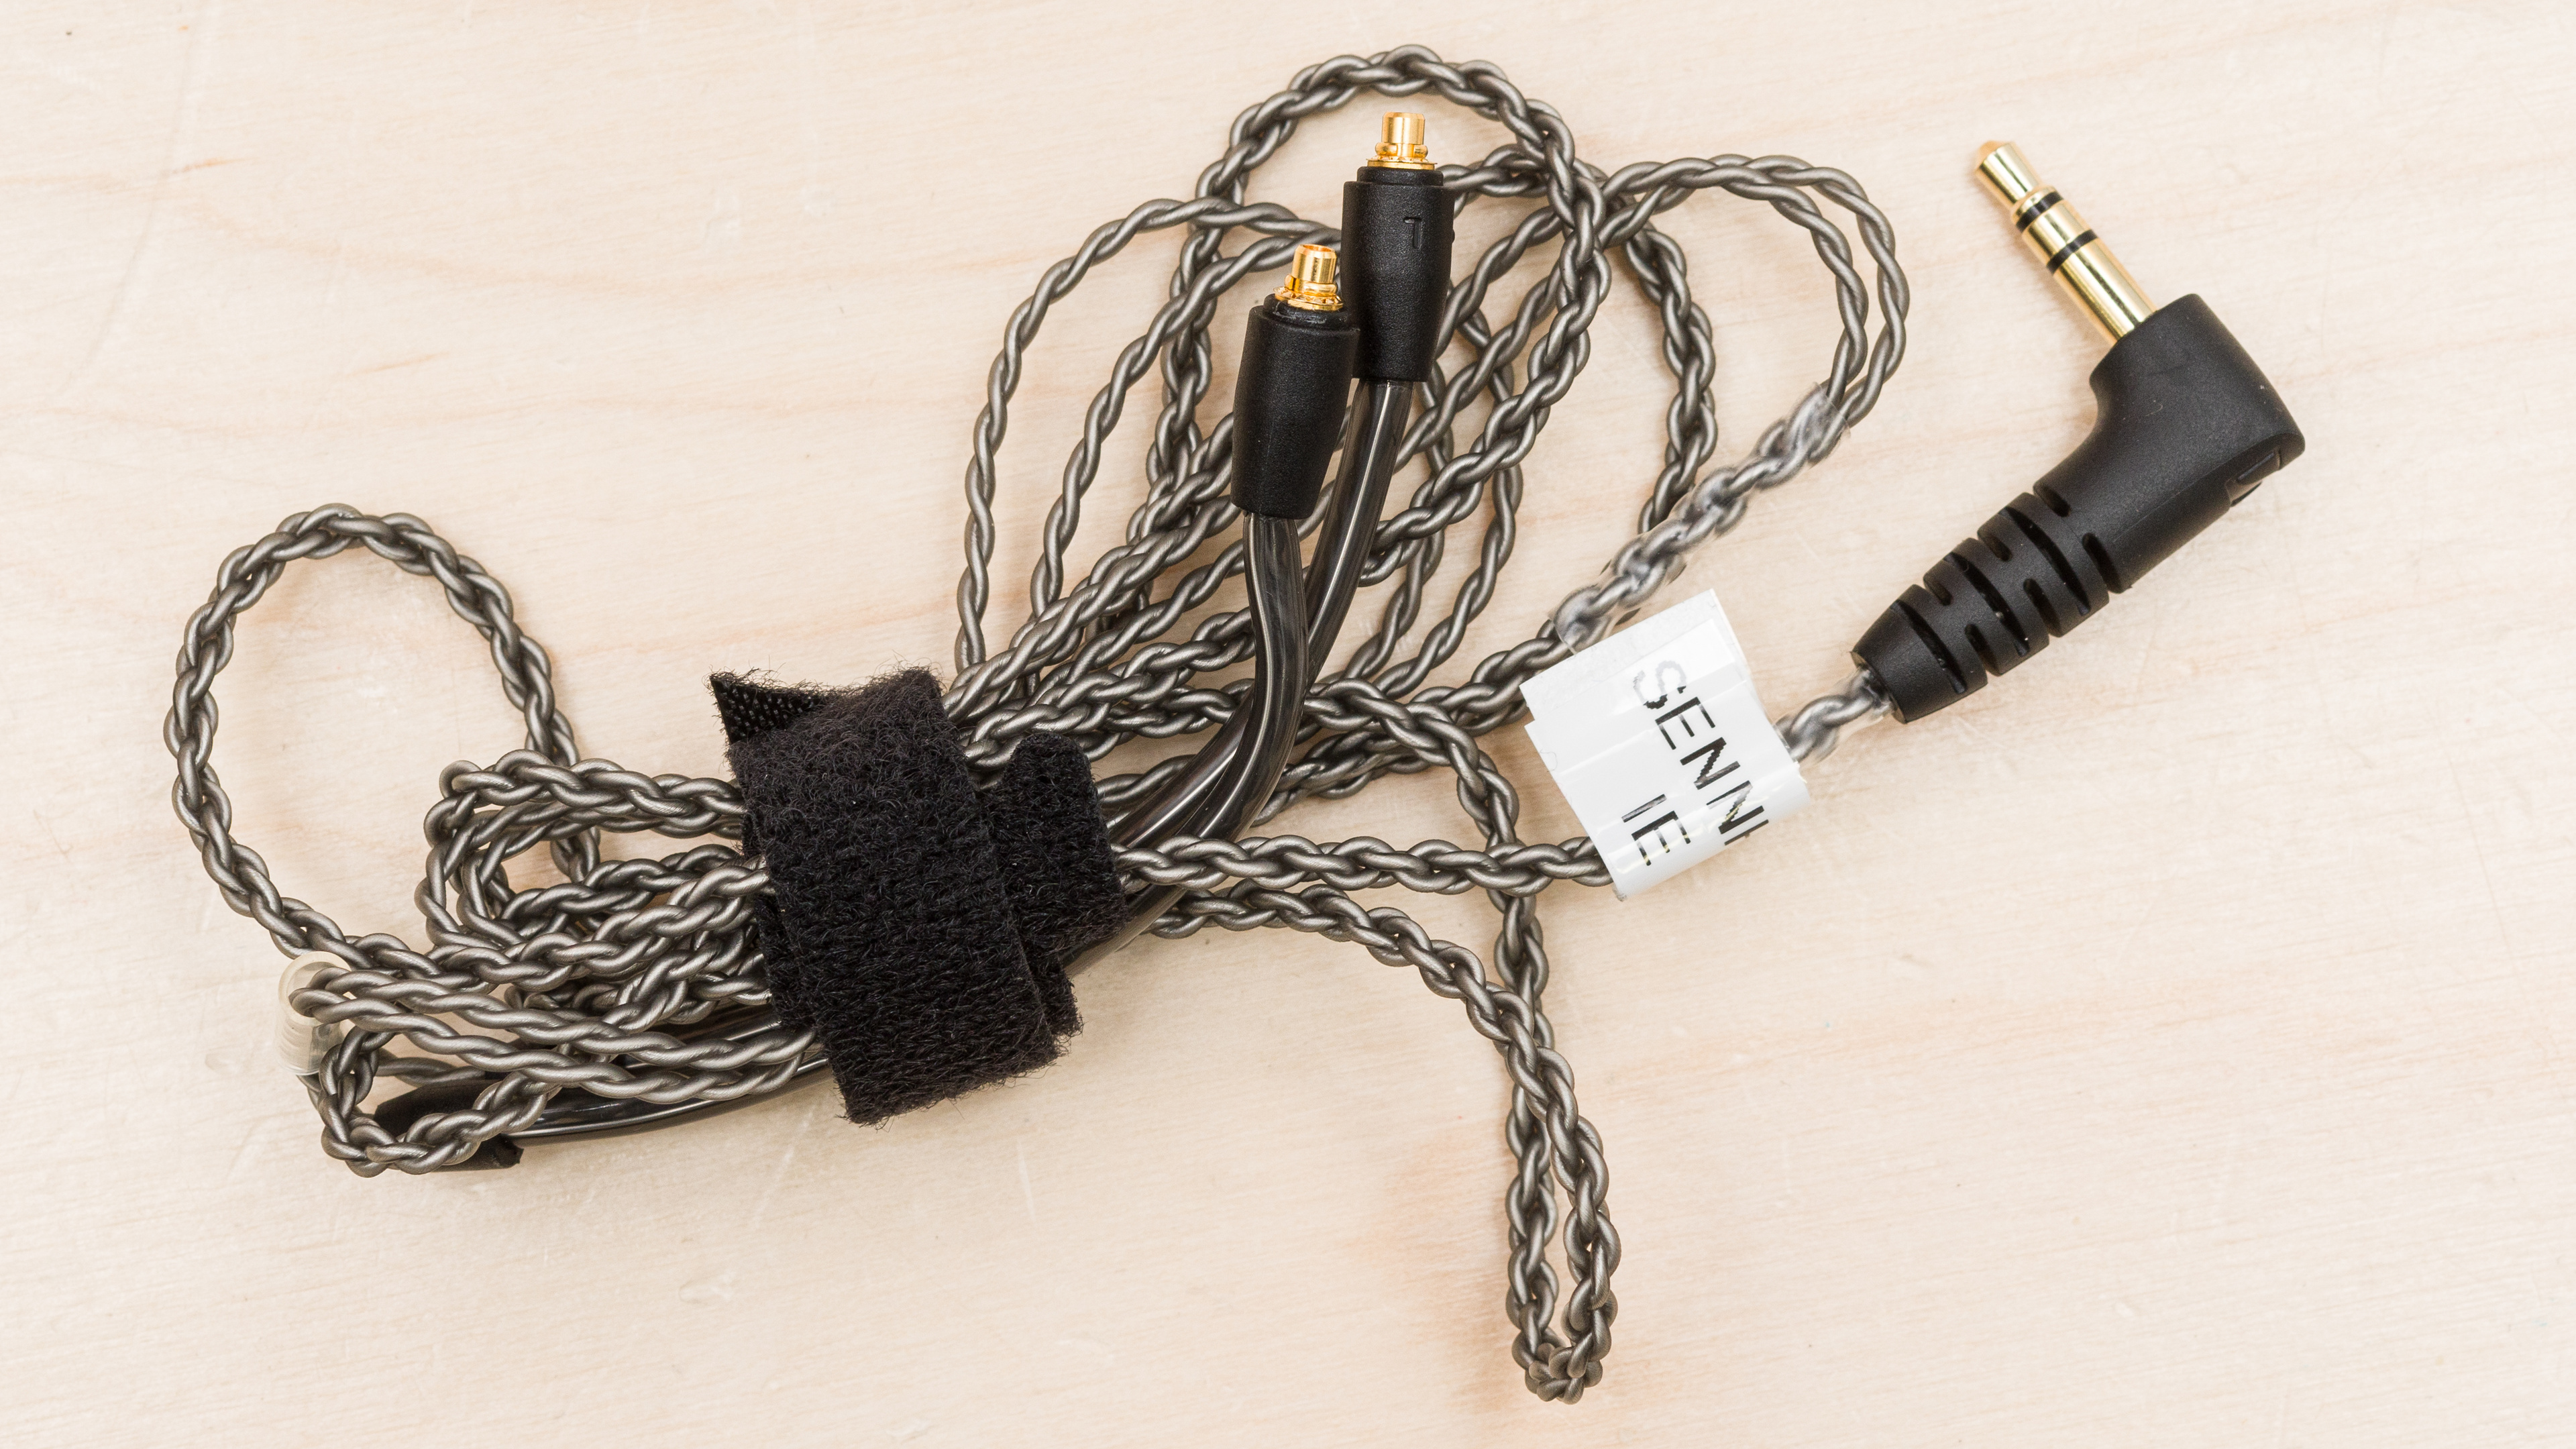
To clean your IEMs, similar rules apply as with the earbuds and ear tips. Wrap a lint-free microfiber cloth around the cable and gently run it over the whole cable. You don't need to do this vigorously, as that unnecessarily risks stressing the internal wiring. Most of the time, a quick wipe with a dry cloth addresses what you need. But, if you want to give attention to cleaning where the cables make contact with your ears, check the cable casing's material. Then, either use the isopropyl alcohol or a slightly soapy solution on a moistened cloth to wipe the cable. If you use water, avoid getting any metal component, such as MMCX connectors or the jack, wet. Pat excess moisture and only use once completely dry.
General Tips For Cleaning Your Earbuds
- Don't directly apply isopropyl alcohol (or water) to your earbuds; instead, moisten a cloth or swab.
- Check and defer to the manufacturer's recommendations.
- If there's resistance, stop. Cleaning shouldn't require you to exert much force.
- Avoid getting water on any metal components to mitigate corrosion or shorting batteries.
- Wait until every part is dry before putting the earbuds in their charging case.
Conclusion
Cleaning your earbuds is important for personal hygiene, and it's part of making sure that they continue to function correctly. You can overdo it if you do it too frequently and too thoroughly because there's a risk each time of damaging them around delicate parts like grilles. Finding a balanced schedule of how often you clean them will make removing gunk before it has compacted easier to maintain and minimize applying too much force when you clean the buds. Otherwise, check the manufacturer's suggestions in case of specialty materials.