Products
Tested using Methodology v0.16
Updated Sep 23, 2026 02:08 PM
SEE PRICE
Amazon
Tested using Methodology v0.16
Updated Sep 30, 2026 06:32 PM
SEE PRICE
Nike.com


Heel Stack Height
39.8 mm
Weight
200.7 g (7.08 oz)
Heel-To-Toe Drop
6.4 mm
Plate
Carbon Fiber
Heel Stack Height
43.8 mm
Weight
280.7 g (9.90 oz)
Heel-To-Toe Drop
9.4 mm
Plate
None
Our Verdict
Nike Alphafly 3
Nike Vomero Plus
The Nike Alphafly 3 is a significantly better racing shoe than the Nike Vomero Plus. It's significantly lighter with better energy return and moves you through stride much quicker. However, if you're just looking for a more cushioned shoe to handle weekly miles, the Vomero Plus is the better option.
Variants
- Alphafly 3 (Black/Olive Aura/Metallic Silver - (Men - US 9))
- Alphafly 3 (Bright Crimson/Lime Blast/Mint Foam/Cave Purple - (Men - US 9))
- Vomero Plus (Black/Cool Grey/Metallic Dark Grey/White - (Men - US 9))
- Vomero Plus (Black/Cool Grey/Metallic Dark Grey/White - (Women - US 7))
Main Differences for
Half/Full Marathon Racing
Half/Full Marathon Racing
Threshold
Half/Full Marathon Racing
8.2
7.1
Weight
8.1
5.2
Full Comparison
Design
Weight
8.1
5.2
Right Shoe Weight Photo
Compare High-Res

Compare High-Res

Left Shoe Weight Photo
Compare High-Res

Compare High-Res

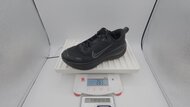
Weight
200.7 g (7.08 oz)
280.7 g (9.90 oz)
Stack Heights
Stack Height Photo
Compare High-Res

Compare High-Res

Heel Stack Height
39.8 mm
43.8 mm
Forefoot Stack Height
33.4 mm
34.4 mm
Heel-To-Toe Drop
6.4 mm
9.4 mm
Advertised Heel-To-Toe Drop
8.0 mm
10.0 mm
External Shape
3D Model Full Shoe
Preview 3D

Preview 3D

Outsole Heel Width
91 mm (3.6")
99 mm (3.9")
Outsole Arch Width
68 mm (2.7")
75 mm (3.0")
Outsole Forefoot Width
116 mm (4.6")
115 mm (4.5")
Heel Width-To-Stack Ratio
2.29
2.26
Forefoot Width-To-Stack Ratio
3.47
3.34
Internal Shape
3D Model Internal
Preview 3D

Preview 3D

Internal Length
273 mm (10.7")
278 mm (10.9")
Internal Heel Width
59 mm (2.3")
64 mm (2.5")
Internal Forefoot Width
90 mm (3.5")
91 mm (3.6")
Wide Sizing Available
No
Yes
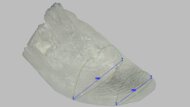
Forefoot Fit: Width
9.4
9.6
Forefoot Width Photo
Compare High-Res
Compare High-Res

Ball-Of-Foot TTS Deviation
-0.8 mm (-0.032")
2.3 mm (0.091")
Toe TTS Deviation
-2.2 mm (-0.087")
2.3 mm (0.091")
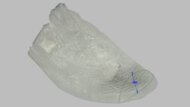
Forefoot Fit: Height
9.7
10
Forefoot Height Photo
Compare High-Res
Compare High-Res

Toe TTS Deviation
-0.8 mm (-0.030")
0.2 mm (0.007")
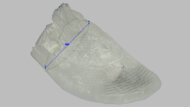
Arch Fit: Width
6.2
5.8
Arch Fit Photo
Compare High-Res
Compare High-Res

Arch Width TTS Deviation
-5.6 mm (-0.219")
-6.0 mm (-0.236")
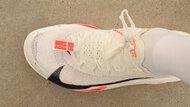
Length Fit
10
10
Toe Clearance Photo
Compare High-Res
Compare High-Res

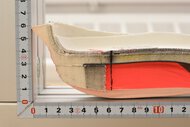
Heel Rocker Geometry
6.6
8.4
Heel Rocker Photo
Compare High-Res
Compare High-Res

Heel Spring
16 mm (0.6")
33 mm (1.3")
Heel Apex Position
15.3%
28.1%
Heel Rocker Angle
21.3°
21.2°
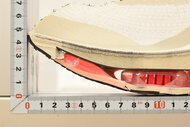
Forefoot Rocker Geometry
6.7
6.5
Forefoot Rocker Photo
Compare High-Res
Compare High-Res

Toe Spring
45 mm (1.8")
45 mm (1.8")
Toe Apex Position
66.4%
61.3%
Forefoot Rocker Angle
26.6°
21.0°
Foam
Primary Foam Picture
Compare High-Res

Compare High-Res

Secondary Foam Picture
Compare High-Res

Compare High-Res
Primary Foam Name
ZoomX
ZoomX
Primary Foam Type
PEBA
Unknown
Secondary Foam Name
No Secondary Foam
No Secondary Foam
Secondary Foam Type
No Secondary Foam
No Secondary Foam
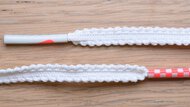
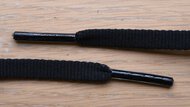
Laces
Laces Picture
Compare High-Res
Compare High-Res
Lace Type
Sawtooth
Flat
Width
6.0 mm (0.2")
5.0 mm (0.2")
Thickness
1.2 mm (0.0")
1.9 mm (0.1")
Stretch
10.5%
10.5%
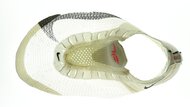
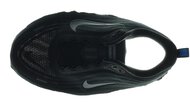
Breathability
7.5
6.0
Breathability Video
Upper Breathability
Compare High-Res
Compare High-Res
Upper Microscope Photo
Compare High-Res

Compare High-Res

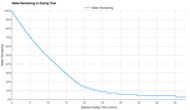
Time-To-Dry
8.1
2.5
Time-To-Dry Timelapse
Time-To-Dry Graph
Preview Graph
Preview Graph
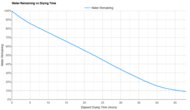
Time To 30% Dry
5.1 hrs
12.7 hrs
Time To 70% Dry
14.9 hrs
32.2 hrs
Time To Dry
24.3 hrs
46.0 hrs
Water Absorption
8.4
4.9
Dry Weight Photo
Compare High-Res
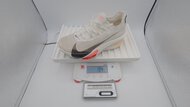
Compare High-Res
Wet Weight Photo
Compare High-Res
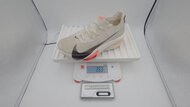
Compare High-Res
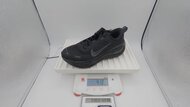
Water Absorbed
35.6%
57.7%
Other Features
Other Features Photo
Compare High-Res

Compare High-Res

Tongue Gusset Type
Non-gusseted
Non-gusseted
Plate
Carbon Fiber
None
Performance
Heel Compression Energy Return
8.2
7.7
Heel Compression Video
Heel Energy Return
Preview Graph
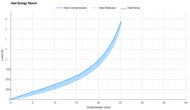
Preview Graph
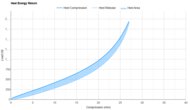
Heel Energy Return
82.0%
79.4%
Forefoot Compression Energy Return
8.2
7.8
Forefoot Compression Video
Forefoot Energy Return
Preview Graph
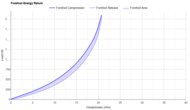
Preview Graph
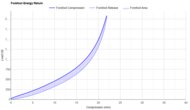
Forefoot Energy Return
82.2%
79.5%
Heel Cushioning
7.6
8.4
Heel Cushioning Picture
Compare High-Res

Compare High-Res

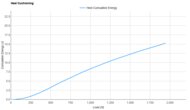
Heel Cushioning
Preview Graph
Preview Graph
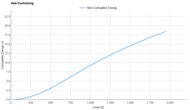
Energy Absorbed At 550N
3.82 J
3.64 J
Energy Absorbed At 1100N
9.18 J
10.40 J
Energy Absorbed At 1900N
14.96 J
18.04 J
Forefoot Cushioning
8.0
8.6
Forefoot Cushioning Picture
Compare High-Res

Compare High-Res

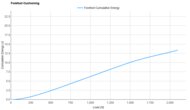
Forefoot Cushioning
Preview Graph
Preview Graph
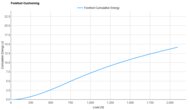
Energy Absorbed At 800N
4.68 J
5.41 J
Energy Absorbed At 1300N
8.55 J
9.50 J
Energy Absorbed At 2050N
13.10 J
13.92 J
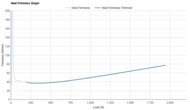
Heel Firmness
7.4
7.3
Heel Firmness Graph
Preview Graph
Preview Graph
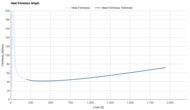
Firmness At 550N
38.8 N/mm
42.4 N/mm
Firmness At 1100N
52.3 N/mm
51.2 N/mm
Firmness At 1900N
75.9 N/mm
70.9 N/mm
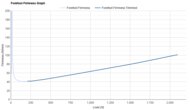
Forefoot Firmness
7.9
7.0
Forefoot Firmness Graph
Preview Graph
Preview Graph
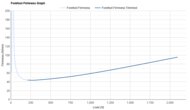
Firmness At 800N
57.0 N/mm
53.1 N/mm
Firmness At 1300N
73.1 N/mm
68.1 N/mm
Firmness At 2050N
99 N/mm
94 N/mm
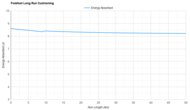
Forefoot Long Run Cushioning
7.8
7.1
Forefoot Long Run Cushioning
Preview Graph
Preview Graph

Energy Absorbed At 10km
8.41 J
7.70 J
Energy Absorbed At 20km
8.33 J
7.54 J
Energy Absorbed At 30km
8.27 J
7.43 J
Energy Absorbed At 40km
8.24 J
7.37 J
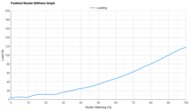
Rocker Stiffness
7.9
6.3
Forefoot Rocker Stiffness Video
Forefoot Rocker Stiffness Graph
Preview Graph
Preview Graph

Force To Flatten The Rocker
117 N
67 N
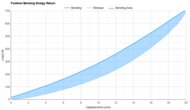
Forefoot Bending Energy Return
8.0
7.1
Forefoot Bending Video
Forefoot Bending Energy Return
Preview Graph
Preview Graph

Forefoot Bending Energy Return
71.3%
65.7%
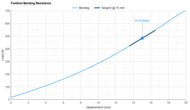
Forefoot Bending Stiffness
9.5
7.4
Forefoot Bending Resistance Picture
Compare High-Res

Compare High-Res

Forefoot Bending Resistance
Preview Graph
Preview Graph

Forefoot Bending Stiffness
41.6 N/mm
12.8 N/mm
Forefoot Bending Force
484 N
314 N
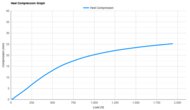
Heel Compression Depth
6.3
6.3
Heel Compression Graph
Preview Graph
Preview Graph
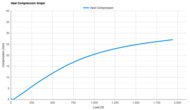
Heel Compression At 550N
14.2 mm
13.0 mm
Heel Compression At 1100N
21.0 mm
21.5 mm
Heel Compression At 1900N
25.0 mm
26.8 mm
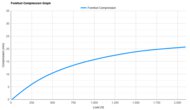
Forefoot Compression Depth
6.1
6.5
Forefoot Compression Graph
Preview Graph
Preview Graph
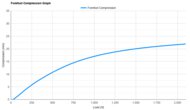
Forefoot Compression At 800N
14.0 mm
15.1 mm
Forefoot Compression At 1300N
17.8 mm
19.1 mm
Forefoot Compression At 2050N
20.6 mm
21.8 mm
Nike Alphafly 3
Nike Vomero Plus
Comments
Nike Alphafly 3 vs Nike Vomero Plus: Main Discussion
What do you think of these products? Let us know below.
Looking for a personalized buying advice from the RTINGS.com experts? Members have direct access to buying advice on our member forum.