We used the following calibration settings to review the 65-inch Hisense QD6QF (65QD6QF), and we expect them to be valid for the 43-inch (43QD6QF), 50-inch (50QD6QF), 55-inch (55QD6QF), 75-inch (75QD6QF) and 85-inch (85QD6QF) models as well. The 100-inch (100QD7QF) model performs differently, so these settings aren't valid for it.
These settings are meant to provide a starting point; they're not meant to be copied 1:1. They provide the most accurate image overall, but you should adjust them to match your preferences and viewing conditions.
SDR Picture Settings
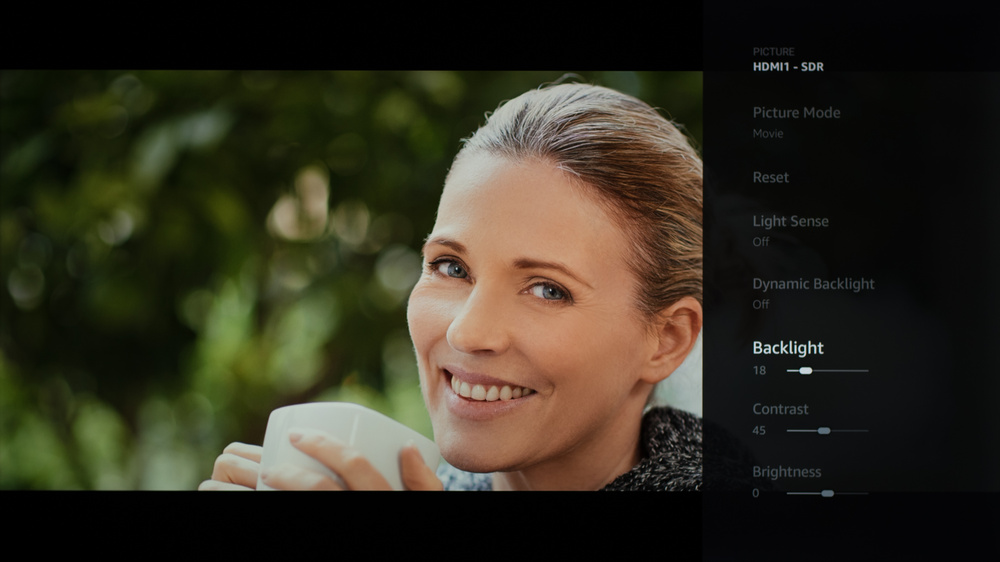
For SDR content, you can choose a few different preset picture modes. We used the 'Movie' Picture Mode because it's the most accurate out of the box and allows for the most customization. Below are the settings we used for SDR. All other settings were either disabled or left off.
- Picture Mode: Movie
- Color Temperature: Warm 1
- Contrast: 50
- Gamma: 0
- Color Space: Auto
HDR10, HDR10+, and Dolby Vision

HDR is automatically enabled for native apps. Once you start playing HDR content, some of the settings change automatically. Below are the settings we used for HDR10. All other settings were either disabled or left off.
- HDR Picture Mode: Movie
- Backlight: 100
- Contrast: 50
- Color Temperature: Warm 1
The TV supports Dolby Vision and HDR10+ from native apps and external devices. As with normal HDR content, when you start playing Dolby Vision or HDR10+ content, some settings change automatically. Since we don't specifically test Dolby Vision or HDR10+, we don't have exact settings for them, but they should be the same as our HDR10 settings.
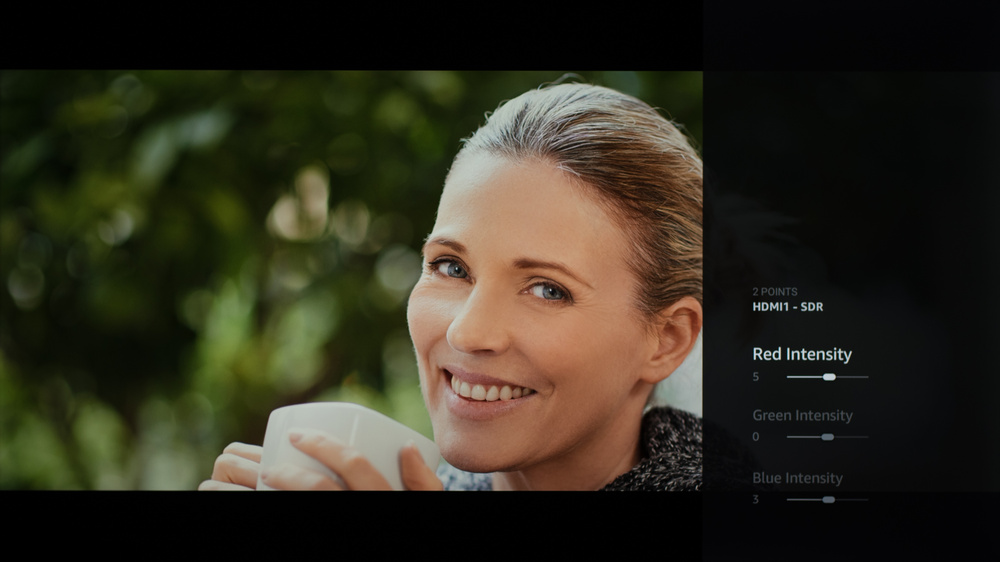
HDR White Point
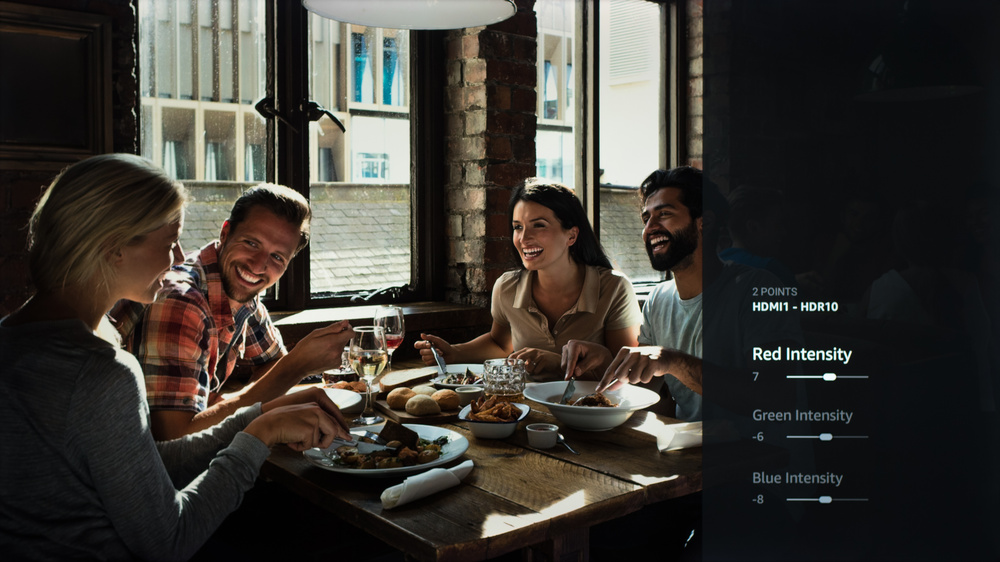
The following are the results of calibrating the white balance of our unit to 6500K in HDR using the 2-point method. We don't publish the values we used for our new 20-point calibration.
They are provided for reference and shouldn't be copied as the calibration values vary per individual unit, even for the same model and size as the TV we reviewed, due to manufacturing tolerances. If you want to try them, you'll need to enter all values shown, as all of them are active at the same time. If you have worse picture quality, simply reset them to the default values.
Gaming Settings
From the base SDR and HDR settings, very few changes are required for the best gaming experience. When you start gaming, it's best to switch to Game Mode to get the lowest input lag. The rest of our gaming settings are identical to our regular settings for SDR or HDR. For chroma 4:4:4, you must have Input 4:4:4 Color set to 'On.'
Upscaling: Sharpness Processing
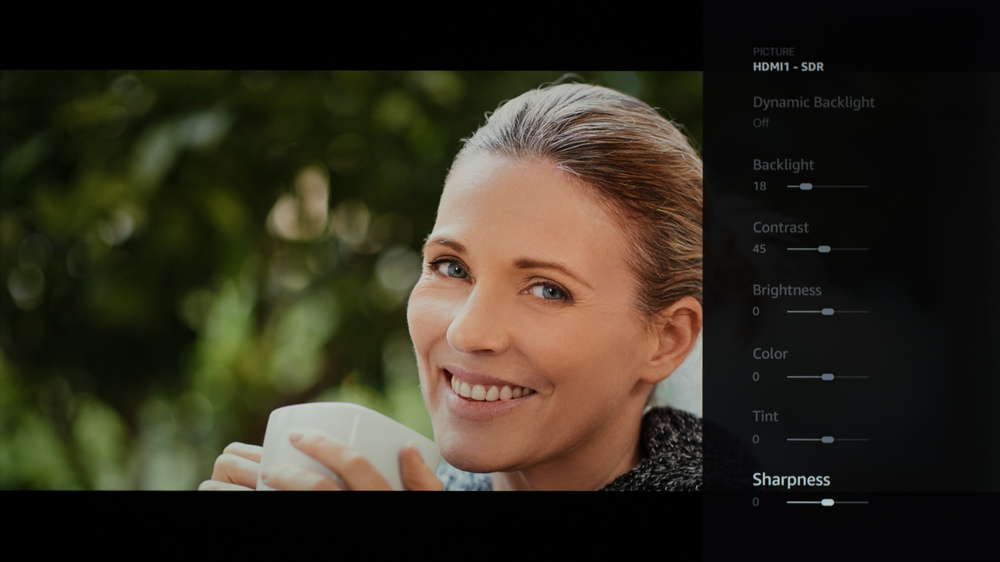
For our 480p upscaling test, we set Sharpness to '0,' with Super Resolution set to 'On.' Sharpness processing was calibrated with no over-sharpening for low-resolution content.
Judder
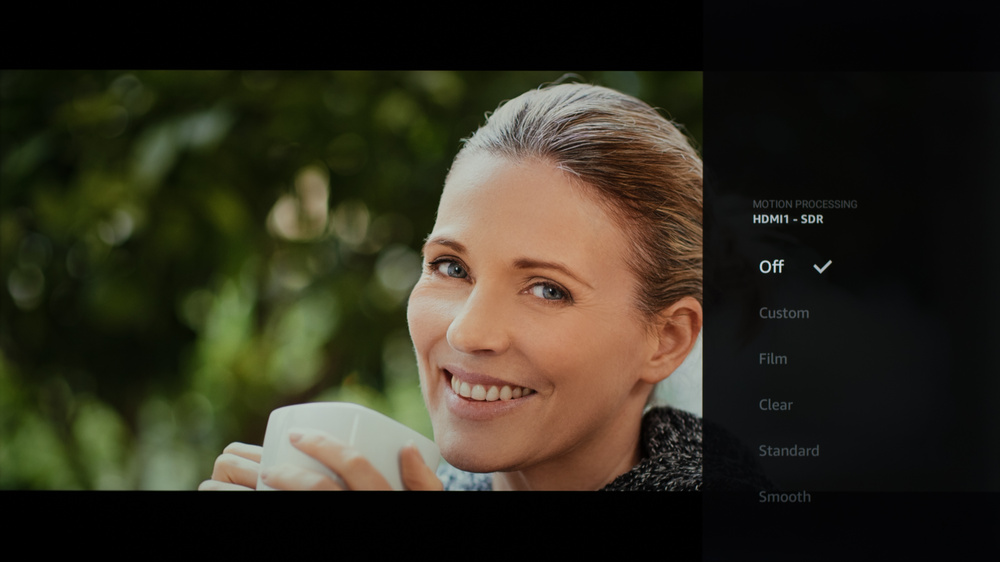
This TV can remove judder from external sources only, but you have to set Motion Processing to 'Film' for it to work. It can't remove judder from the native apps.
Stutter Reduction Via Interpolation
Setting De-judder to '3' outputs a framerate equivalent to 30fps, which helps to reduce stutter in 24fps content.
Storage Space & Firmware
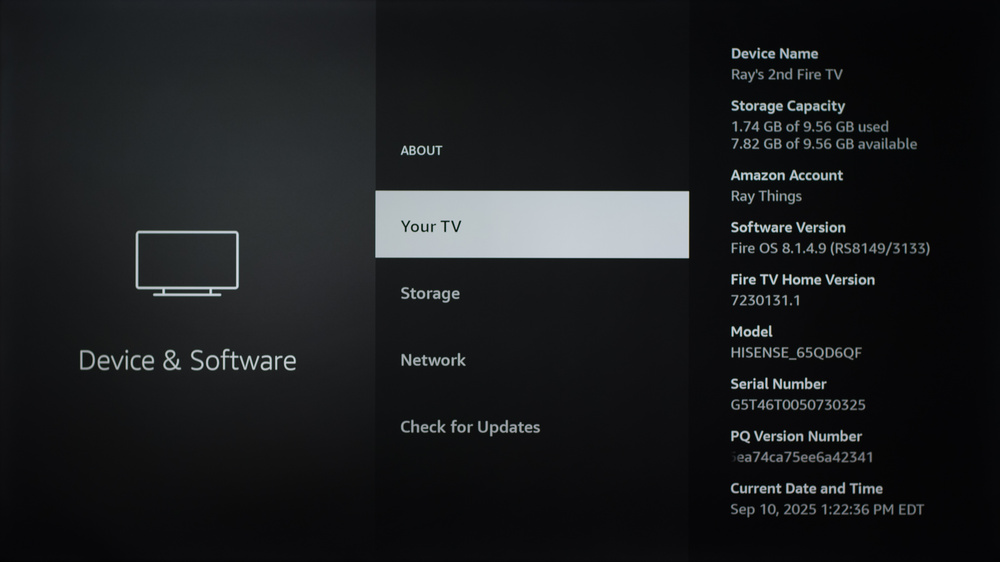
This TV has about 7.82GB of accessible internal storage with the included apps installed. These settings are valid for the unit we bought and tested, and it was calibrated on Fire OS 8.1.4.9 (RS8149/3133).
Other Settings
For information on any other settings or features that fall outside of the scope of our testing, please refer to the product's support page.
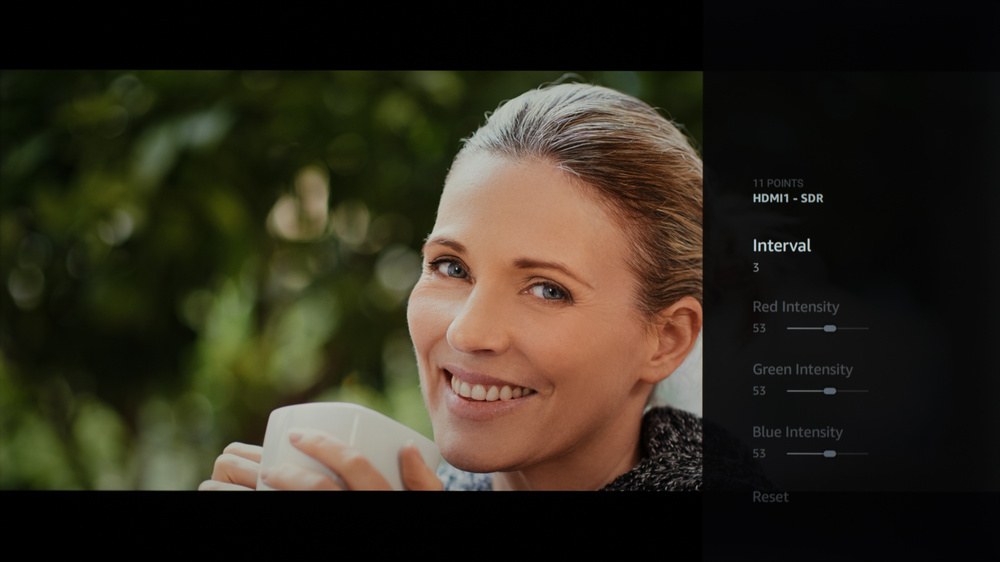
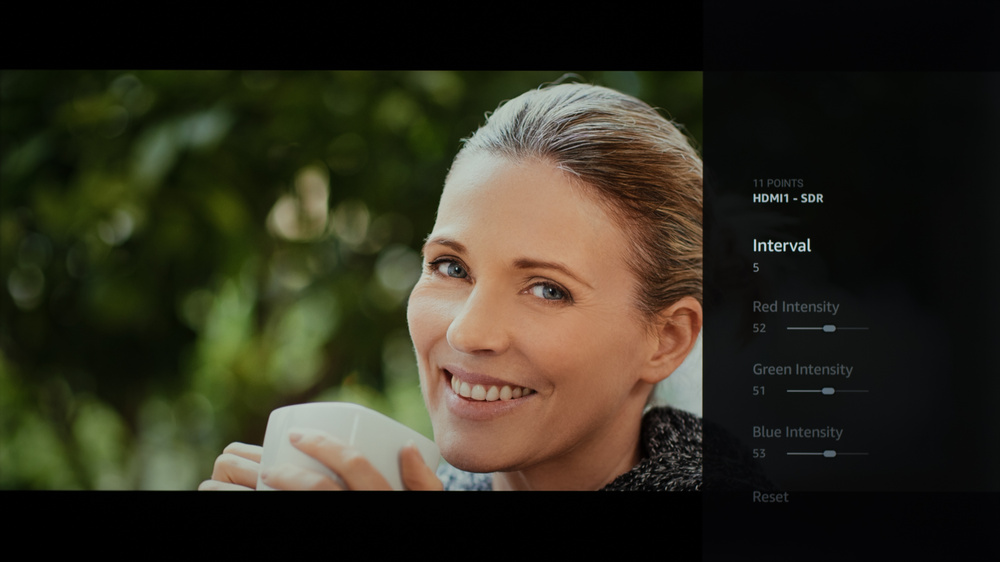
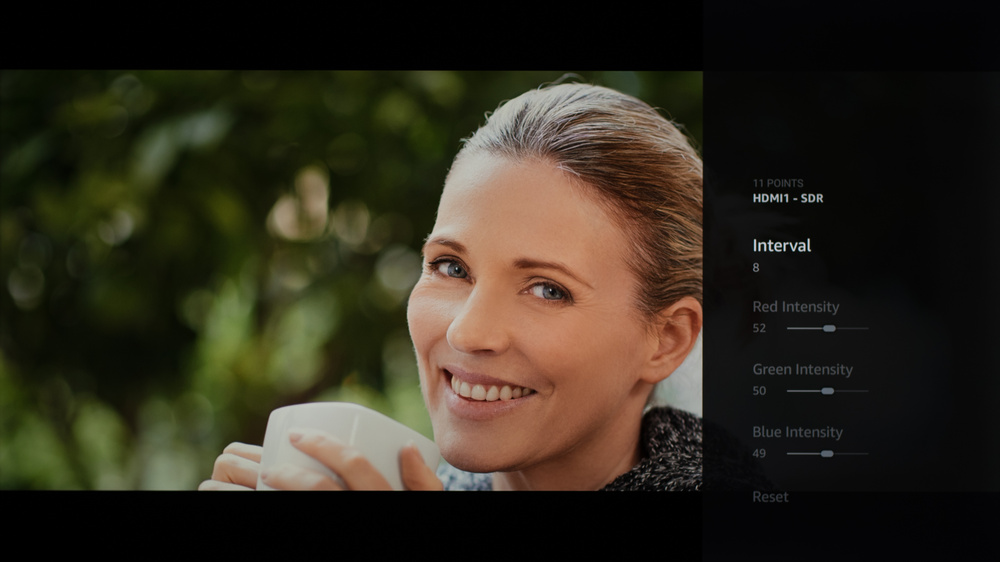
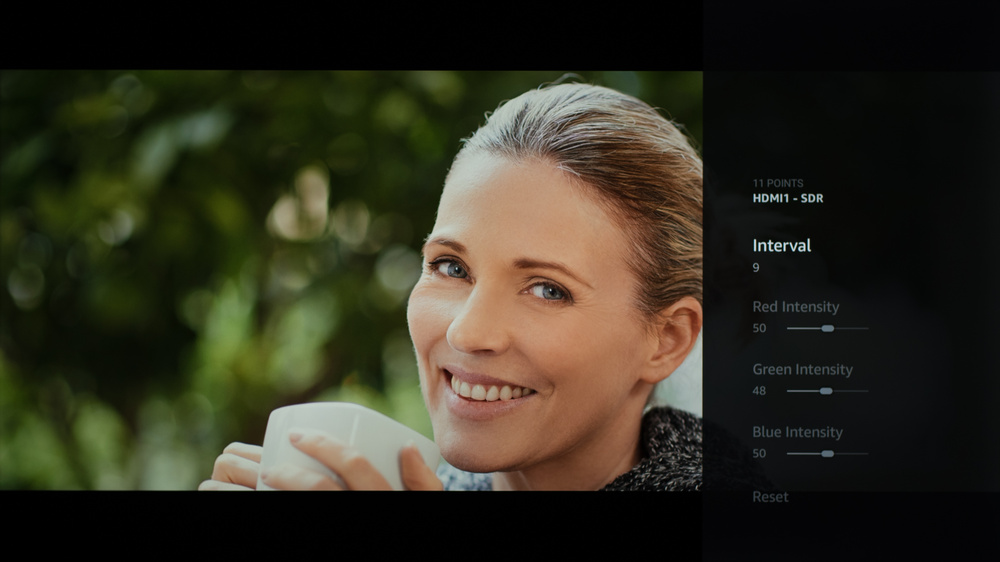
White Balance Settings
The following are the results of the white balance and colorspace calibration on our unit. They are provided for reference, and should not be copied as the calibration values vary per individual unit, even for the same model and size as the TV we reviewed, due to manufacturing tolerances. If you want to try them, you will need to enter all values shown, as all of them are active at the same time. If you end up with worse picture quality, simply reset them to the default values.