We've tested these running shoes to expand our database and allow users to compare results to help with their buying decisions. We don't expect to write a full review, but if you have any questions about this product, please let us know.
Our Verdict
Performance Usages
Popular Running Shoe Comparisons
The adidas Adizero Takumi Sen 11 and the Nike Streakfly 2 are both built for shorter races and fast sessions, but they take different paths. The Takumi Sen 11 carries a bit more weight and sits on a higher stack, offering a touch more cushioning. Its EnergyRods add some stiffness, and in terms of raw midsole energy return, it actually has an edge. The Streakfly 2, however, is in a class of its own when it comes to efficiency at short distances. Its ultra-light build, firm forefoot, and full-length carbon plate make it incredibly snappy and efficient at higher paces, feeling closer to a track spike for the road. If you want a little more substance and protection, the adidas may suit you better, but for pure speed and efficiency over 5K to 10K, the Nike is unmatched.
The adidas Adizero Takumi Sen 11 and Nike Vaporfly 4 are both snappy racers built for shorter-distance speed, but they deliver that speed with a different feel underfoot. The Nike comes in lighter while still keeping a moderate stack, giving it a very quick, responsive sensation that works especially well for 5K and 10K efforts when you want a fast turnover without feeling overly tall. The adidas sits even closer to the ground and uses rods instead of a plate. Both feel very snappy, but the adidas tends to feel more stable and slightly more energetic in how it returns effort.
The adidas Adizero Adios 9 and the adidas Adizero Takumi Sen 11 are both lightweight speed options, but they serve slightly different purposes. The Adios 9 is the lighter of the two, with a very low stack that emphasizes ground feel and quick turnover. It uses a partial plastic shank to add a touch of stiffness, while keeping the ride stripped-down and minimal. The Takumi Sen 11, on the other hand, has a bit more stack and cushioning underfoot, making it more protective for slightly longer efforts. It replaces the shank with carbon fiber rods, which provide a stiffer feel but also make the shoe a bit less connected to the ground.

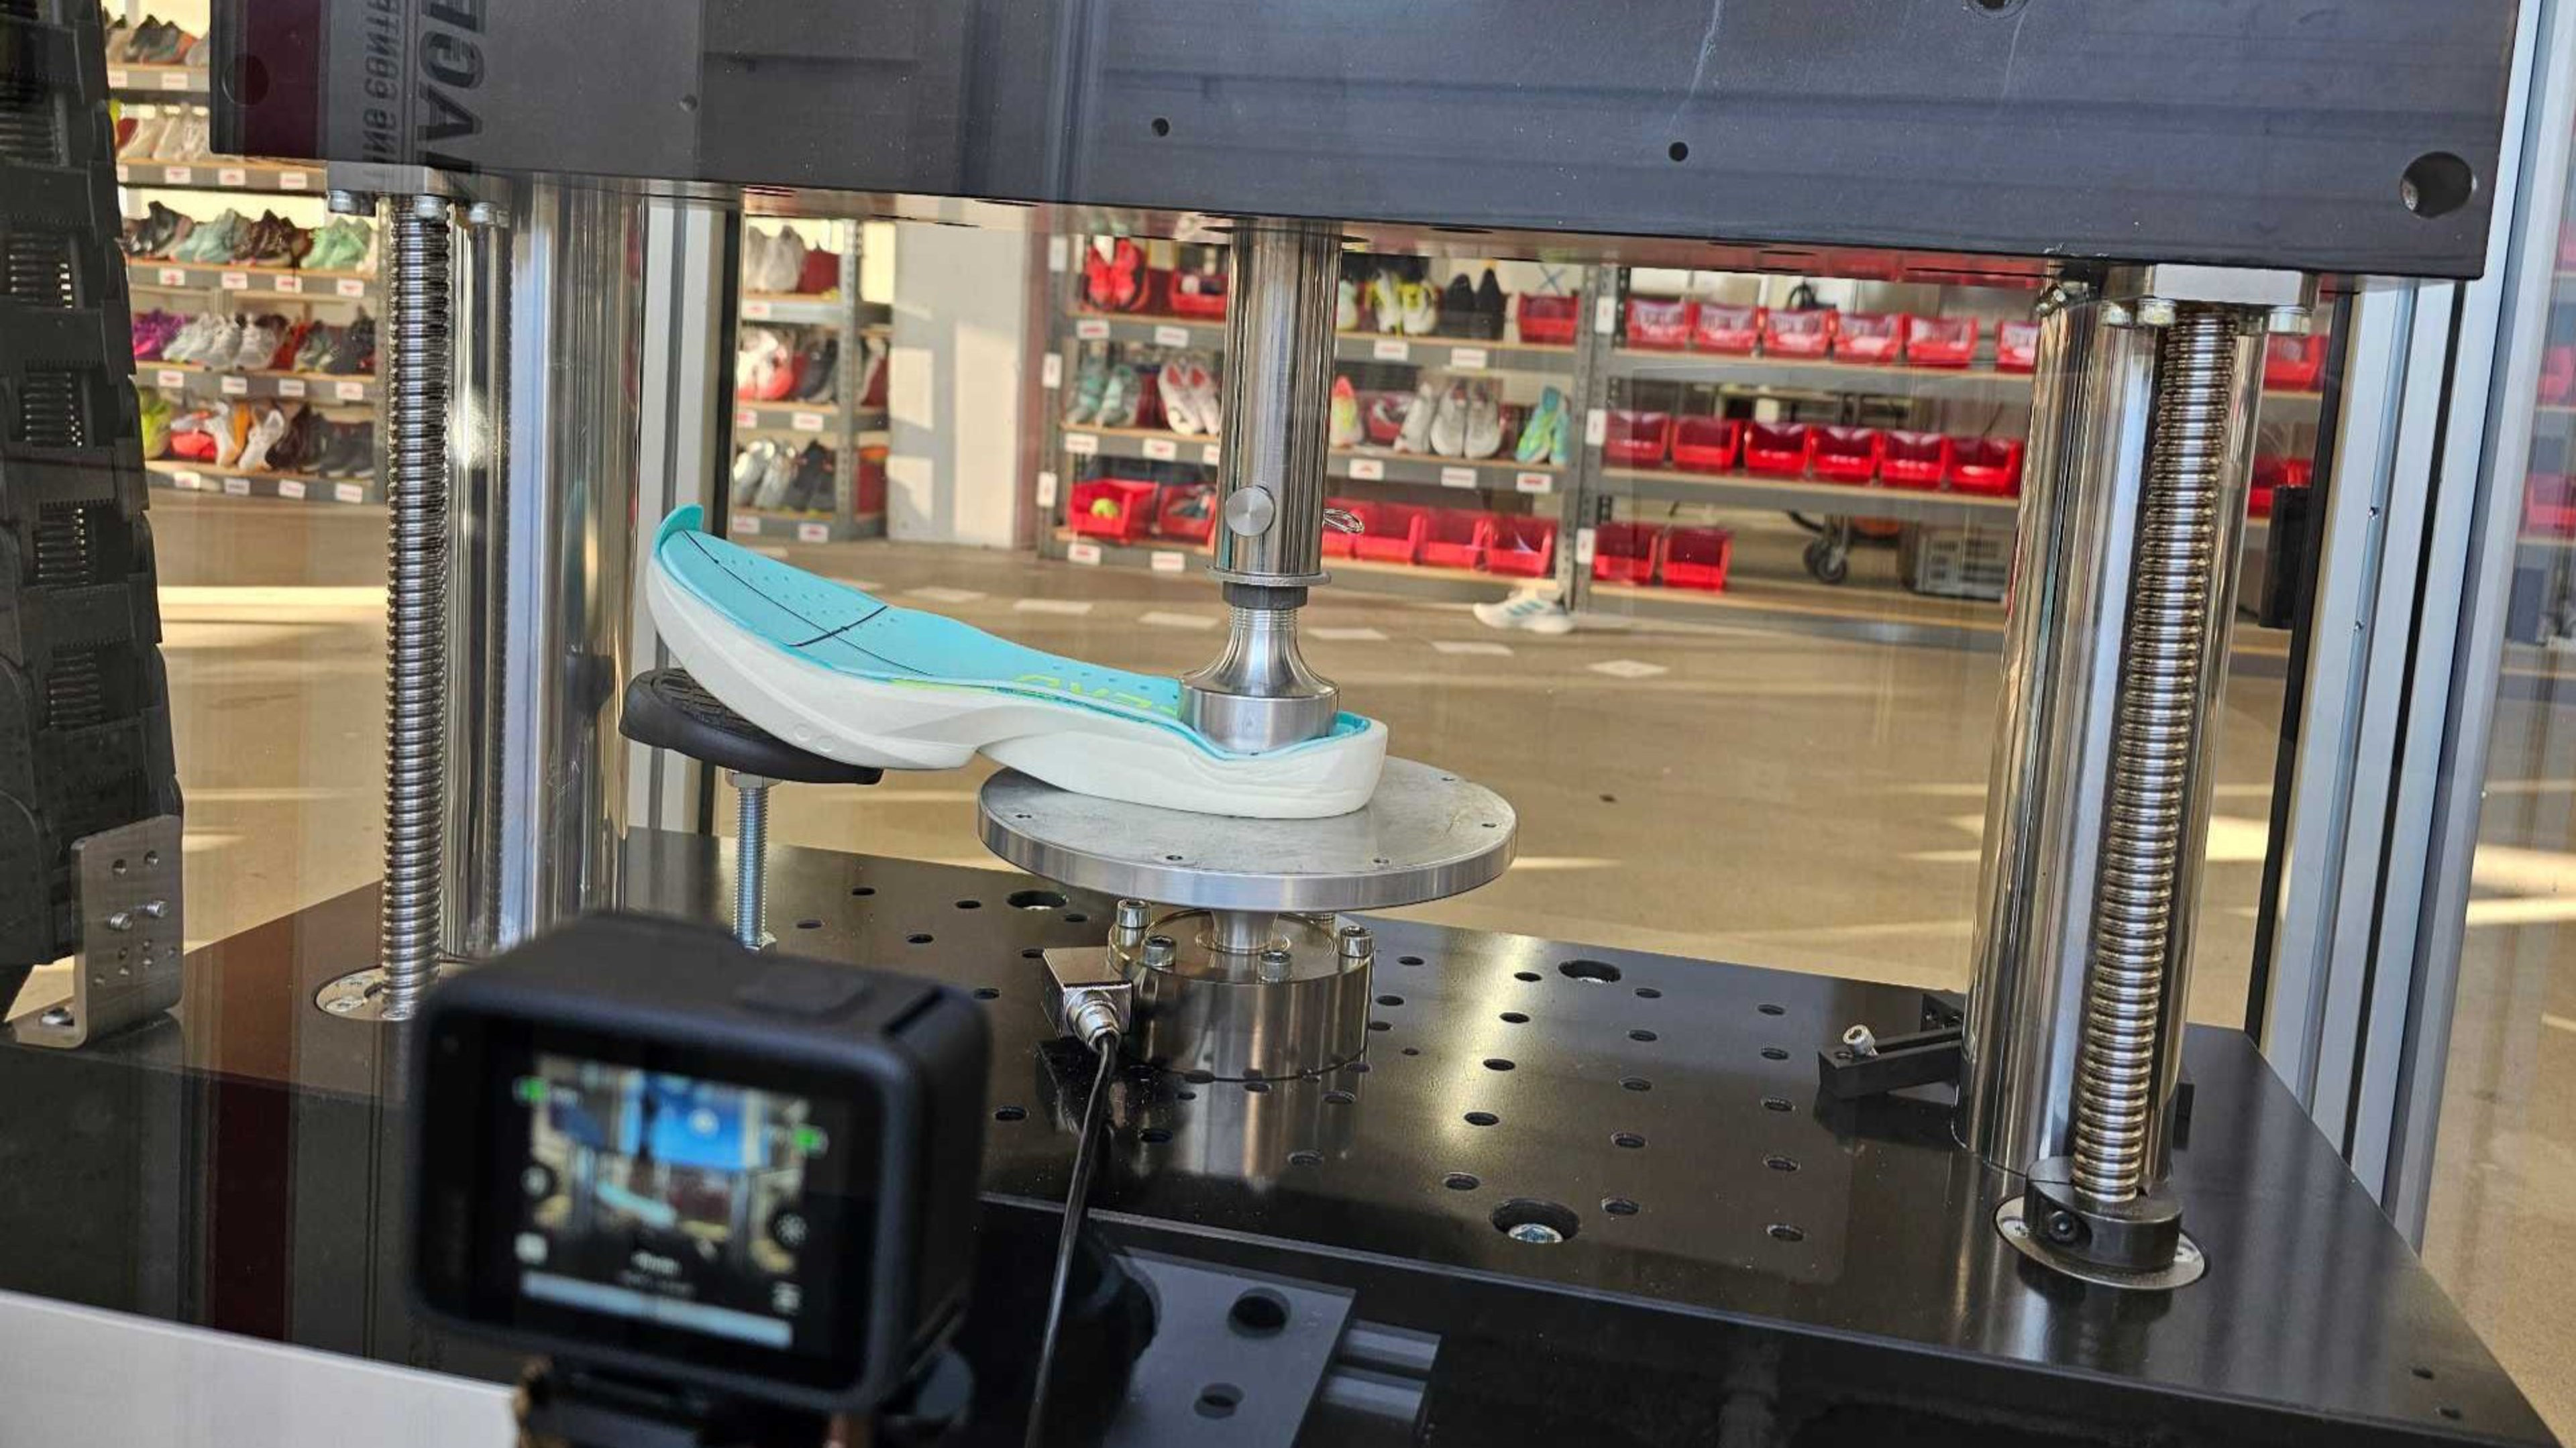
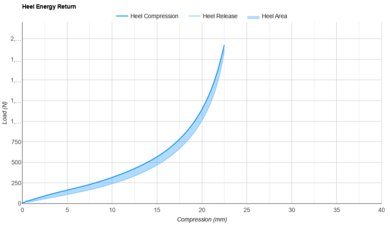
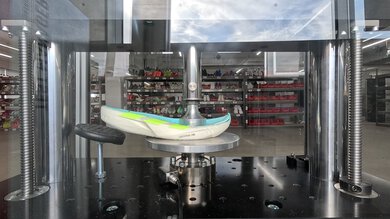
We buy and test running shoes with a very data-oriented approach. While we're just getting started, our methodology already has dozens of tests to help you make the right purchasing decision for your needs. Not only do we use high-end equipment to gather objective data, but we also order multiple sizes of the same shoes so team members can log in miles. This real-world testing is conducted at various paces and conditions, across different types of workouts, to cover all the bases. This allows us to verify our results and ensure they align with what you might feel with a specific pair.
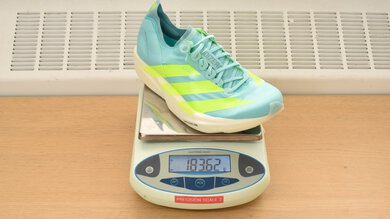
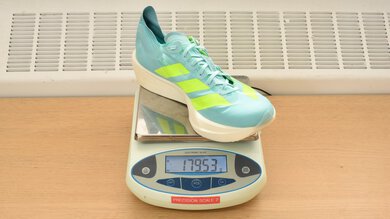
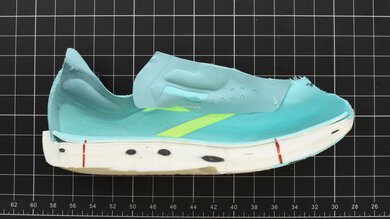
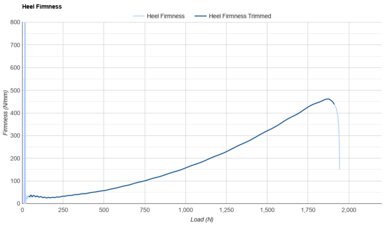
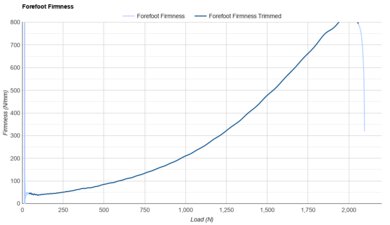
Test Results