Products
Tested using Methodology v0.8.2
Updated May 25, 2026 10:11 PM
Tested using Methodology v0.12
Updated Jun 16, 2026 05:40 PM
Our Verdict
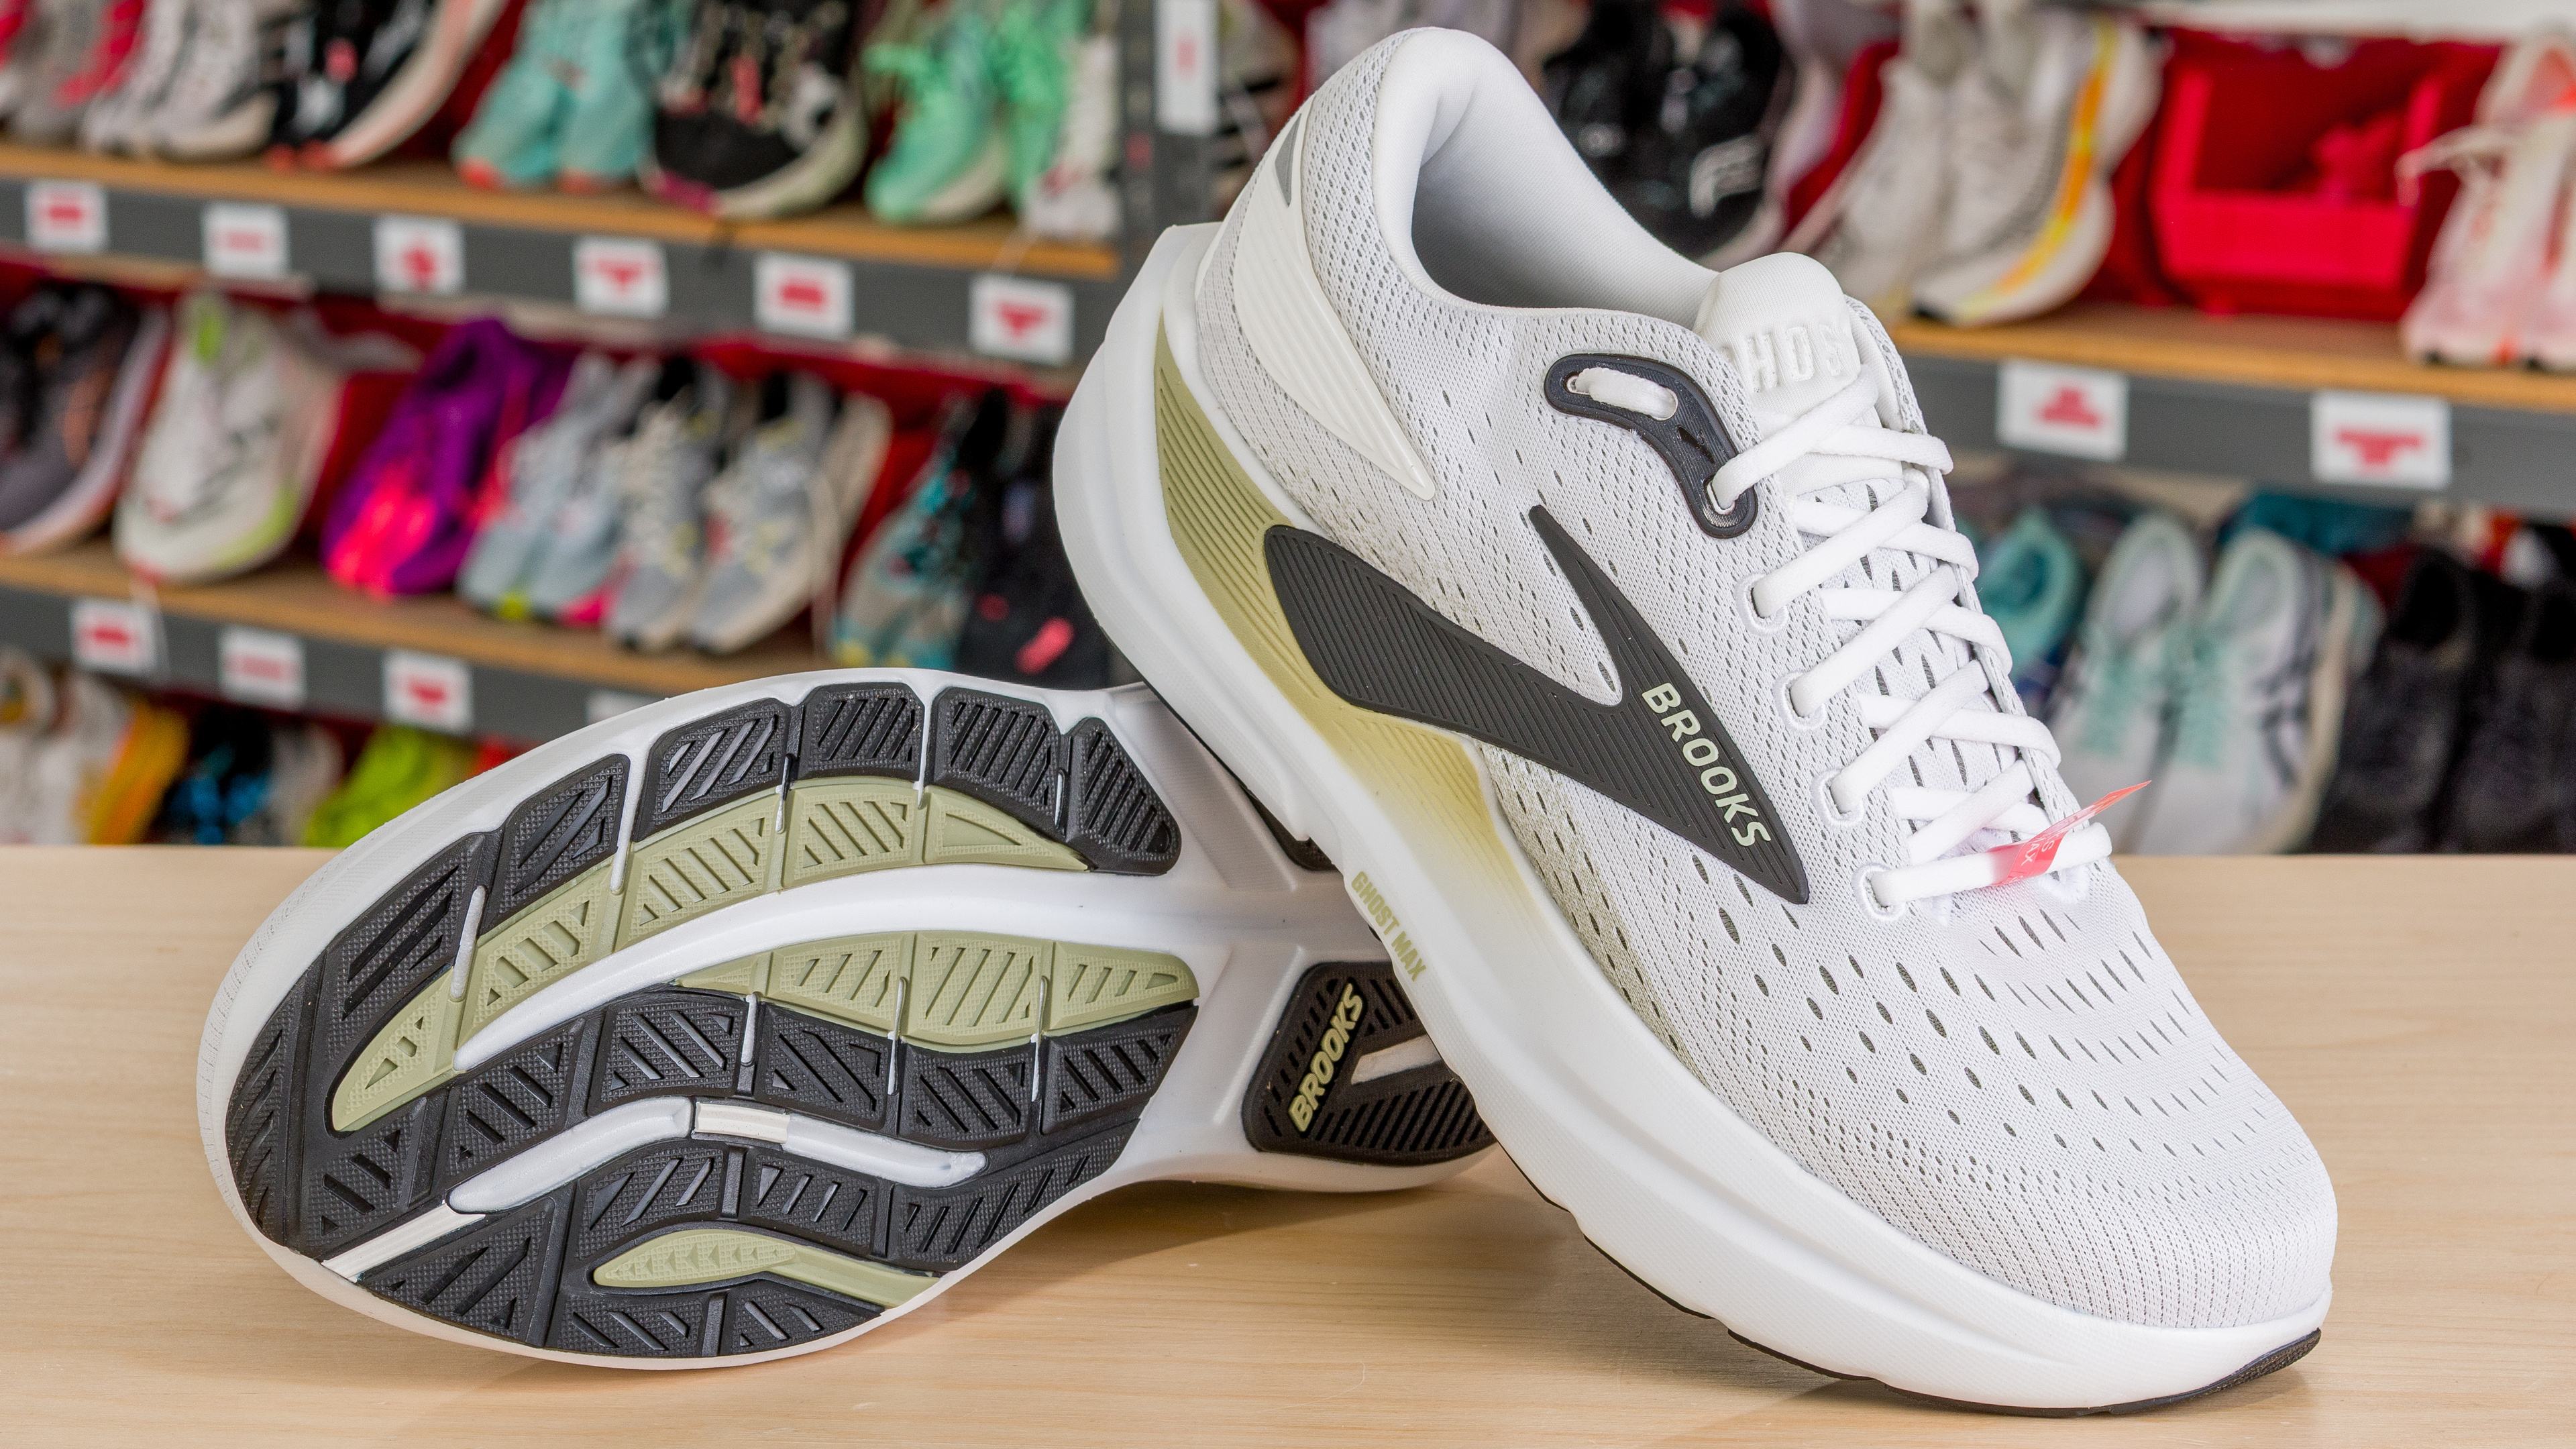
Brooks Ghost Max 3
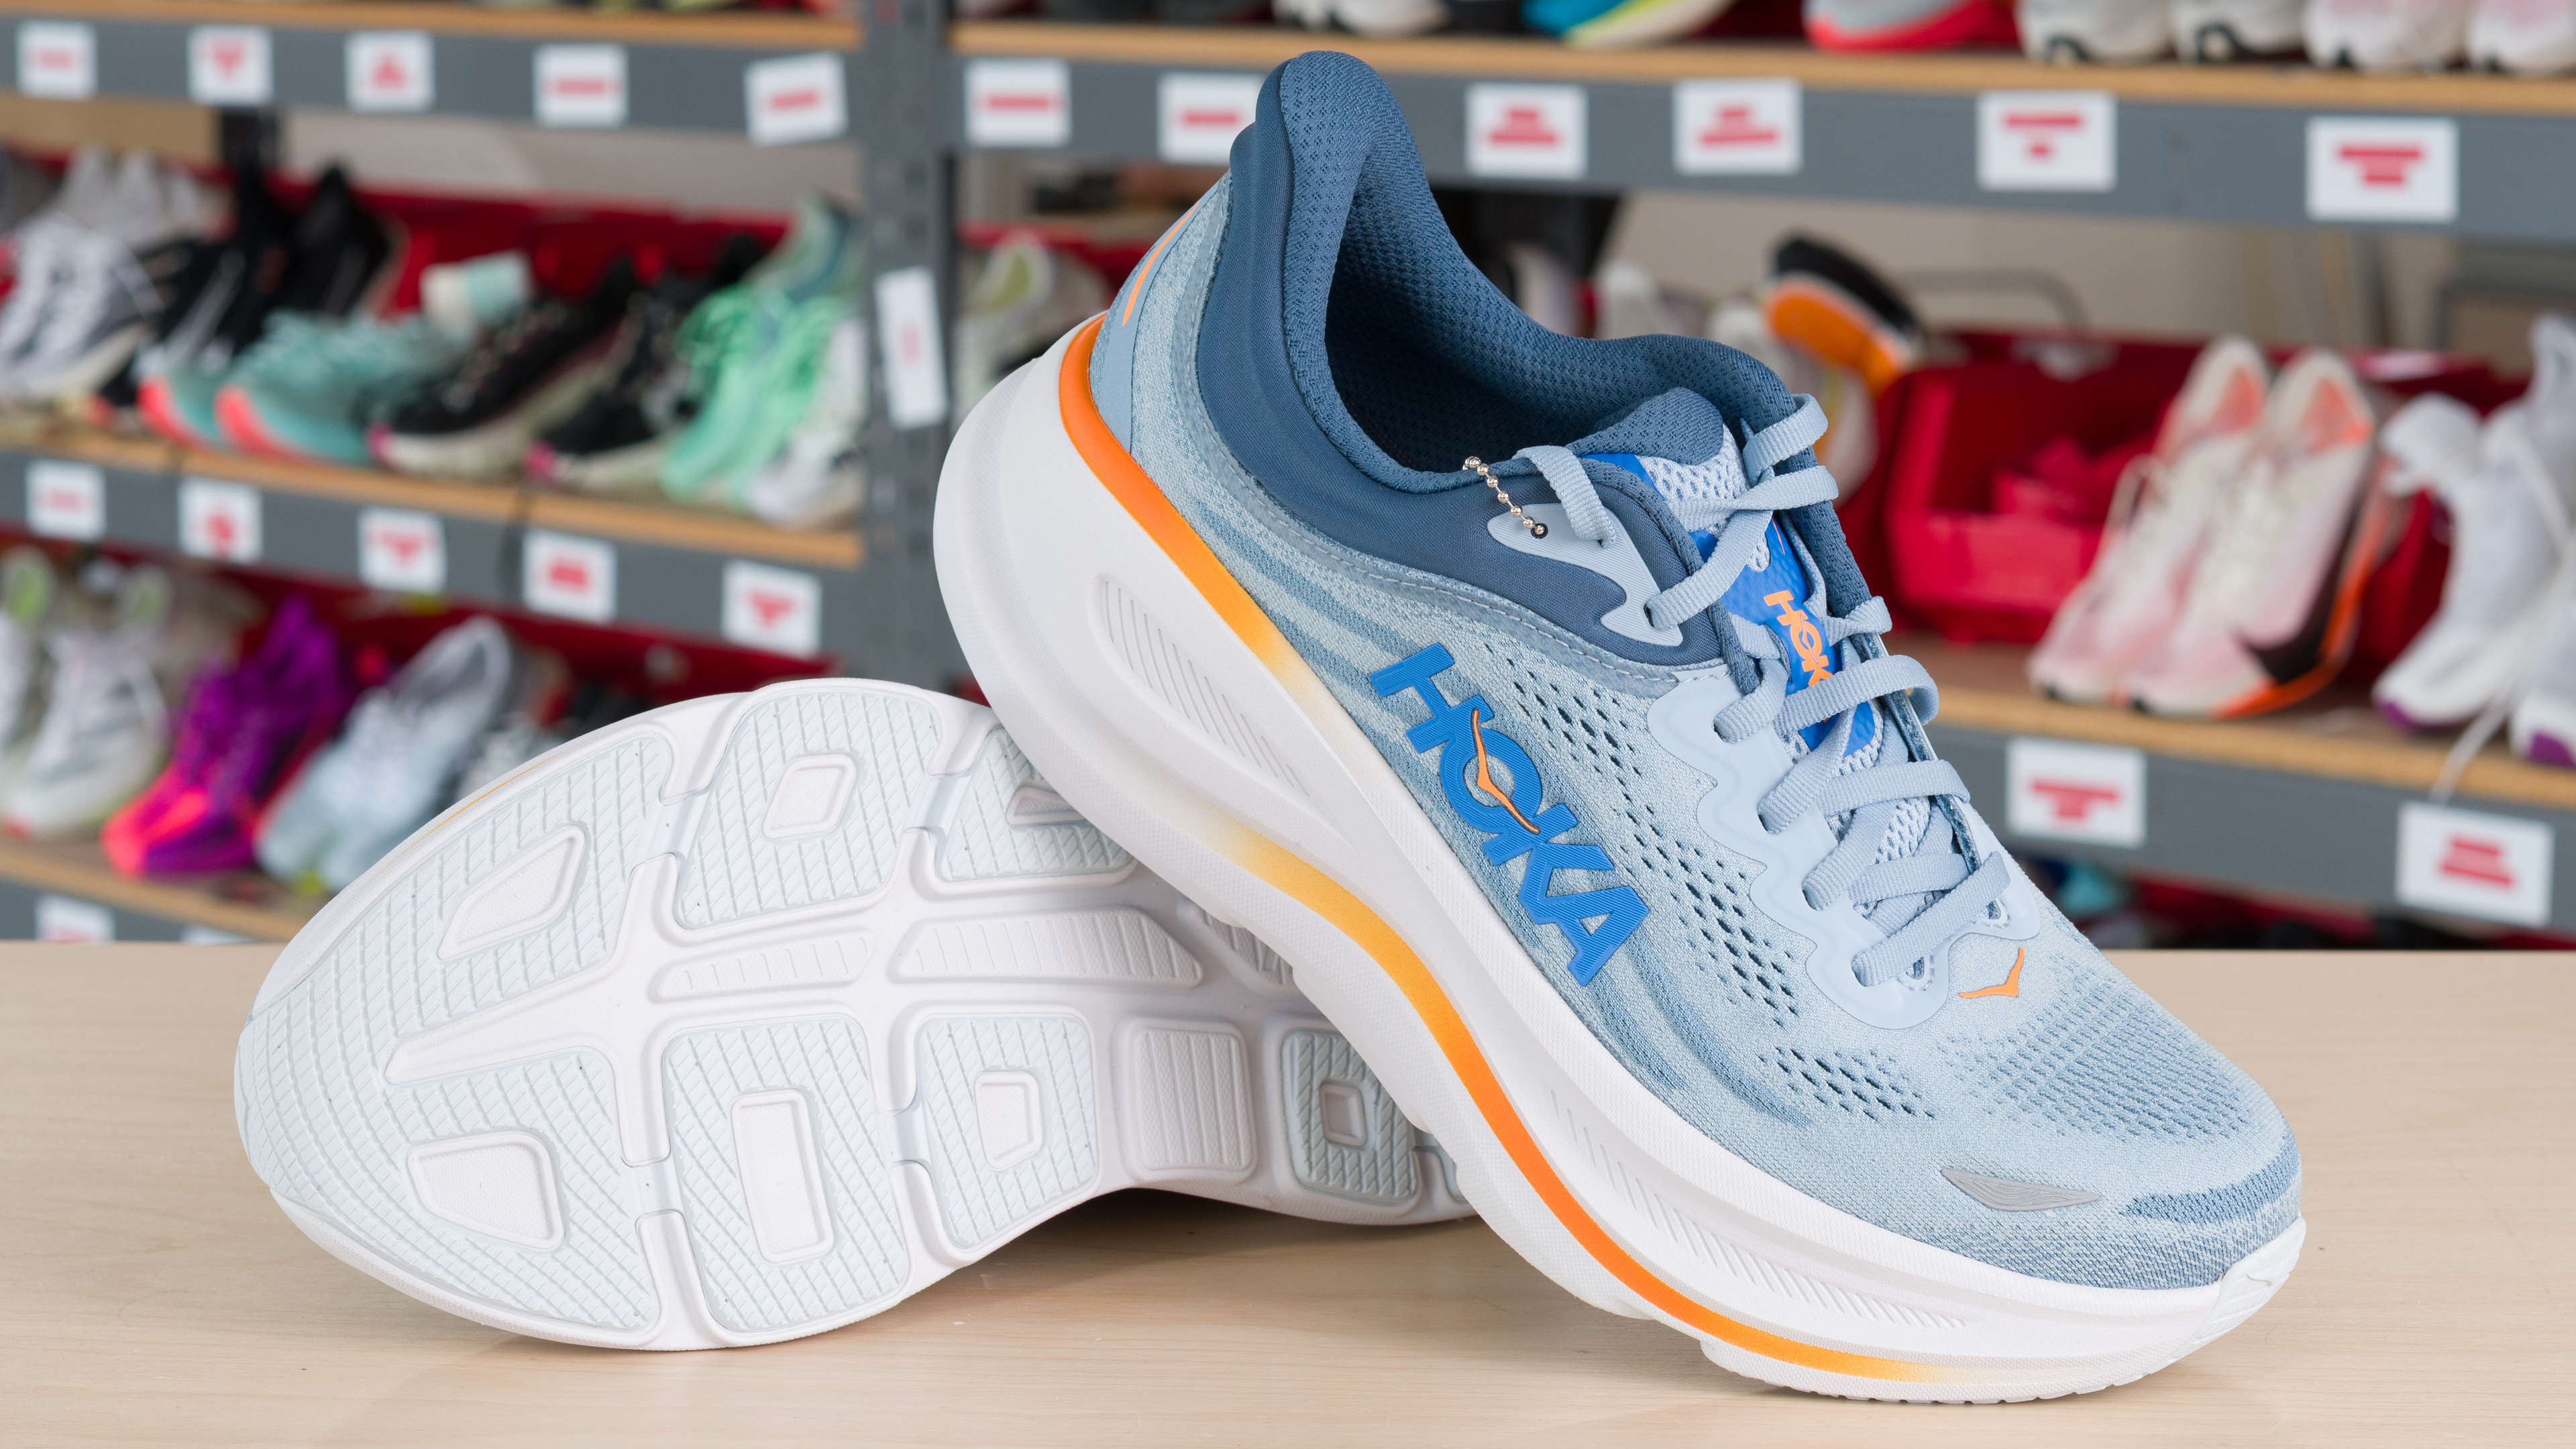
HOKA Bondi 9
The Brooks Ghost Max 3 and HOKA Bondi 9 are two shoes that deliver very different experiences on foot. The HOKA is all about plush cushioning, and its supercritical EVA midsole soaks up even the heaviest of impacts. The HOKA does an okay job of returning the energy you put into it, so you'll get a bit of bounce in your step. The Brooks, on the other hand, is a firmer, less cushy shoe. The stiffer midsole, combined with a slightly lower stack height, makes the Brooks shoe a bit more stable than the HOKA. It also gives the shoe very little bounce. If you're planning to do more running than walking, the HOKA is the better shoe. If you want a walking shoe that you can occasionally run with, the Brooks is a solid choice.
Variants
- Ghost Max 3 (Apricot/Apricot/Super Pink - (Women - US 7))
- Ghost Max 3 (Black/Black/Ebony - (Men - US 9))
- Bondi 9 (Asphalt Grey/Gravel - (Men - US 9))
- Bondi 9 (Aster Flower/Starlight Glow - (Women - US 7))
Main Differences for
Half/Full Marathon Racing
Threshold
Half/Full Marathon Racing
Forefoot Energy Return
Plate
Heel Energy Return
Full Comparison
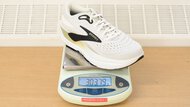
Weight
Right Shoe Weight Photo
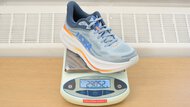
Left Shoe Weight Photo
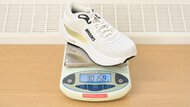
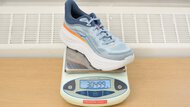
Weight
Stack Heights
Stack Height Photo
Heel Stack Height
Forefoot Stack Height
Heel-To-Toe Drop
Advertised Heel-To-Toe Drop
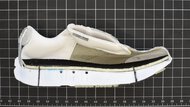
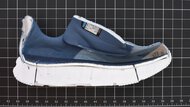
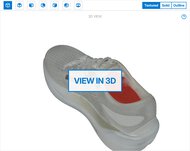
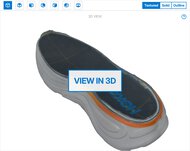
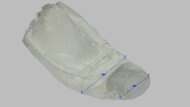
External Shape
3D Model Full Shoe
Outsole Heel Width
Outsole Arch Width
Outsole Forefoot Width
Heel Width-To-Stack Ratio
Forefoot Width-To-Stack Ratio
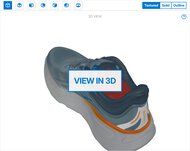
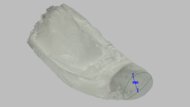
Internal Shape
3D Model Internal
Internal Length
Internal Heel Width
Internal Forefoot Width
Wide Sizing Available
Forefoot Fit: Width
Forefoot Width Photo
Ball-Of-Foot TTS Deviation
Toe TTS Deviation
Forefoot Fit: Height
Forefoot Height Photo
Toe TTS Deviation
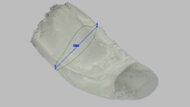
Arch Fit: Width
Arch Fit Photo
Arch Width TTS Deviation
Length Fit
Toe Clearance Photo
Heel Rocker Geometry
Heel Rocker Photo

Heel Spring
Heel Apex Position
Heel Rocker Angle
Forefoot Rocker Geometry
Forefoot Rocker Photo

Toe Spring
Toe Apex Position
Forefoot Rocker Angle
Other Features
Other Features Photo
Tongue Gusset Type
Plate
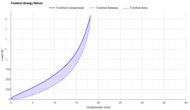
Heel Compression Energy Return
Heel Compression Video
Heel Energy Return
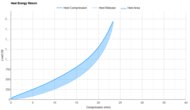
Heel Energy Return
Forefoot Compression Energy Return
Forefoot Compression Video
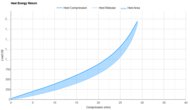
Forefoot Energy Return
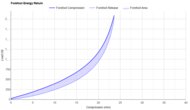
Forefoot Energy Return
Heel Cushioning
Heel Cushioning Picture


Heel Cushioning
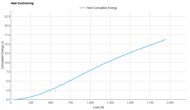
Energy Absorbed At 550N
Energy Absorbed At 1100N
Energy Absorbed At 1900N
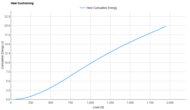
Forefoot Cushioning
Forefoot Cushioning Picture


Forefoot Cushioning
Energy Absorbed At 800N
Energy Absorbed At 1300N
Energy Absorbed At 2050N
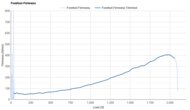
Heel Firmness
Heel Firmness
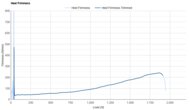
Heel Firmness Graph
Firmness At 550N
Firmness At 1100N
Firmness At 1900N
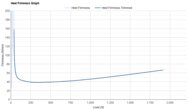
Forefoot Firmness
Forefoot Firmness
Forefoot Firmness Graph
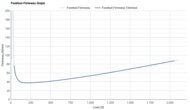
Firmness At 800N
Firmness At 1300N
Firmness At 2050N
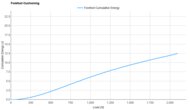
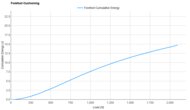
Forefoot Long Run Cushioning
Forefoot Long Run Cushioning
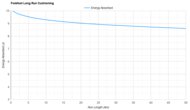
Energy Absorbed At 10km
Energy Absorbed At 20km
Energy Absorbed At 30km
Energy Absorbed At 40km
Rocker Stiffness
Forefoot Rocker Stiffness Video
Forefoot Rocker Stiffness Graph
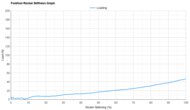
Force To Flatten The Rocker
Forefoot Bending Energy Return
Forefoot Bending Video
Forefoot Bending Energy Return
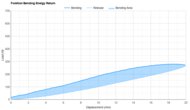
Forefoot Bending Energy Return
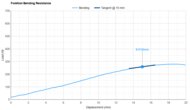
Forefoot Bending Stiffness
Forefoot Bending Resistance Picture
Forefoot Bending Resistance
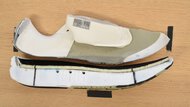
Brooks Ghost Max 3
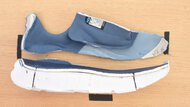
HOKA Bondi 9
Comments
Brooks Ghost Max 3 vs HOKA Bondi 9: Main Discussion
What do you think of these products? Let us know below.
Looking for a personalized buying advice from the RTINGS.com experts? Members have direct access to buying advice on our member forum.